
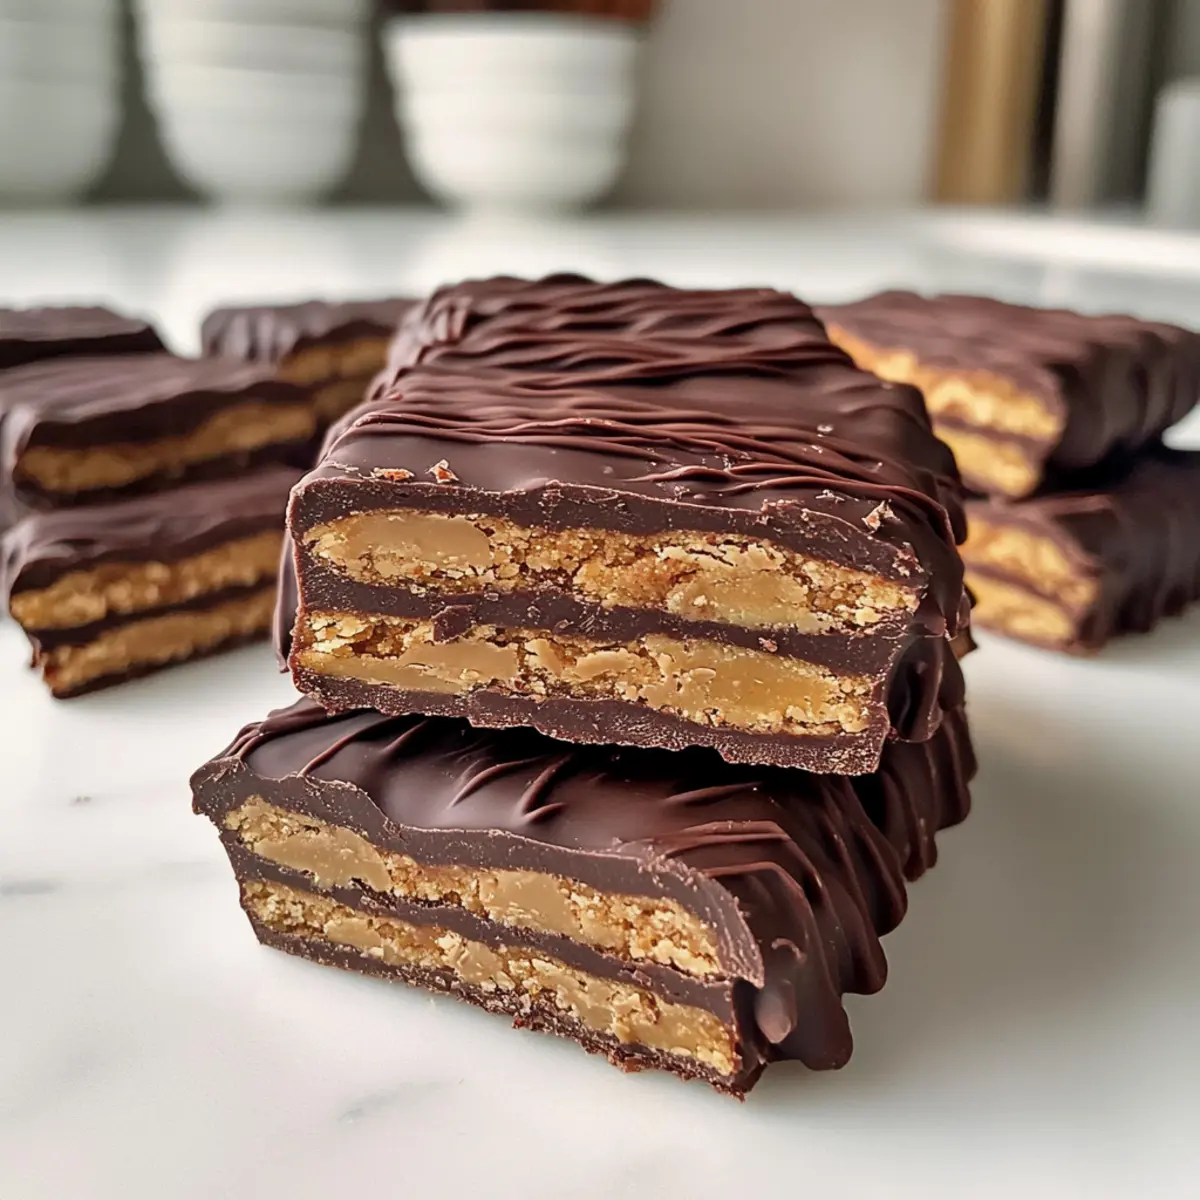
I’ll never forget the excitement of unwrapping a candy bar after a long day. Those iconic layers of crunchy wafers and rich chocolate were a sweet escape. Now, I’m thrilled to bring you a healthier version with my Healthy Kit Kat Recipe! These homemade Kit Kat bars are not just a nostalgic treat; they’re gluten-free, vegan, and without refined sugars, making them a guilt-free indulgence any time you crave something sweet. With quick preparation and easy substitutions for nut-free options, these bars are perfect for every dietary preference. Imagine savoring a crispy, chocolate-covered delight without a second thought! Are you ready to dive into this wholesome twist on a classic favorite? Let’s get started!
Why are these Kit Kat Bars special?
Guilt-Free Indulgence: These Healthy Kit Kat Bars satisfy your sweet tooth without guilt! With no refined sugars and vegan ingredients, you can enjoy them anytime.
Simple to Make: This recipe is quick and perfect for busy days. In just a few steps, you can whip up a delicious treat that everyone will love!
Customizable Options: Whether it’s nut-free or paleo, you can easily adapt the recipe to suit your dietary needs, making it versatile for any occasion.
Crowd-Pleasing Delight: Perfect not just for adults, but kids will adore them too! Serve at parties or enjoy as an after-school snack—everyone will be asking for more.
Lasting Freshness: Store them in the freezer for optimal crispness; they’ll be ready to enjoy whenever those cravings hit. Pair them with a glass of almond milk or a warm cup of tea for the ultimate treat experience!
Healthy Kit Kat Bar Ingredients
• For those ready to create these delightful treats, here’s what you’ll need:
For the Cookie Base
- Almond Flour – This provides a great structure and crunch; use tigernut flour for a nut-free option.
- Coconut Sugar – A natural sweetener with a lower glycemic index than refined sugar, perfect for our Healthy Kit Kat Recipe.
- Ground Flax – A binder that adds nutritional value; ground chia seeds work as a great substitute.
- Salt – Enhances the overall flavor of the bars.
- Coconut Oil – Delivers richness and helps achieve that perfect fudge consistency.
- Water – Helps to hydrate dry ingredients and bind the mixture together.
- Vanilla Extract – For adding a delightful aromatic sweetness to your bars.
For the Filling and Coating
- Peanut Butter – This gives creaminess and a luscious flavor; substitute with sunbutter if you’re going nut-free.
- Dark Chocolate – Use dairy-free chocolate for the coating to ensure they stay vegan-friendly.
Now that you’re all set with the ingredients, let’s dive into making these irresistible Healthy Kit Kat Bars that will surely become a family favorite!
Step‑by‑Step Instructions for Healthy Kit Kat Recipe
Step 1: Prepare the Dough
In a mixing bowl, combine almond flour, coconut sugar, ground flax, and salt, stirring until evenly blended. Next, add melted coconut oil, water, and vanilla extract, mixing until a smooth dough forms. The mixture should be slightly sticky but hold together. Prepare your baking sheet with parchment paper, ready for the next steps.
Step 2: Roll and Cut
Transfer the dough onto a piece of parchment paper. Using a rolling pin, gently roll out the dough to about ⅛” thickness, ensuring it’s even throughout. Cut the rolled dough into rectangles measuring approximately 3.5″ x 0.75″. Gather any excess dough, re-roll, and cut additional rectangles to maximize your Healthy Kit Kat Recipe output.
Step 3: Bake the Cookies
Preheat your oven to 350°F (175°C). Place the cut rectangles on your prepared baking sheet, ensuring they have space to spread slightly. Bake in the preheated oven for 8-10 minutes, or until they turn a light golden brown. The cookies should be firm but tender; remove them from the oven to cool slightly before transferring them to a wire rack.
Step 4: Cool the Cookies
Allow the cookies to cool on the baking sheet for 5-10 minutes. Once they are easier to handle, move them to a wire rack to cool completely. This cooling step is vital, as it ensures the cookies set properly and hold their shape for the upcoming assembly of your Healthy Kit Kat Recipe.
Step 5: Assemble the Bars
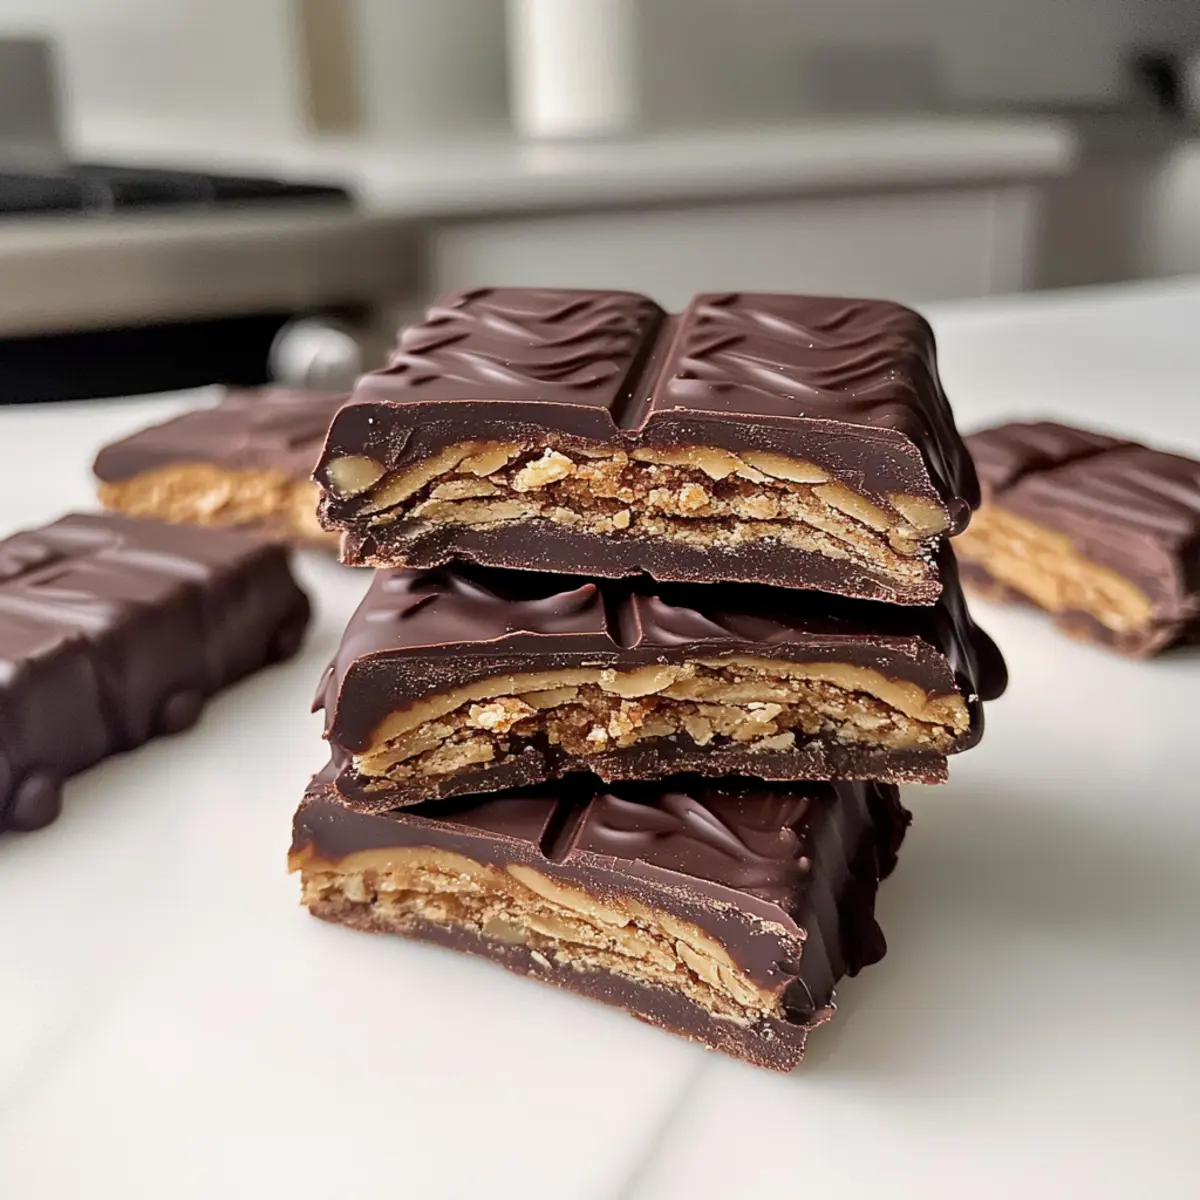
Once the cookies are cooled, prepare your filling by mixing together peanut butter and melted dark chocolate until smooth. Layer a spoonful of this chocolate-peanut butter fudge between two cookies, gently pressing them together. Repeat until all cookies are filled. This layered approach gives your Healthy Kit Kat Bars that classic treat feel!
Step 6: Coat in Chocolate
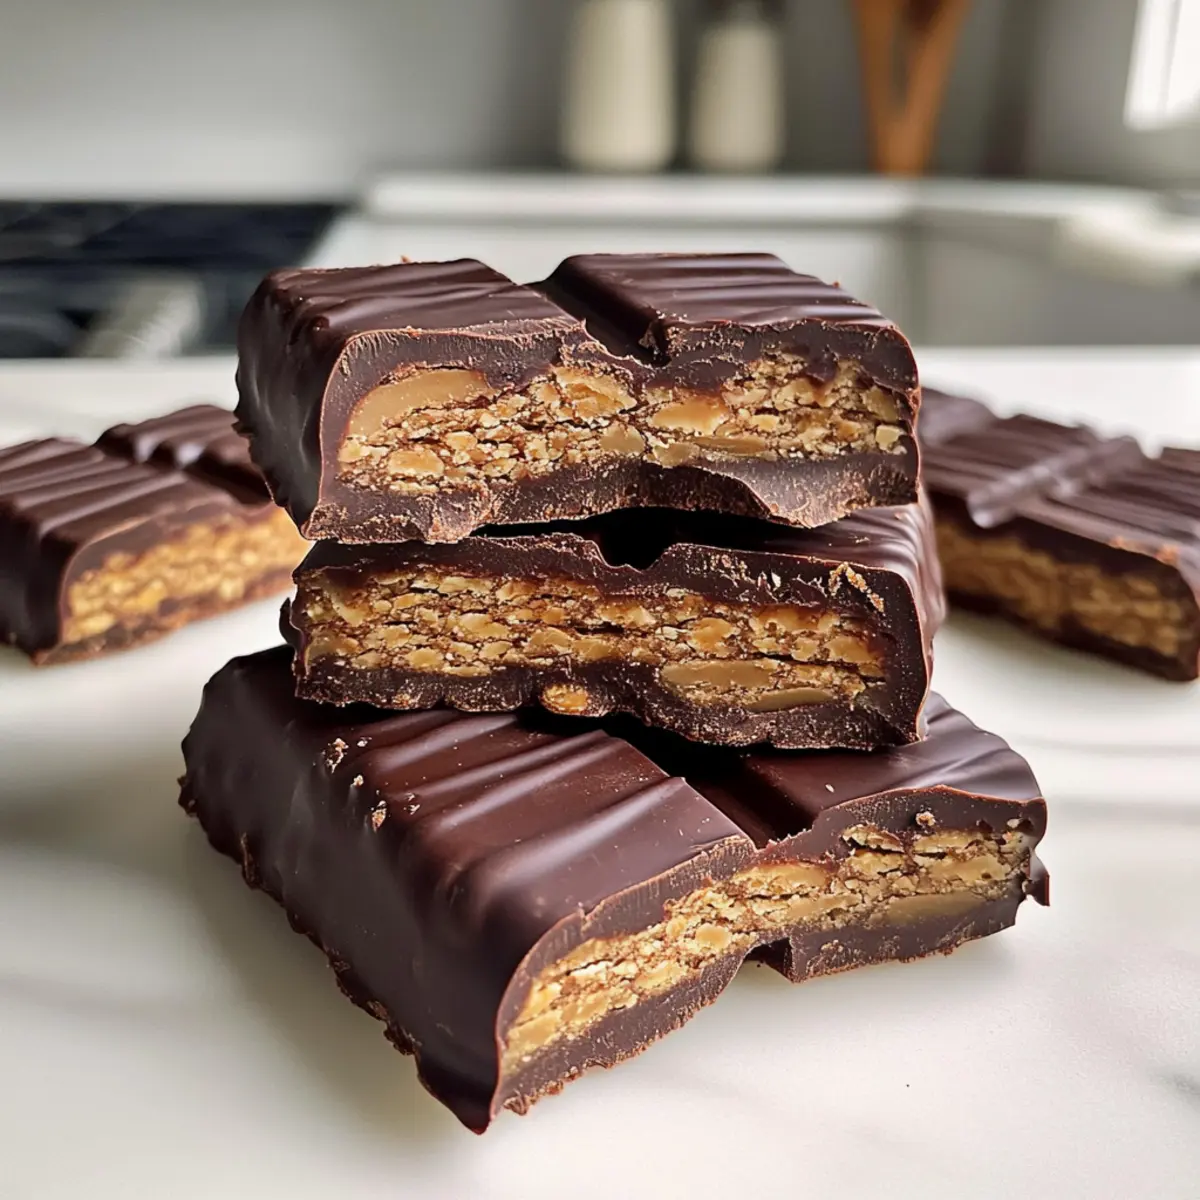
Melt more dark chocolate in a double boiler or microwave until smooth. Dip each assembled cookie into the melted chocolate, ensuring they are fully coated. Place the coated bars back on parchment paper, allowing excess chocolate to drip off. This chocolate layer is what gives your Healthy Kit Kat Recipe its indulgent finish.
Step 7: Refrigerate Until Set
Allow the coated bars to sit at room temperature for a few minutes, then refrigerate until the chocolate is firm, about 30-60 minutes. This will help them set perfectly. You want that satisfying crunch when you bite into your Healthy Kit Kat Bars, so patience is key during this final cooling phase!
Step 8: Enjoy or Store
Once set, enjoy your delicious Healthy Kit Kat Bars! Store any leftovers in a sealed container in the fridge for up to two weeks, or freeze them for up to two months. They’re perfect for a quick snack or a delectable dessert that’s both guilt-free and satisfying.
Expert Tips for Healthy Kit Kat Recipe
Perfect Texture: Ensure a smooth dough by blending thoroughly—lumps can lead to uneven baking.
Cooling Time: Don’t rush the cooling process; cookies set better and hold their shape when cooled completely before assembly.
Nut-Free Substitutes: For a nut-free Healthy Kit Kat Recipe, use tigernut flour and sunbutter instead of almond flour and peanut butter.
Chocolate Coating: Dip thoroughly in melted chocolate; this ensures a rich, decadent layer that mimics a traditional candy bar.
Storage Tips: Keep in a sealed container in the fridge to maintain freshness; they can also be frozen for up to two months.
What to Serve with Healthy Kit Kat Bars
These delightful treats are perfect for creating a memorable meal experience filled with fun and indulgence.
- Creamy Almond Milk: This refreshing beverage adds a nutty touch that complements the chocolatey richness of the bars.
- Iced Coffee: A chilled brew balances the sweetness, providing a perfect pick-me-up alongside your treat.
- Fresh Fruit Salad: Bright and juicy fruits create a vibrant contrast in texture and flavor—ideal for a light snack pairing.
- Coconut Whipped Cream: Dreamy and airy, this topping enhances the indulgence, creating an enchanting experience for every bite.
- Chocolate Dipped Strawberries: For an extra layer of decadence, serve these alongside the bars to keep the chocolate party going!
- Nutty Granola: A crunchy granola on the side brings heartiness, perfect for breakfast or an afternoon snack!
- Smoothie Bowl: A vibrant, fruity protein-packed smoothie bowl can be a great addition, offering a refreshing balance to the treat.
- Decaffeinated Herbal Tea: Sip on a warm cup of soothing herbal tea to round off your dessert and provide a comforting touch.
- Homemade Trail Mix: A medley of nuts, seeds, and dark chocolate chips invites munching between bites of your Kit Kat bars, keeping the flavors exciting!
- Frozen Yogurt: Top with sprinkles or fruit for a fun dessert experience that pairs beautifully with the Healthy Kit Kat Bars.
Make Ahead Options
Preparing these Healthy Kit Kat Bars in advance is a fantastic way to save time during hectic weeks! You can make the cookie base up to 24 hours ahead of time; simply bake the cookies and store them in an airtight container at room temperature to maintain their crispiness. If you prefer, you can also fill and coat the bars up to 3 days ahead, just refrigerate them in a sealed container to keep them fresh and delicious. When you’re ready to enjoy, let them sit at room temperature for a few minutes and, if desired, rewarm for a few seconds in the microwave for that fresh-out-of-the-oven taste. This way, you’ll have delightful treats ready whenever those cravings hit, without any compromise on flavor or quality!
Healthy Kit Kat Recipe Variations
Feel free to explore and customize this recipe to suit your cravings and dietary needs!
-
Nut-Free Option: Use tigernut flour instead of almond flour for a safe, nut-free base. This swap retains that delightful crunch without the nuts!
-
Sunbutter Swap: Substitute peanut butter with sunbutter for a nut allergy-friendly version. The flavor stays rich and creamy, perfect for satisfying those sweet cravings.
-
Coconut Flour: For a gluten-free twist, try coconut flour in place of almond flour. Note that it absorbs more moisture, so you’ll need to adjust the liquid ingredients slightly.
-
Flavor Fun: Add cocoa powder to the dough for a chocolatey cookie base. This will enhance the flavor profile and offer a deeper chocolate taste for chocolate lovers!
-
Spicy Kick: Mix in a pinch of cinnamon or a dash of cayenne pepper to the cookie dough for an unexpected flavor boost that adds a warm, spicy undertone to your treat.
-
Fruit Fillings: Layer in sliced bananas or raspberries between the cookie layers for an added burst of freshness. The fruit adds a delightful tang contrasting the rich chocolate.
-
Cookie Texture: For a crispier texture, try rolling the dough thinner while cutting the shapes. This will give your Kit Kat Bars that extra crunch that mimics the original!
-
Chocolate Variations: Explore different types of dark chocolate or even milk chocolate if you’re not strictly vegan. Each chocolate type will bring a unique flavor and sweetness to your bars.
Looking for more delicious ideas? You might enjoy making some Honey Garlic Tofu for a satisfying meal or baking up a batch of Fruitcake Cookies for a sweet treat. Enjoy experimenting!
How to Store and Freeze Healthy Kit Kat Bars
Fridge: Store your Healthy Kit Kat Bars in a sealed container in the fridge for up to 2 weeks. This keeps them fresh and helps maintain their deliciously crispy texture.
Freezer: For longer storage, freeze the bars for up to 2 months. Wrap them individually in parchment paper and place them in an airtight container to avoid freezer burn.
Thawing: When you’re ready to enjoy, simply remove a bar from the freezer and let it thaw at room temperature for about 10-15 minutes before serving. This will give you that delightful crunch!
Temperature Check: To maintain optimal texture, avoid leaving your bars out at room temperature for extended periods—keep them cool to relish every bite.

Healthy Kit Kat Bars Recipe FAQs
What ripeness or type of ingredients should I choose?
Absolutely! When selecting your ingredients, opt for fresh, high-quality items. For the almond flour, look for a fine texture without clumps, as this influences the bars’ crunchiness. Ensure that your dark chocolate is dairy-free and preferably organic for the best flavor. If you’re going nut-free, tigernut flour is a fantastic alternative! For peanut butter, choose creamy and natural varieties without added sugars.
How should I store the Healthy Kit Kat Bars, and for how long?
To keep your Healthy Kit Kat Bars fresh, place them in a sealed container in the fridge. They will stay delicious for up to 2 weeks. This method helps maintain their crispy texture. If you want to extend their shelf life, feel free to freeze them for up to 2 months! Just wrap each bar in parchment paper before putting them in an airtight container to avoid freezer burn.
Can I freeze these bars, and how?
Yes, you can freeze these Healthy Kit Kat Bars! To do so, wrap each bar individually in parchment paper and place them in an airtight container. This method prevents them from sticking together. When you want to enjoy a bar, remove one from the freezer and let it thaw at room temperature for about 10-15 minutes before serving. This ensures you still have that satisfying crunch!
What should I do if my dough is too sticky or crumbly?
Very! If your dough is too sticky, add a little extra almond flour, one tablespoon at a time, until it holds together without feeling tacky. If it’s crumbly, a splash of water can help bring it back together. Just remember to mix gently until you’re satisfied with the texture; it should feel slightly sticky but still manageable.
Are these Kit Kat Bars suitable for those with allergies?
Absolutely! This Healthy Kit Kat Recipe can be adapted for various dietary needs. For nut allergies, simply substitute almond flour with tigernut flour and use sunbutter instead of peanut butter. Always check labels on products like chocolate and nut butters to ensure they are free from cross-contamination if allergies are a concern.
How can I make these bars more flavorful?
Very! For added flavor, you can infuse your dough with spices like cinnamon or cocoa powder. You could even explore variations, such as adding crushed nuts or seeds for an extra crunch or mixing in some coconut flakes into the filling. The more the merrier with your creativity—and your tastebuds will thank you!
Indulge in Guilt-Free Joy: Healthy Kit Kat Recipe Delight
Ingredients
Equipment
Method
- In a mixing bowl, combine almond flour, coconut sugar, ground flax, and salt, stirring until evenly blended. Add melted coconut oil, water, and vanilla extract, mixing until a smooth dough forms.
- Transfer the dough onto a piece of parchment paper and roll out to about ⅛" thickness. Cut into rectangles approximately 3.5" x 0.75".
- Preheat the oven to 350°F (175°C). Place the cut rectangles on a baking sheet and bake for 8-10 minutes until lightly golden brown.
- Allow the cookies to cool on the baking sheet for 5-10 minutes, then transfer to a wire rack to cool completely.
- Prepare the filling by mixing together peanut butter and melted dark chocolate until smooth. Layer spoonfuls between two cookies, pressing together.
- Melt more dark chocolate and dip each assembled cookie into it, ensuring full coating. Place back on parchment paper.
- Let the coated bars sit at room temperature, then refrigerate until chocolate is firm, about 30-60 minutes.
- Enjoy the Healthy Kit Kat Bars or store leftovers in a sealed container in the fridge for up to two weeks or freeze for two months.
Leave a Reply