
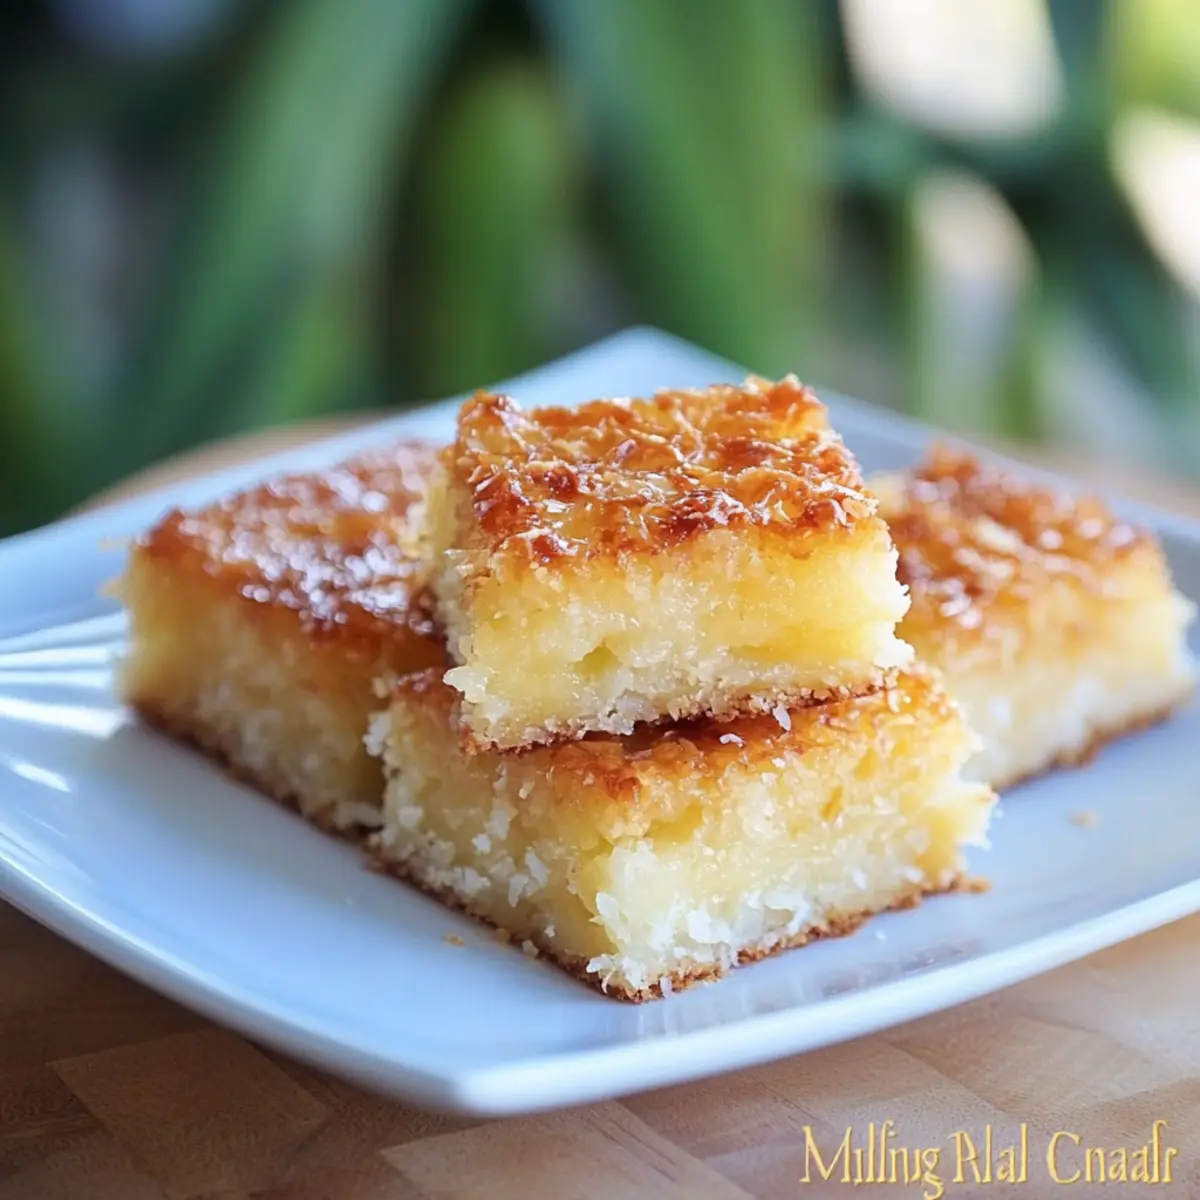
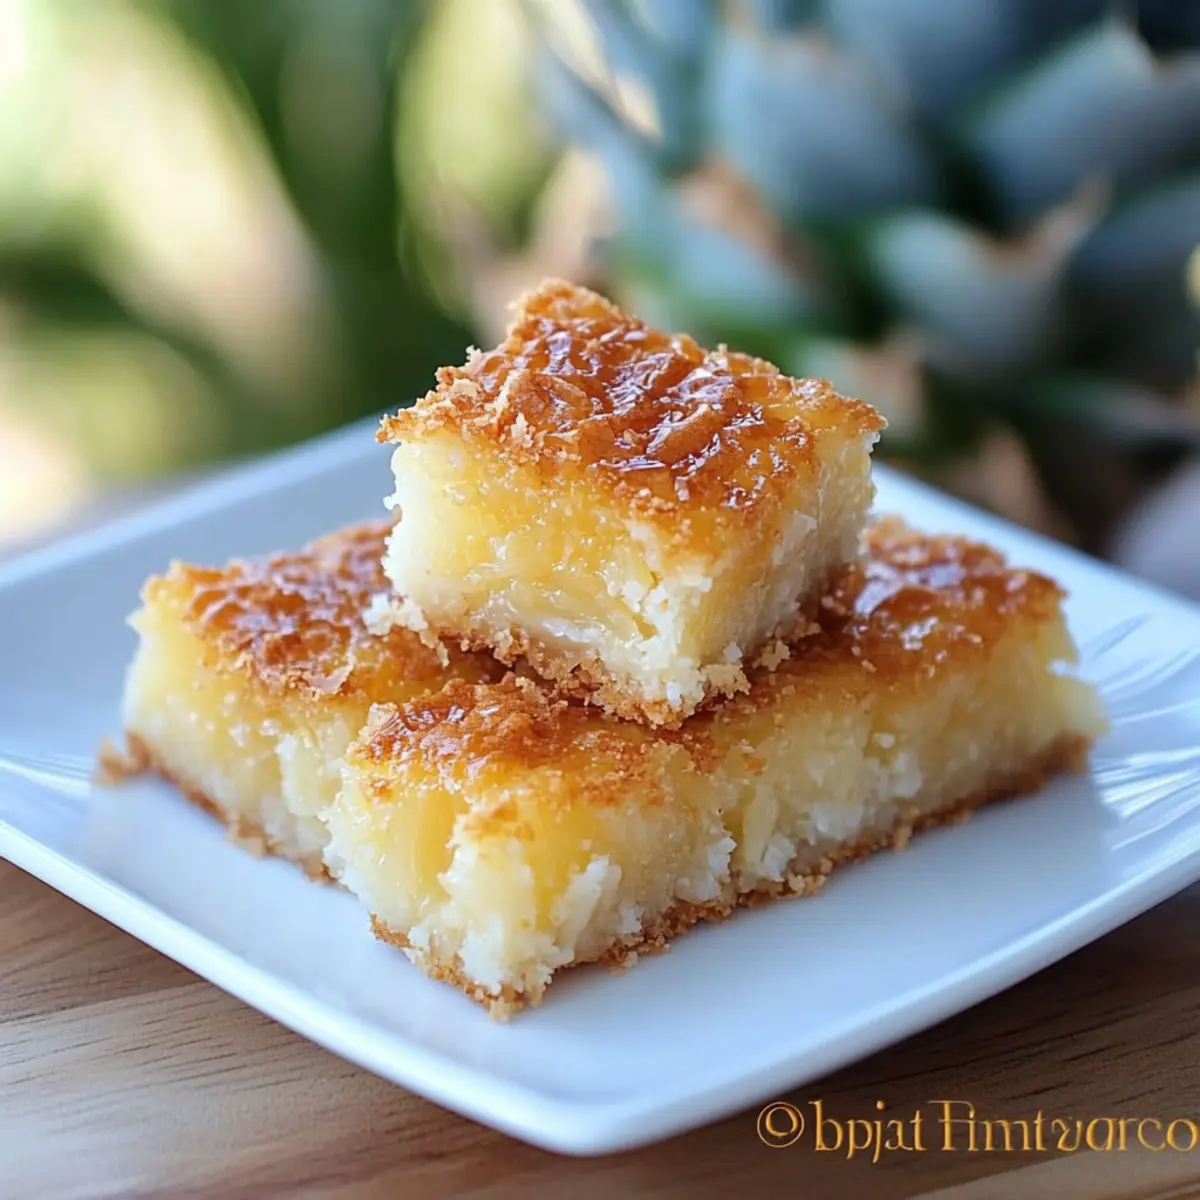
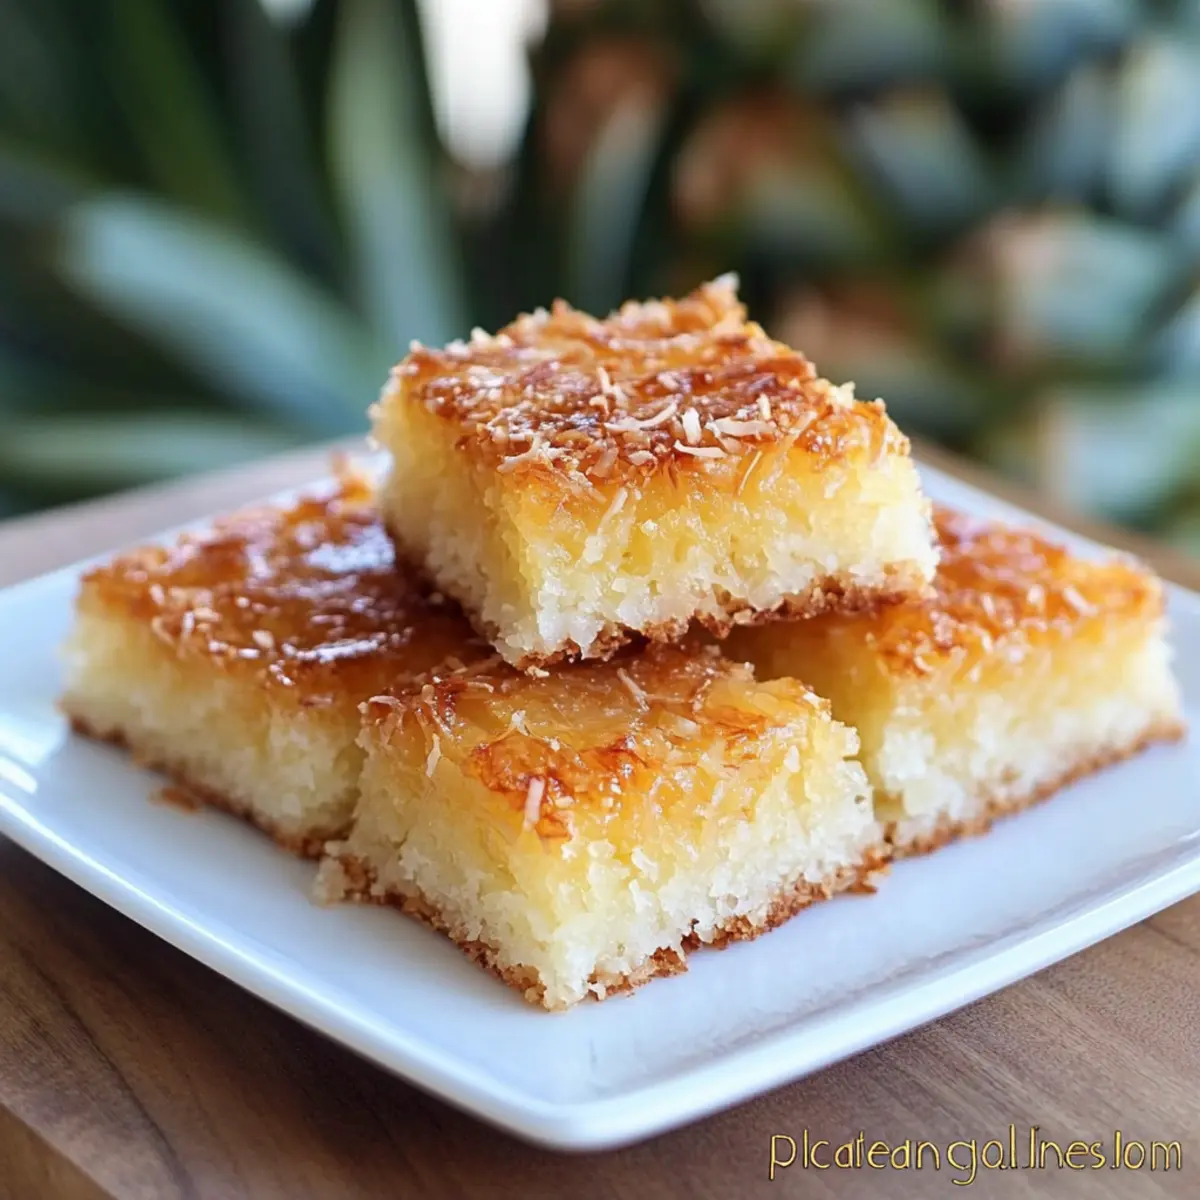
As the aroma of freshly baked goods wafted through the kitchen, I couldn’t help but feel transported to the vibrant streets of the Philippines. This is where I discovered Bibingka—a moist and chewy Filipino Coconut Cake that encapsulates the essence of comfort food. Perfect for cozy gatherings and potlucks, this gluten-free delight brings together the tropical sweetness of coconut and crushed pineapple in every bite. Its unique texture is sure to captivate both the eyes and the taste buds, making it a crowd-pleaser for any occasion. Plus, it’s surprisingly easy to whip up, which means you can skip the fast food and embrace the joy of homemade treats. Ready to embark on a culinary journey that marries tradition and flavor? Let’s dive into making this delightful Bibingka!
Why is Bibingka so Special?
Unmatched Flavor: The fusion of coconut and pineapple creates a tropical explosion that dances on your palate, transporting you straight to the Philippines.
Unique Texture: Bibingka offers a chewy delight with a crispy top, reminiscent of a warm hug from your favorite dessert.
Versatile Recipe: Feel free to experiment – swap in mango or add shredded coconut for an extra twist that will wow your guests.
Gluten-Free Joy: This cake caters to gluten-sensitive eaters, ensuring no one has to miss out on deliciousness.
If you love this treat, be sure to check out our recipe for Moist Carrot Cake Delight or try the delicious Apple Crumble Cupcakes for more tropical-inspired flavors!
Filipino Coconut Cake Ingredients
For the Cake
- Cream Cheese – Adds richness and creaminess to the cake; consider using a vegan cream cheese for a dairy-free option.
- Granulated Sugar – Provides sweetness; adjust according to personal preference.
- Eggs – Adds structure and moisture; for a vegan alternative, use flaxseed meal mixed with water.
- Sweet Rice Flour – Essential for the chewy texture characteristic of Bibingka; look for Mochiko or Koda Farms brands, as regular rice flour won’t give the same results.
- Baking Powder – Helps the cake rise.
- Melted Butter – Contributes to the cake’s richness; substitute with coconut oil for a dairy-free version.
- Vanilla Extract – Adds aromatic flavor; use pure vanilla for the best taste.
- Cream of Coconut – Provides a sweet, creamy coconut flavor; critical for achieving the authentic taste of this Filipino coconut cake.
- Milk – For moisture; can be replaced with coconut milk or any non-dairy milk.
- Crushed Pineapple (can, undrained) – Enhances tropical flavor and adds moisture; fresh pineapple may also be used.
- Brown Sugar – Creates a caramelized topping; can be replaced with additional granulated sugar.
- Granulated Sugar (for topping) – Adds a crunchy texture; optional but recommended for added sweetness.
Enjoy gathering these ingredients and let the joy of making Bibingka fill your kitchen!
Step‑by‑Step Instructions for Filipino Coconut Cake
Step 1: Preheat the Oven
Begin by preheating your oven to 350°F (175°C). This ensures a properly heated environment for baking your Filipino Coconut Cake, allowing it to rise and bake evenly. Use an oven thermometer if needed to check the temperature accuracy, and prepare your baking dish by greasing a 13×9 inch pan for easy release later on.
Step 2: Prepare the Cream Cheese Mixture
In a large mixing bowl, beat together the cream cheese and granulated sugar using an electric mixer on medium speed until the mixture is smooth and creamy, about 2-3 minutes. This step is crucial as it develops a rich base for your bibingka, ensuring every bite is full of delightful flavor. Scrape down the sides of the bowl as needed to incorporate all the ingredients.
Step 3: Add the Eggs
Crack the eggs into the cream cheese mixture, adding them one at a time. Mix well after each addition, beating until fully combined and the batter is light and fluffy, roughly 1-2 minutes per egg. This step will help provide structure to the Filipino Coconut Cake and enhance moisture, resulting in a beautiful, chewy texture.
Step 4: Incorporate Dry Ingredients
Gradually sift in the sweet rice flour and baking powder into the bowl, mixing gently with a spatula or wooden spoon until just combined. Be cautious not to overmix, as we want to maintain the batter’s lightness. You’ll know it’s ready once no dry flour remains, and your mixture is thick yet smooth.
Step 5: Add Wet Ingredients
Next, stir in the melted butter, vanilla extract, cream of coconut, and milk, along with the undrained crushed pineapple. Mix gently to combine, letting the flavors meld together beautifully. The cream of coconut adds that essential tropical touch, making this bibingka a delicious tribute to its Filipino roots.
Step 6: Pour the Batter
Pour the batter into your prepared 13×9 inch pan, spreading it evenly with a spatula to ensure consistent baking. The batter should reach the edges of the pan. This is where the magic of your Filipino Coconut Cake begins, and you’ll soon smell the delightful aroma filling your kitchen.
Step 7: Add Toppings
Generously sprinkle the top of the batter with brown sugar and additional granulated sugar, creating a sweet, caramelized crust as it bakes. This step not only enhances the visual appeal but also adds a crunchy texture on top that beautifully contrasts with the chewy interior of the bibingka.
Step 8: Bake the Cake
Transfer the pan to the preheated oven and bake for approximately 1 hour, or until the cake is lightly golden on top and set in the center. You can check for doneness by inserting a toothpick; it should come out clean or with a few moist crumbs. Enjoy the warm, inviting scent that fills your kitchen as it bakes!
Step 9: Cool and Serve
Once baked, remove the Filipino Coconut Cake from the oven and allow it to cool in the pan for at least 10-15 minutes. This resting period helps the cake firm up. After cooling, cut into square pieces and serve warm or at room temperature, letting everyone savor the delightful, tropical flavors and chewy texture.

Storage Tips for Bibingka
Room Temperature: Store leftover bibingka in an airtight container at room temperature for up to 3 days to maintain its chewy texture.
Fridge: Alternatively, refrigerate for up to a week, keeping it covered to prevent it from drying out.
Freezer: For longer storage, freeze bibingka in an airtight container or freezer bag for up to 3 months. Thaw in the fridge overnight before serving.
Reheating: Reheat individual squares in the microwave for about 15-20 seconds or place in a warm oven to restore its delightful warmth and flavor. Enjoy your delicious Filipino coconut cake!
Filipino Coconut Cake: Creative Twists
Feel free to let your imagination run wild and customize this delightful dessert to your taste buds’ delight!
-
Dairy-Free: Substitute cream cheese and milk with vegan cream cheese and almond milk for a plant-based version. You’ll still enjoy the rich, creamy texture!
-
Mango Madness: Swap out crushed pineapple for finely chopped fresh mango for a vibrant, tropical twist that will surprise and delight.
-
Nutty Crunch: Add ½ cup of chopped macadamia nuts or walnuts for extra texture and a nutty flavor that complements the cake beautifully.
-
Chocolate Indulgence: Fold in ½ cup of mini chocolate chips for a decadent dessert that combines the best of both worlds—coconut, and chocolate!
-
Spicy Kick: Add a pinch of cayenne pepper or ground ginger to the batter for a subtle heat that contrasts wonderfully with the sweet coconut and pineapple flavors.
-
Healthier Option: Replace half of the sugar with mashed ripe bananas for natural sweetness and an extra boost of moisture in your cake.
-
Bread Pudding Style: Turn leftovers into a delicious bread pudding by soaking squares in coconut milk and baking with a sprinkle of cinnamon for a unique breakfast treat.
Get creative with these variations and mix and match until you find your perfect Bibingka blend! If you love indulging in sweet treats, you’ll also want to try our Apple Crumble Cupcakes or explore the charming flavors in Velvet Strawberry Cheesecake!
Make Ahead Options
These Moist and Chewy Bibingka – Traditional Filipino Coconut Cakes are ideal for meal prep enthusiasts! You can mix the batter and assemble the cake up to 24 hours in advance; just refrigerate the prepared batter in a covered bowl to maintain freshness. Alternatively, you can bake the bibingka and store it in an airtight container at room temperature for up to 3 days. To enjoy it warm, simply pop slices in the microwave for a few seconds before serving. This makes it perfect for busy weeknights or unexpected guests, ensuring you have a delightful treat ready with minimal effort!
What to Serve with Moist and Chewy Bibingka?
Indulging in the tropical delight of Bibingka opens a door to a deliciously vibrant meal that warms both heart and home.
-
Coconut Ice Cream: This cool, creamy accompaniment enhances the cake’s coconut richness and adds a delightful contrast in temperature.
-
Fresh Mango Slices: Juicy mango brightens the palate, providing a fresh, tropical taste that beautifully balances the cake’s sweetness.
-
Pineapple Salsa: A zesty mix of diced pineapple, red onion, and cilantro provides a refreshing kick, perfect for cutting through the cake’s dense texture.
-
Sweetened Condensed Milk Drizzle: A luscious drizzle adds an extra layer of sweetness and creaminess, elevating the experience with each bite.
-
Mint Tea: This aromatic herbal tea refreshes the palate while its subtle earthy notes perfectly complement the cake’s sweet flavors.
-
Chocolate-Covered Macadamia Nuts: Their crunchy texture and rich chocolate flavor make a delightful contrast that will have everyone coming back for more.
-
Tropical Fruit Salad: Combine watermelon, papaya, and kiwi for a colorful, refreshing side that enhances the cake’s tropical essence and provides a hint of acidity.
-
Mango Lassi: The sweet, tangy yogurt drink pairs wonderfully, offering a creamy texture that harmonizes beautifully with Bibingka’s chewy delight.
-
Lemon Sorbet: This light and tart dessert cleanses the palate, leaving a refreshing finish after the sumptuous flavors of the cake.
Expert Tips for Bibingka
-
Precise Measurements: Ensure all ingredients, especially sweet rice flour, are accurately measured for the best texture in your Filipino coconut cake.
-
Gentle Mixing: When incorporating dry ingredients, mix gently to avoid flour dusting everywhere and to prevent a dense texture.
-
Baking Dish: Use a greased 13×9 inch pan for optimal baking; for mini cakes, reduce baking time to about 25-30 minutes.
-
Cooling Time: Let the bibingka cool completely before cutting to maintain its chewy structure and prevent crumbling.
-
Storage Tips: Store leftovers in an airtight container at room temperature for up to 3 days or refrigerate for up to a week.
Filipino Coconut Cake Recipe FAQs
What type of sweet rice flour should I use for Bibingka?
Look for Mochiko or Koda Farms brands of sweet rice flour, as these provide the unique chewy texture that is characteristic of Bibingka. Regular rice flour will not yield the same results and could potentially lead to disappointment in your cake’s texture.
How should I store leftover Bibingka?
Store any leftovers in an airtight container at room temperature for up to 3 days. If you prefer to keep it longer, refrigerate for up to a week. Just make sure it’s well-sealed to prevent it from drying out.
Can I freeze Bibingka, and how do I do it?
Absolutely! To freeze Bibingka, cut it into squares and place them in an airtight container or freezer bag. Make sure to separate layers with parchment paper to avoid sticking. It can last up to 3 months in the freezer. For serving, simply thaw overnight in the fridge before enjoying, or microwave for 15-20 seconds to warm it up.
What should I do if my Bibingka is too dry?
If you find your Bibingka is dry, it may be due to overbaking. Always check for doneness around the 55-minute mark by inserting a toothpick—if it comes out clean with only a few moist crumbs, it’s ready! For a next time, make sure to measure ingredients accurately, and ensure that you don’t exceed the baking time specified in the recipe.
Are there any dietary considerations I should be aware of?
Yes! Bibingka can be made gluten-free by using sweet rice flour. For a dairy-free version, you can substitute both cream cheese and melted butter with vegan alternatives, such as vegan cream cheese and coconut oil. Additionally, if you’re cooking for someone with allergies, always check ingredient labels to ensure they’re safe to consume.
Can I use fresh pineapple instead of canned for this recipe?
You can certainly use fresh pineapple, but be sure to finely chop it and remove excess juice before incorporating it into the batter. Canned pineapple is convenient and usually has a perfect moisture level, but fresh could add a brighter flavor profile to your Bibingka. Enjoy the authentic essence of this Filipino Coconut Cake!
Filipino Coconut Cake: Irresistibly Chewy and Tropical Delight
Ingredients
Equipment
Method
- Preheat your oven to 350°F (175°C) and grease a 13x9 inch pan.
- In a large mixing bowl, beat the cream cheese and granulated sugar together until smooth and creamy, about 2-3 minutes.
- Crack the eggs into the cream cheese mixture one at a time, mixing well after each addition until fluffy.
- Gradually sift in the sweet rice flour and baking powder, mixing gently until just combined.
- Stir in the melted butter, vanilla extract, cream of coconut, and milk, followed by the undrained crushed pineapple.
- Pour the batter into the prepared pan, spreading it evenly.
- Sprinkle the top of the batter with brown sugar and additional granulated sugar.
- Bake for approximately 1 hour, or until golden on top and set in the center.
- Allow the cake to cool in the pan for at least 10-15 minutes before cutting into pieces.
Leave a Reply