
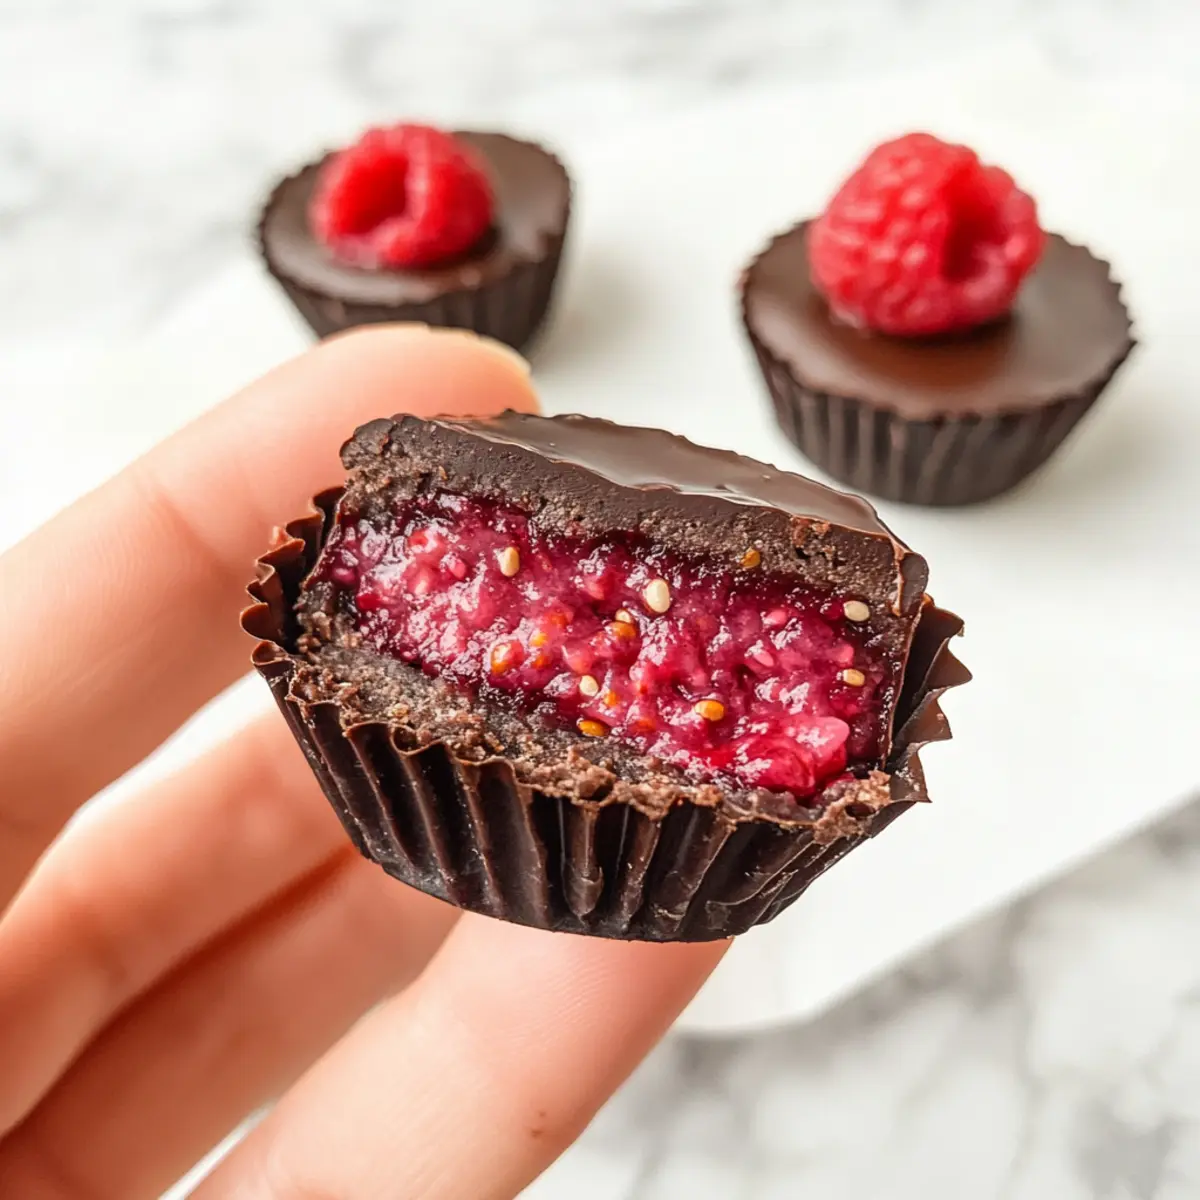
As I rummaged through my pantry the other day, my eyes landed on a colorful splash of raspberries and a jar of chia seeds. Inspiration struck! That’s how my No-Bake Chocolate Raspberry Chia Cups were born. These delightful treats are not just easy to prepare but also pack a punch of nutrition—perfect for satisfying your sweet tooth without the guilt. The combination of rich chocolate with a creamy, fruity raspberry layer will leave you wondering how something that’s vegan, gluten-free, and refined sugar-free can taste so indulgent. Each bite is a chance to reinvent dessert in a healthier way, making them an ideal pick for gatherings or a cozy night in. Curious about how to whip up these creamy delights? Let’s dive in!
Why Are These Cups So Irresistible?
Decadent Flavor: The rich chocolate and tart raspberry blend create an exquisite taste adventure that will satisfy your cravings without the guilt.
Healthy Indulgence: Packed with nutrients from chia seeds and berries, these cups are a wholesome option for dessert lovers.
No-Bake Convenience: Perfect for busy days, simply mix melt, layer, and freeze—no oven required!
Endless Variations: Feel free to experiment with different berries or make mini versions for extra fun. Whether you’re whipping up a sweet treat for a gathering or a cozy night in, these Chocolate Raspberry Chia Cups will wow your guests. Pair them with other delightful options like White Chocolate Cranberry or Chewy Chocolate Chip cookies for a perfect dessert spread!
Chocolate Raspberry Chia Cups Ingredients
• All the essentials to create these delectable treats await!
For the Raspberry Filling
- Raspberries – Freshness and tartness provide the fruity filling; can substitute with blueberries, strawberries, or mixed berries as desired.
- Maple Syrup – Adds natural sweetness to the raspberry filling; honey can be used as an alternative for non-vegan versions.
- Vanilla – Enhances the flavor of the raspberry filling; pure vanilla extract is preferred.
- Chia Seeds – Thickens the raspberry filling and adds nutrition (omega-3s); additional chia can be used if needed for a thicker consistency.
For the Chocolate Coating
- Coconut Oil – Serves as the base for the chocolate coating, ensuring a smooth texture; can be replaced with vegan butter or another neutral oil.
- Cocoa Powder – Provides the chocolate flavor; use unsweetened varieties for best results.
- Dark Chocolate (optional) – Can substitute for cocoa powder and coconut oil for a richer taste.
Enjoy crafting your Chocolate Raspberry Chia Cups!
Step‑by‑Step Instructions for Chocolate Raspberry Chia Cups
Step 1: Prepare the Muffin Tin
Line a muffin tin with 4 silicone liners, or use mini liners for 8 smaller cups. Make sure they are securely placed, as this will hold your delightful Chocolate Raspberry Chia Cups while they freeze. Prepping your tins first creates a smooth flow as you layer the ingredients later on.
Step 2: Cook the Raspberry Filling
In a medium pot over medium heat, combine the fresh raspberries and maple syrup. Allow them to simmer gently for about 8-10 minutes until the raspberries break down and the mixture becomes syrupy. Mash the raspberries with a fork, then stir in vanilla and chia seeds. Mix well and set aside to cool for approximately 10 minutes, thickening as it cools.
Step 3: Mix the Chocolate Coating
While the raspberry filling cools, melt the coconut oil in a microwave or stovetop until fully liquefied. In a mixing bowl, whisk together the melted coconut oil, cocoa powder, and remaining maple syrup until you achieve a smooth, glossy consistency. This rich chocolate mixture will coat your cups beautifully, providing a luscious chocolate flavor.
Step 4: Create the Bottom Layer
Pour 1 tablespoon of the chocolate mixture into each prepared liner, ensuring a thin, even layer at the bottom. Use the back of a spoon to spread it if needed. Place the muffin tin in the freezer for about 5 minutes, allowing this layer to firm up completely before adding the raspberry filling on top.
Step 5: Add the Raspberry Layer
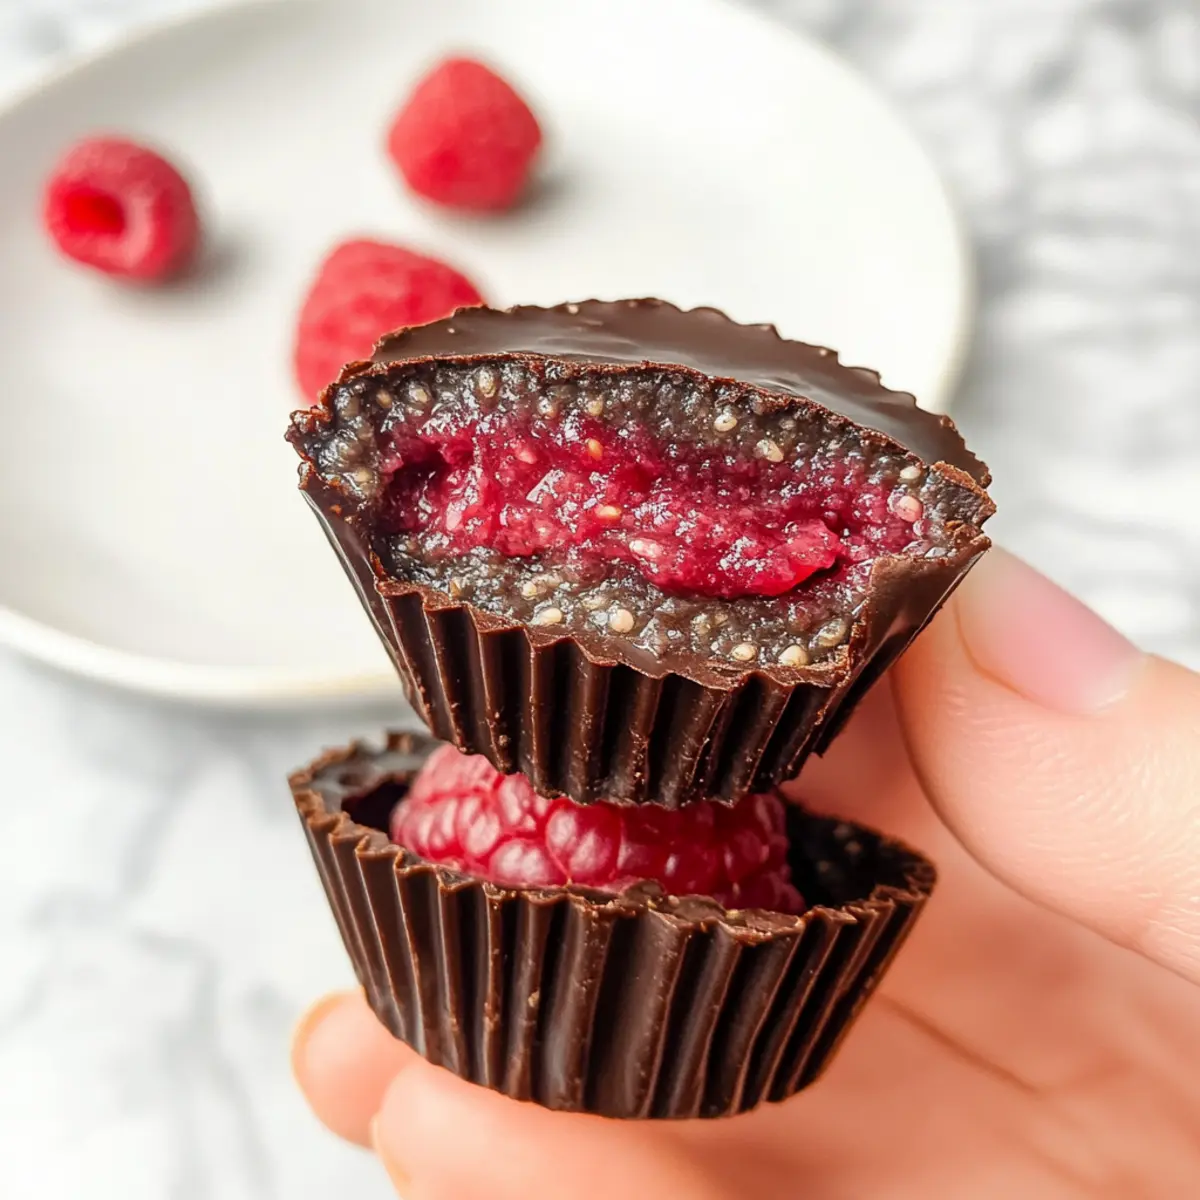
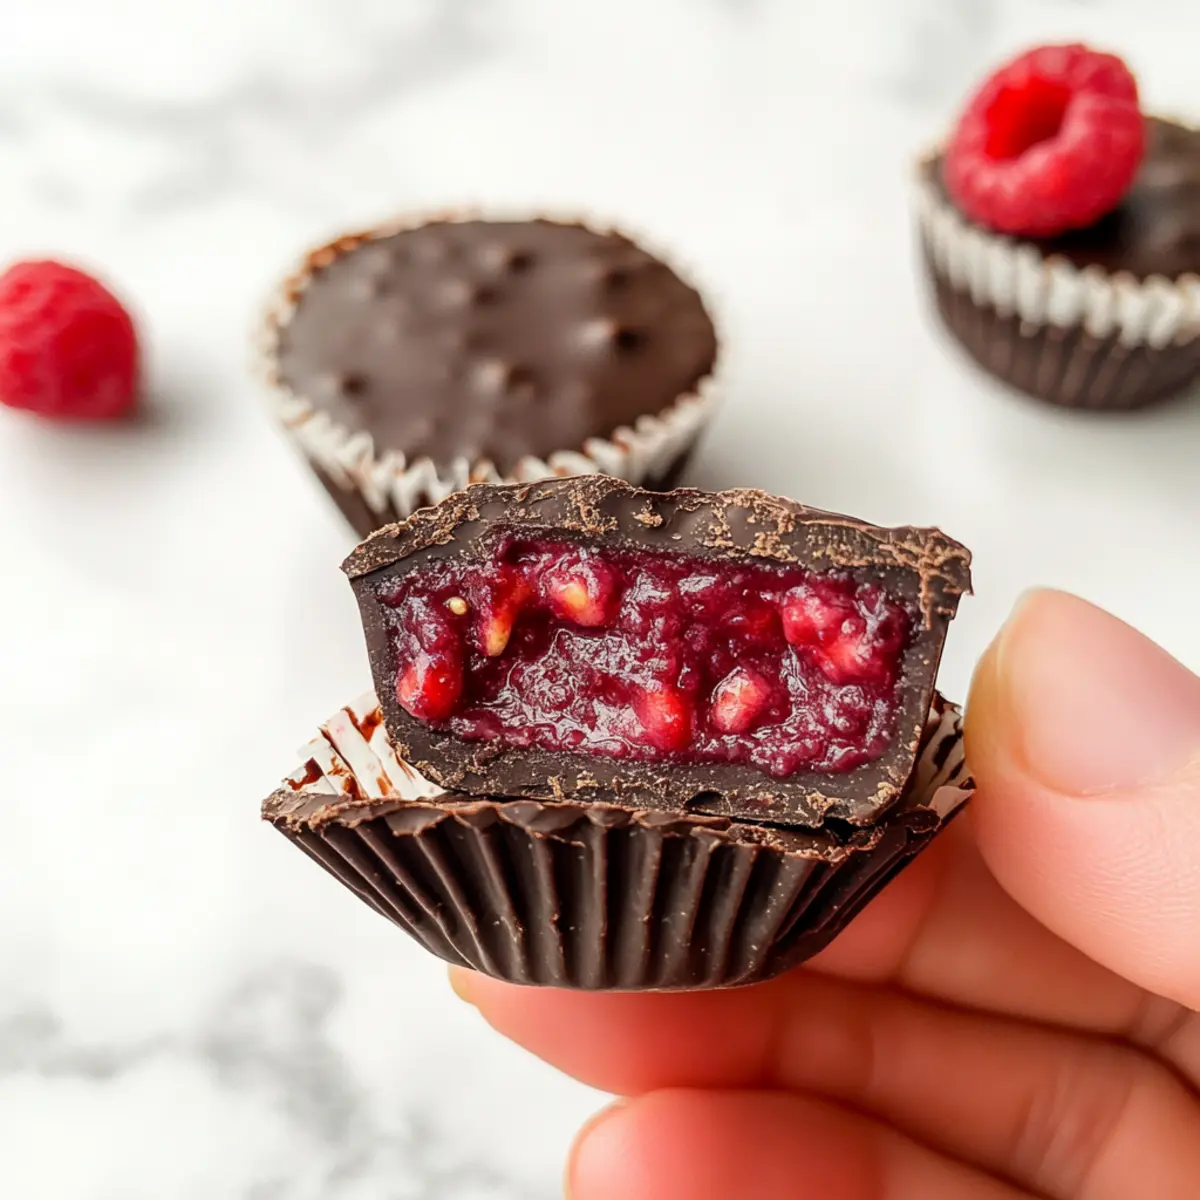
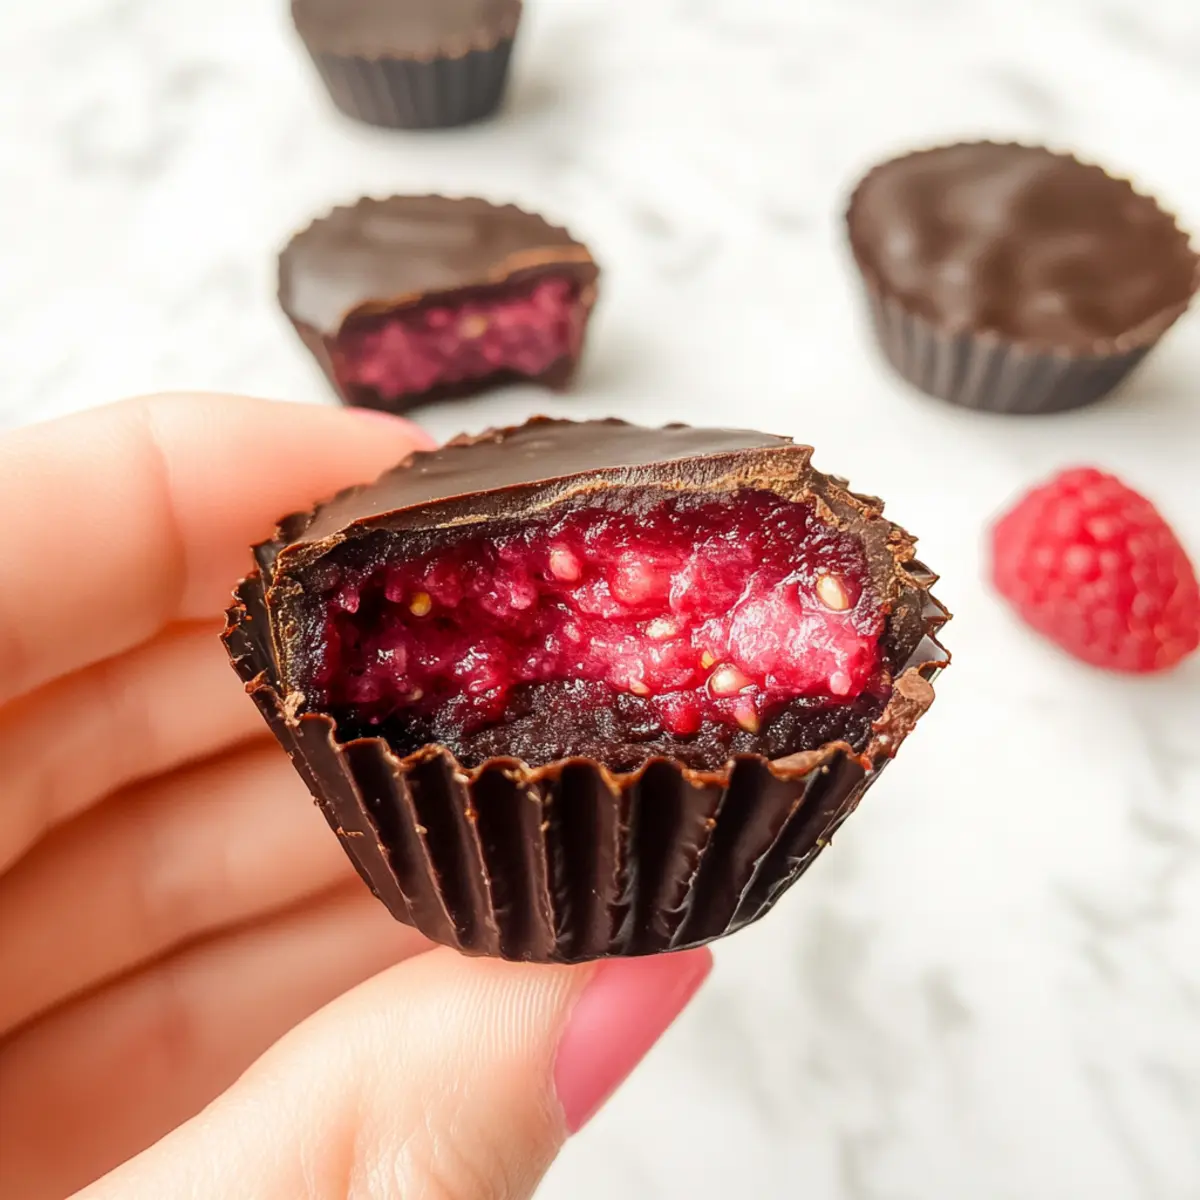
Once the chocolate layer is set, take the muffin tin out of the freezer. Spoon 1 tablespoon of the raspberry mixture onto each chilled chocolate layer, spreading it evenly with a spoon. The vibrant color of the raspberry filling will contrast beautifully with the dark chocolate base. Return the muffin tin to the freezer for another 5 minutes to allow the raspberry layer to firm up.
Step 6: Top with More Chocolate
Once the raspberry layer is firm, remove the muffin tin from the freezer again. Pour an additional tablespoon of the chocolate mixture over each raspberry layer, ensuring that it covers the filling completely. This final chocolate layer creates a delightful seal. Place in the freezer and allow to set for approximately 2 hours, until fully firm.
Step 7: Serve and Store
Once fully set, remove the Chocolate Raspberry Chia Cups from the silicone liners carefully. Store your delicious cups in the freezer in a sealed container. When you’re ready to enjoy them, let them thaw at room temperature for a few minutes for the perfect creamy texture. Indulge in your delightful creation!
How to Store and Freeze Chocolate Raspberry Chia Cups
Freezer: Store your Chocolate Raspberry Chia Cups in an airtight container in the freezer for up to 2 months. This ensures they maintain their delicious texture and flavor.
Thawing: When ready to enjoy, let them thaw at room temperature for about 5-10 minutes for optimal creamy texture. This allows the chocolate to soften slightly while keeping the raspberry layer luscious.
Serving: If you prefer a quicker option, you can microwave each cup on low for about 10-15 seconds just to take the chill off, but be cautious not to overheat!
Check for Freshness: Always check for any ice crystals or freezer burn before consuming; if they look good, they should be perfect to eat!
What to Serve with No-Bake Chocolate Raspberry Chia Cups
Elevate your dessert experience by pairing these creamy delights with complementary flavors and textures that tantalize your taste buds.
-
Refreshing Mint Tea: This fragrant infusion is a light, soothing drink that complements the rich layers of the chia cups beautifully.
-
Roasted Almonds: Their crunchy texture adds a satisfying contrast, while the nuttiness enhances the chocolate’s depth.
-
Fresh Fruit Salad: A medley of seasonal fruits brightens the plate and adds a touch of natural sweetness to balance the dessert.
-
Coconut Whipped Cream: Luxurious and airy, this creamy topping perfectly mirrors the cups’ flavors while introducing a tropical twist.
-
Vegan Vanilla Ice Cream: For an indulgent treat, serve a scoop on the side to create a decadent contrast to the tart raspberry filling.
-
Dark Chocolate Dipped Strawberries: These simple yet elegant bites amplify the chocolate experience while introducing another fruity layer.
-
Espresso or Coffee: A cup of deep, rich coffee enhances the bold chocolate notes and makes for a delightful after-dinner pairing.
-
Almond Milkshake: Creamy and nutty, this shake can serve as a refreshing, nutrient-packed accompaniment to your no-bake cups.
With these pairings, your no-bake Chocolate Raspberry Chia Cups will be a sensational centerpiece for any gathering or special occasion!
Make Ahead Options
These No-Bake Chocolate Raspberry Chia Cups are perfect for meal prep, allowing you to enjoy a sweet treat with minimal fuss during your busy week! You can prepare the raspberry filling and chocolate coating up to 24 hours in advance. Simply cook and cool the raspberry mixture (step 2), then refrigerate it in an airtight container; this helps maintain its vibrant flavor and prevents browning. Likewise, mix your chocolate coating and store it in the fridge until ready to layer. When you’re set to assemble, just layer it all as instructed and freeze for the final setting. With these make-ahead tips, you’ll savor delicious, guilt-free indulgence with less preparation time!
Chocolate Raspberry Chia Cups Variations
Feel free to unleash your creativity and customize these delightful cups with a variety of options that excite your palate.
-
Mixed Berries: Swap raspberries for a medley of blueberries, strawberries, or blackberries for a unique fruity twist.
-
Nutty Crunch: Add crushed nuts such as almonds or hazelnuts to the chocolate layer for an extra delightful crunch and flavor contrast.
-
Creamy Avocado: Blend in ripe avocado to your chocolate mixture for an ultra-creamy texture without sacrificing any flavor.
-
Sweetener Substitution: For a lower glycemic option, replace maple syrup with agave nectar or your favorite sugar alternative to suit your dietary needs.
-
Minty Freshness: Infuse the raspberry filling with mint extract for a refreshing burst of flavor that elevates the entire dessert.
-
Spicy Kick: Stir in a pinch of cayenne pepper or chili powder into the chocolate layer for a surprising spicy twist that plays beautifully against the richness.
-
Layer it Up: For a visually appealing treat, layer the cups in small glasses for a parfait-style dessert, punctuated with layers of crushed cookies or granola.
-
Fun Flavors: Experiment with different extracts like almond or orange for a custom flavor profile that adds a delightful twist.
Whichever variation you choose, these Chocolate Raspberry Chia Cups are sure to shine! Don’t forget to pair them with other lovely dessert options like Caramel Apple Dessert Cups or 4-Ingredient Chocolate Oat Cookies for an irresistible sweet spread!
Expert Tips for Chocolate Raspberry Chia Cups
Easy Removal: Use silicone liners for hassle-free removal of your Chocolate Raspberry Chia Cups after freezing. They ensure a clean release without sticking.
Berry Substitutions: If fresh raspberries aren’t available, feel free to experiment with blueberries or strawberries. Just remember to adjust the sweetness as needed!
Check Consistencies: This dessert’s success relies on the balance of chia seeds. Too few can make the filling runny; if needed, add extra chia for a thicker texture.
Temperature Matters: Allow ingredients like coconut oil and chia seeds to reach room temperature before mixing. This prevents clumping and ensures a smooth blend.
Thawing Tips: Let the cups thaw for a few minutes at room temperature before serving. This enhances the silky mouthfeel and makes the flavors pop!
Chocolate Raspberry Chia Cups Recipe FAQs
What type of raspberries should I use for the filling?
Absolutely! Fresh raspberries are best for achieving that sweet and tart flavor that complements the chocolate. If they’re not available, you can substitute with blueberries, strawberries, or a mix of berries for a delicious twist.
How should I store my Chocolate Raspberry Chia Cups?
To keep your Chocolate Raspberry Chia Cups fresh, store them in an airtight container in the freezer for up to 2 months. This will maintain their delightful texture and ensure they remain delicious. When you’re ready to enjoy one, simply let it thaw at room temperature for about 5-10 minutes.
Can I freeze these cups for long-term storage?
Very! Your Chocolate Raspberry Chia Cups can be frozen for up to 2 months. For freezing, ensure they’re in a well-sealed container to prevent freezer burn. Just take them out when you’re craving something sweet and let them thaw for a few minutes before indulging in their creamy goodness.
What if my raspberry filling is runny?
If your raspberry filling turns out too runny, you can easily thicken it by adding more chia seeds. Start with an additional 1-2 teaspoons and let the filling sit for about 10 minutes to firm up. This will help create that perfect layered texture in your Chocolate Raspberry Chia Cups!
Can I make these cups nut-free?
Certainly! The recipe as outlined is already nut-free, but always double-check your cocoa and any other products for any hidden allergens, especially if you’re serving guests with food sensitivities.
What’s the best way to serve these cups?
I recommend letting the cups thaw for about 5 minutes at room temperature before serving for the best texture. They’ll be easy to enjoy with a spoon, or you can pop them onto a dessert plate for a beautiful presentation!
Indulge in No-Bake Chocolate Raspberry Chia Cups Today
Ingredients
Equipment
Method
- Line a muffin tin with 4 silicone liners, or use mini liners for 8 smaller cups.
- In a medium pot over medium heat, combine the fresh raspberries and maple syrup. Simmer for about 8-10 minutes until syrupy.
- Mash the raspberries with a fork, then stir in vanilla and chia seeds. Set aside to cool for approximately 10 minutes.
- Melt the coconut oil until fully liquefied. Whisk together with cocoa powder and remaining maple syrup until smooth.
- Pour 1 tablespoon of the chocolate mixture into each prepared liner. Freeze for about 5 minutes.
- Spoon 1 tablespoon of raspberry mixture onto each chocolate layer. Return to freezer for another 5 minutes.
- Pour an additional tablespoon of the chocolate mixture over each raspberry layer, ensuring it covers completely. Freeze for approximately 2 hours.
- Remove from silicone liners and store in the freezer in a sealed container.
- Thaw at room temperature for a few minutes before serving.
Leave a Reply