
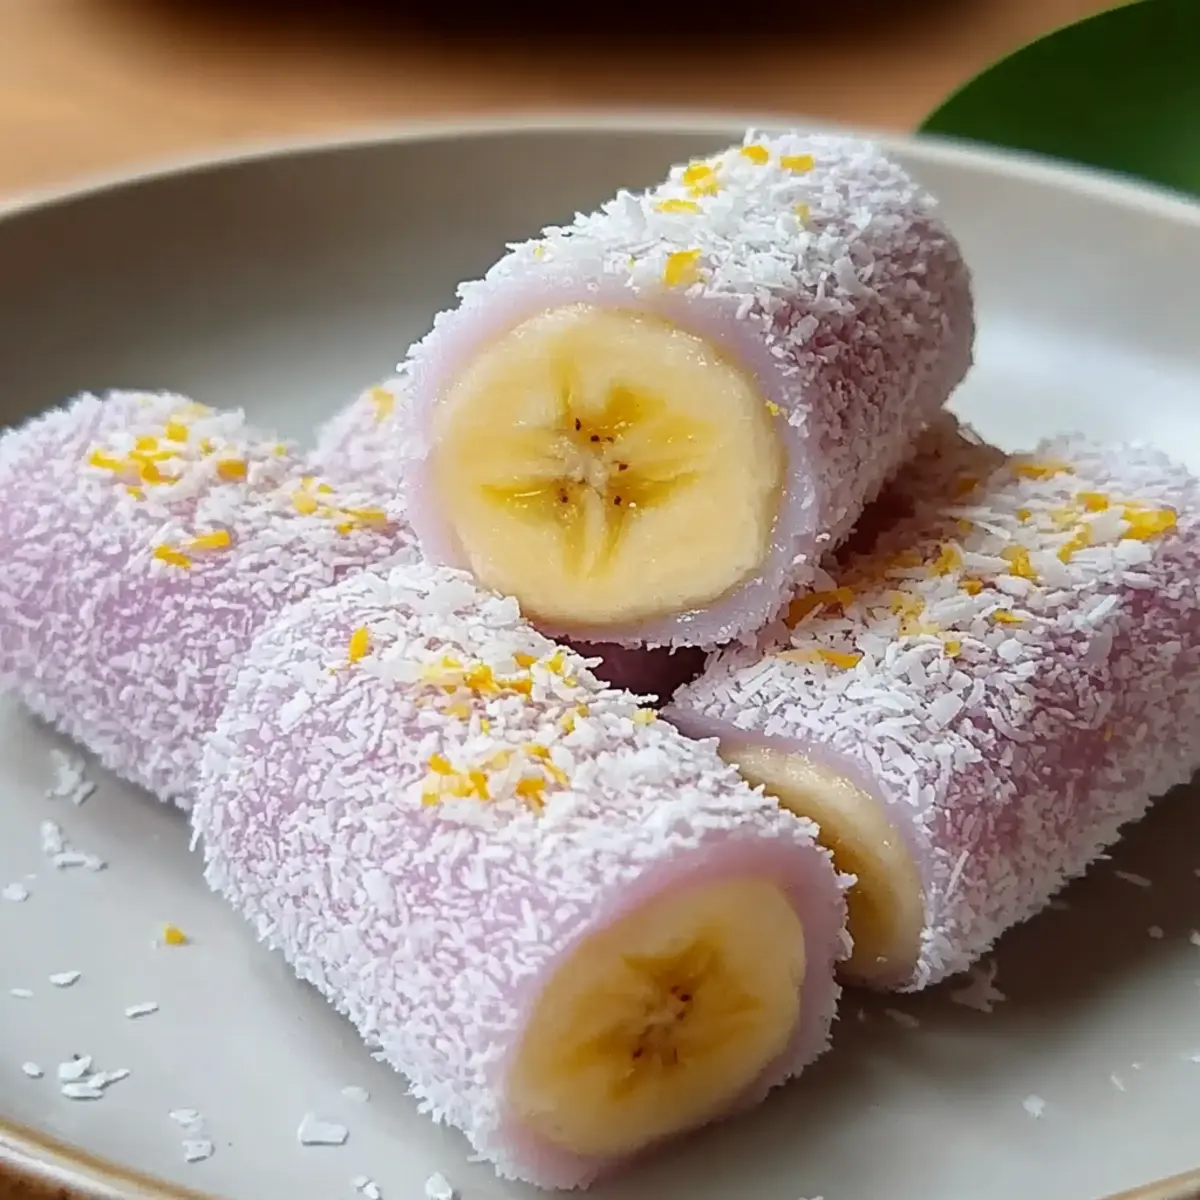
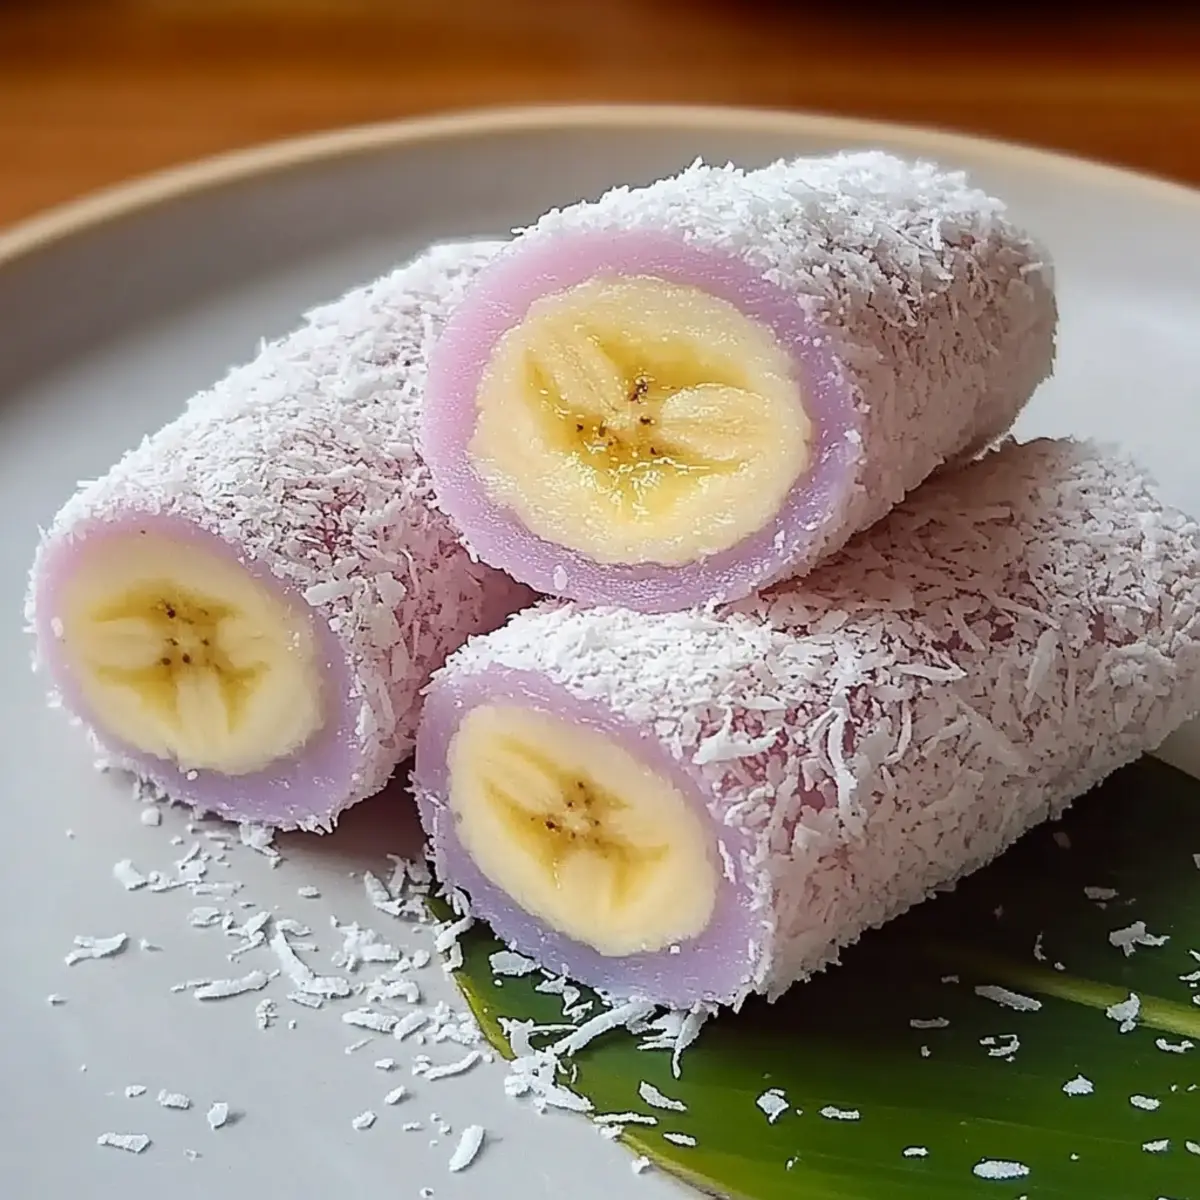
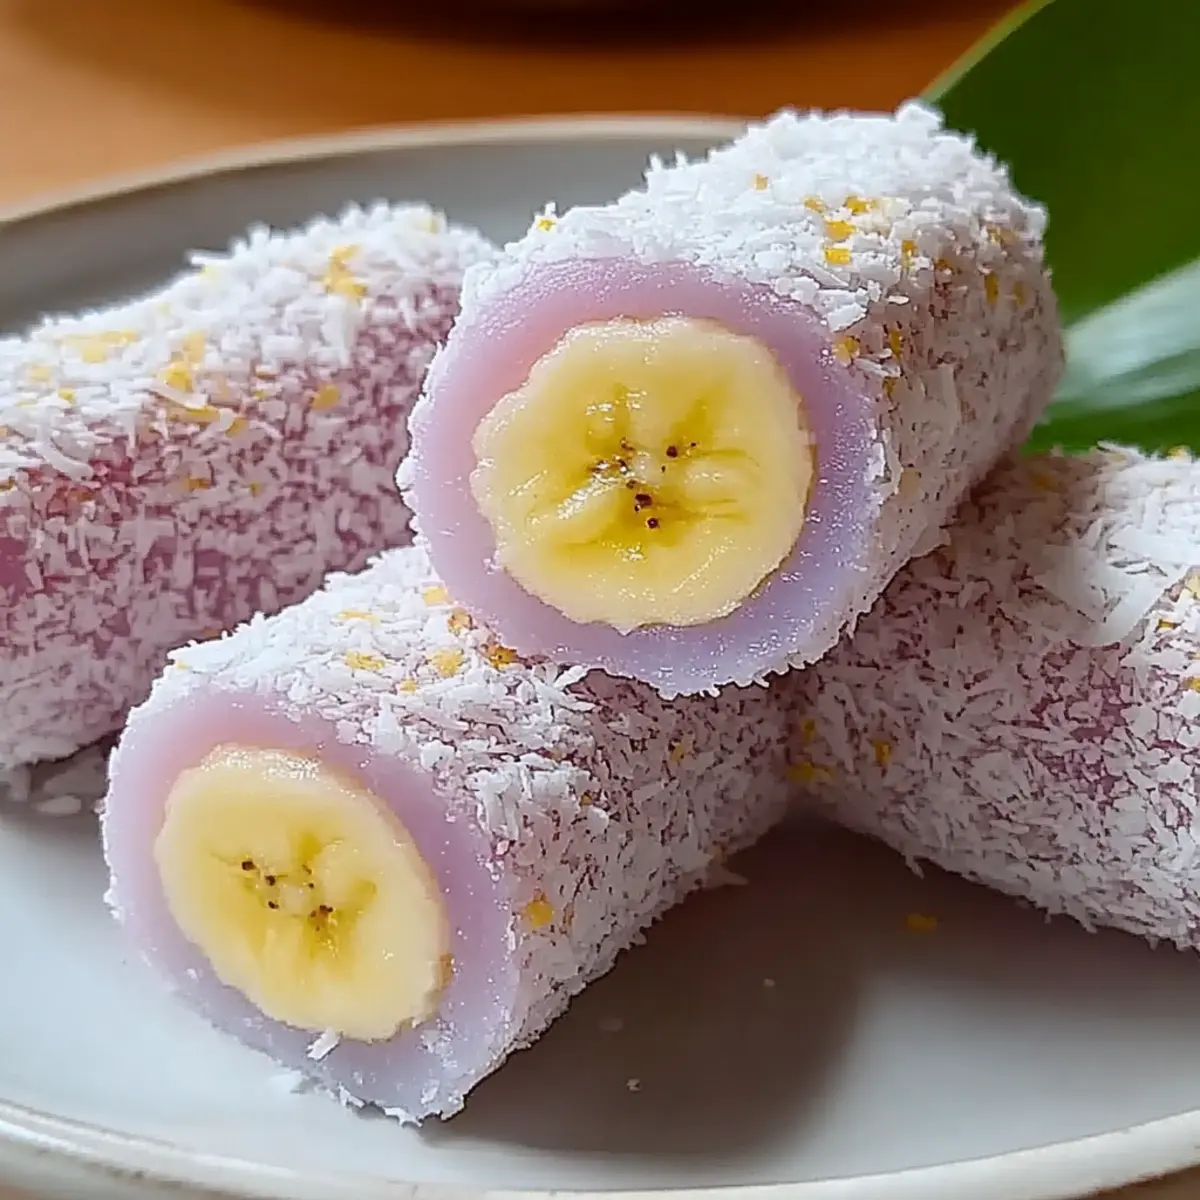
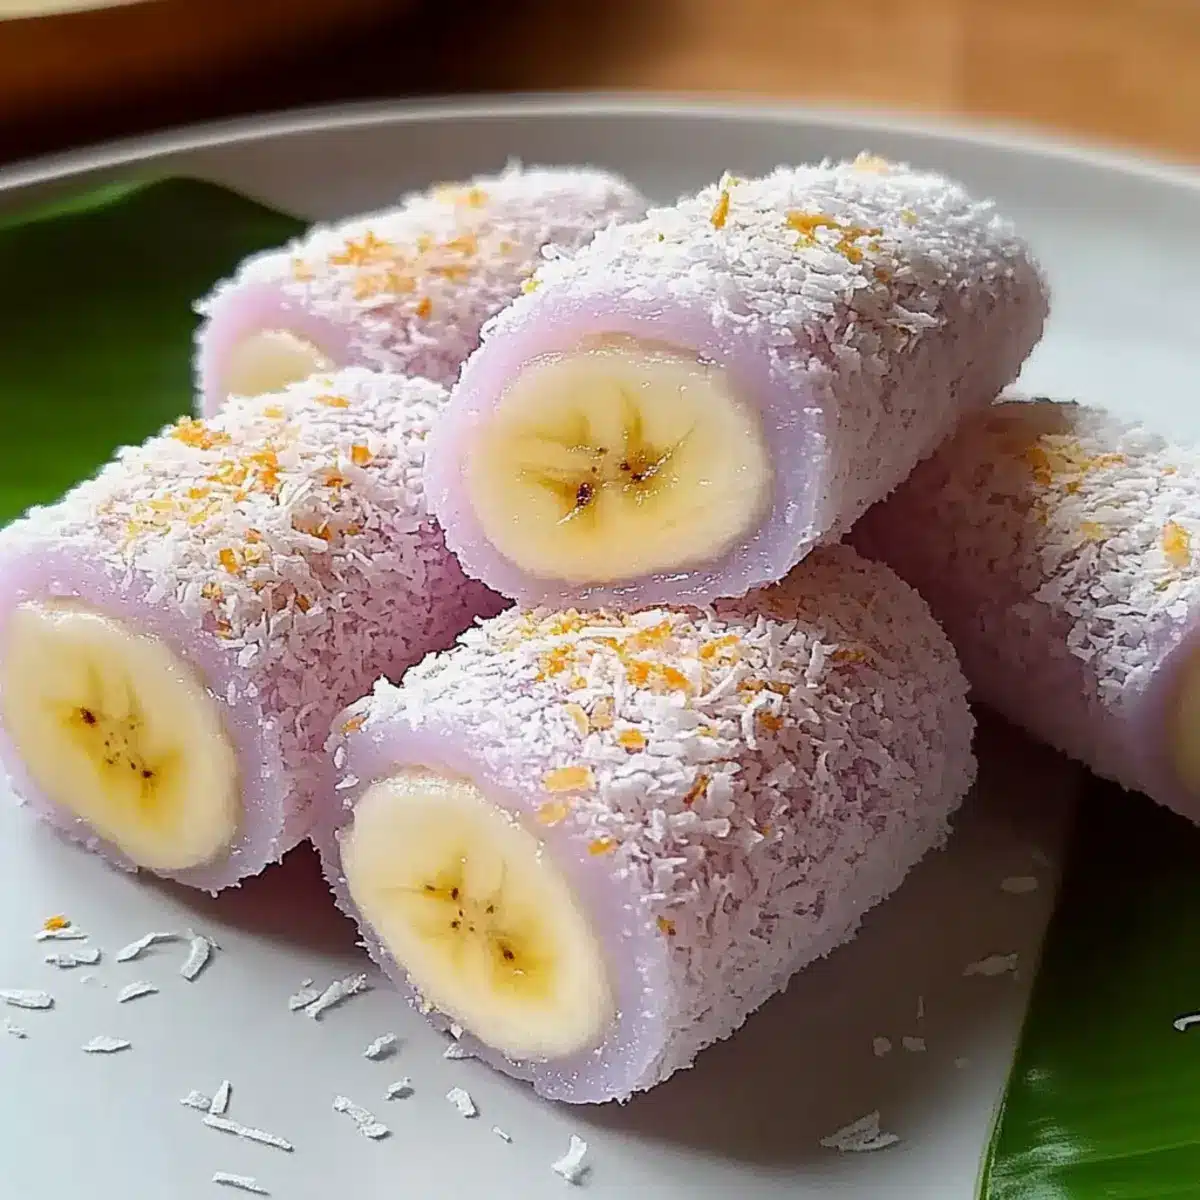
As I watched my friend’s eyes light up, I knew I had struck gold with my Banana Mochi. This delightful dessert brings together the soft, chewy texture of mochi with the sweet surprise of banana wrapped in a crunchy coconut coating—talk about a treat worth savoring! Perfect for impressing guests or simply satisfying a sweet craving, this recipe is an easy win for any home cook. Requiring just a handful of ingredients, it’s not only a fun project but also adaptable for gluten-free diets. Plus, you can customize the fillings to your heart’s desire, so why not get creative? With these bright flavors and charming textures, don’t be surprised if your family starts requesting Banana Mochi on repeat! Which filling variation will you try first?
Why Is Banana Mochi So Irresistible?
Delightfully Chewy: The unique texture of glutinous rice flour makes every bite a satisfying experience.
Sweet Surprise: With ripe bananas hidden within, each mouthing is a burst of natural sweetness.
Versatility at Its Best: Customize with fillings like Nutella or strawberries for endless variety.
Simple to Make: Just a few steps are needed to prepare this delectable treat, making it ideal for home cooks.
Gluten-Free Friendly: Easily swap ingredients to cater to gluten-free diets, making it inclusive for everyone.
Perfect for Sharing: Great for gatherings or an after-dinner dessert; your guests will be asking for more!
Banana Mochi Ingredients
For the Mochi Dough
- Glutinous Rice Flour – Provides the essential stretchy and chewy texture for mochi; don’t substitute with regular rice flour.
- Cornstarch – Helps to smooth the dough and prevent stickiness; can be omitted in some recipes but may affect texture.
- Granulated Sugar – Adds the right level of sweetness to the mochi dough; adjust based on your personal taste preference.
- Milk – Binds the dry ingredients and ensures moisture; dairy-free alternatives like almond milk can be used.
- Oil/Melted Butter – Enhances the flavor and richness of the dough; use olive oil or coconut oil for unique flavor twists.
- Dragon Fruit Juice (optional) – Adds natural color and a hint of fruity flavor; can be replaced with any fruit juice for a similar effect.
For the Filling
- Bananas – The core sweet surprise inside the mochi; ensure any fruit used is ripe but not overly juicy.
For Coating
- Coconut Flakes – Coats the mochi to add crunch and flavor; crushed nuts or colorful sprinkles can be used for a fun twist.
- Powdered Sugar (optional) – Dust for aesthetic appeal before serving; can be omitted for a less sweet finish.
Whether you enjoy it plain or with customized fillings, celebrating with homemade Banana Mochi is sure to bring joy to your kitchen!
Step‑by‑Step Instructions for Banana Mochi
Step 1: Prepare the Dough
In a mixing bowl, combine glutinous rice flour, cornstarch, sugar, and milk. Stir the mixture until it’s smooth and free of lumps, ensuring all ingredients are well incorporated. This should take about 3-5 minutes. The resultant dough should have a thick but pourable consistency, resembling a pancake batter.
Step 2: Steam the Mixture
Pour the prepared dough into a heatproof dish, spreading it evenly. Cover the dish tightly with a lid or foil to keep steam in. Place the dish in a steamer over simmering water, and steam for about 20 minutes. You’ll know it’s ready when the dough turns firm and translucent; it should spring back slightly when pressed.
Step 3: Knead the Dough
Once the mochi dough is done steaming, carefully remove it from the steamer and let it cool for a few minutes until it’s warm but manageable. Dust your hands with cornstarch to prevent sticking, then knead in your choice of oil and dragon fruit juice (if using). This kneading process should take about 5 minutes to achieve a smooth and pliable texture, which sets the stage for your Banana Mochi.
Step 4: Shape the Mochi
Pinch off small portions of the dough and flatten them out into thin circles, approximately 3-4 inches in diameter. Place a piece of ripe banana in the center of each circle, then carefully fold and seal the dough around the banana. This step is crucial to avoid leaks, so ensure the edges are firmly pressed together, forming a small ball or pouch.
Step 5: Coat the Mochi
Once all your Banana Mochi are shaped, roll each piece in a bowl of coconut flakes to create a crunchy outer layer. Make sure to coat each mochi evenly for that delightful texture in every bite. You can also use crushed nuts or colorful sprinkles, depending on your preference, for a fun twist.
Step 6: Optional Presentation
For an extra touch, dust the finished Banana Mochi with powdered sugar before serving, or drizzle with melted chocolate for a richer experience. Arrange the mochi on a vibrant platter for a beautiful presentation. This delightful treat not only looks appetizing but promises a burst of flavor with every bite.
Step 7: Serve and Enjoy
Your homemade Banana Mochi is now ready to be enjoyed! Serve it fresh with a side of tea, some fruit slices, or even a scoop of ice cream for a fabulous dessert experience. Remember, whether you’re sharing with friends or indulging alone, these fluffy treats will bring joy to anyone who takes a bite!
Make Ahead Options
These delightful Banana Mochi are perfect for meal prep! You can prepare the mochi dough up to 24 hours in advance; simply make it, steam, and cool completely before wrapping it tightly in plastic wrap and refrigerating. For the best quality, avoid adding the banana filling until you’re ready to shape the mochi just before serving—this prevents the bananas from browning or becoming overly mushy. When you’re ready, pinch off portions of dough, fill with banana, and coat in coconut flakes. This way, you’ll enjoy the same fresh and chewy texture with minimal effort, making it an ideal treat for busy weeknights or unexpected guests!
How to Store and Freeze Banana Mochi
- Room Temperature: Enjoy your Banana Mochi fresh within 24 hours at room temperature. Just keep it covered to prevent it from drying out.
- Fridge: Store leftover mochi in an airtight container in the fridge for up to 3 days. Note that the texture may become firmer but still delicious!
- Freezer: For longer storage, freeze individual pieces wrapped in plastic wrap or in a freezer bag for up to 2 months. Thaw overnight in the fridge before serving.
- Reheating: To restore some softness, lightly steam the mochi for a few minutes after thawing. Enjoy your Banana Mochi at its best!
What to Serve with Banana Mochi?
Indulging in delightful Banana Mochi opens the door to a world of delicious pairings that will elevate your dessert experience.
- Fresh Fruit Salad: Bright and refreshing, a medley of seasonal fruits enhances the sweetness of the mochi and adds vibrant colors to your table.
- Coconut Ice Cream: Creamy and rich, it complements the coconut coating of the mochi, creating a tropical duo that’s utterly irresistible.
- Japanese Green Tea: The earthy notes of this tea balance the sweetness of the mochi beautifully, adding a traditional touch to your dessert.
- Mochi Ice Cream: For another playful combination, pair with mochi ice cream in varied flavors for a delightful texture contrast with similar flavors.
Elevate your presentation by serving the mochi on colorful platters alongside these options. With each bite, you’ll experience a harmony of flavors that celebrates the uniqueness of Banana Mochi!
Banana Mochi Variations & Substitutions
Feel free to unleash your culinary creativity with these delightful alternatives that make each batch of Banana Mochi uniquely yours!
-
Fruit Variations: Try filling with mango or strawberries for a tropical twist that pairs beautifully with the chewy texture.
-
Nutty Surprise: Swap the banana for nutella or peanut butter to add a rich, creamy core that will leave everyone wanting more.
-
Dairy-Free Delight: Use almond milk instead of traditional milk for a completely dairy-free version, perfect for those with dietary restrictions.
-
Colorful Dough: Add a splash of beet juice for a beautiful pink color or matcha powder for a lovely green twist—both bring visual appeal along with flavor!
-
Crunchy Coating: Instead of coconut flakes, coat your mochi with crushed nuts or colorful sprinkles to entice kids and adults alike.
-
Texture Twist: For a unique texture, incorporate toasted sesame seeds in the dough, adding a nutty taste paired wonderfully with bananas.
-
Spiced Up: Sprinkle in some cinnamon or cardamom into the dough for an aromatic touch that brings out the sweetness of the bananas.
-
Extra Sweetness: Drizzle a little honey or maple syrup on top before serving for an additional layer of sweetness that elevates the flavor profile.
If you’re looking for more inspiration, consider other childhood favorites to fill your mochi with or explore gluten-free alternatives for any ingredient!
Expert Tips for Making Banana Mochi
- Use Glutinous Rice Flour: Always choose glutinous rice flour for that signature chewy texture; regular rice flour will lead to disappointing results.
- Avoid Stickiness: Dust your hands with cornstarch or coconut flakes when handling the dough to prevent it from sticking to your fingers.
- Ripeness is Key: Make sure your bananas are perfectly ripe—too green and they won’t be sweet enough, too overripe and they may be too mushy for the filling.
- Storage Solution: Keep leftover Banana Mochi in an airtight container. Refrigeration can change the texture slightly, but it extends freshness.
- Experiment with Fillings: Don’t hesitate to mix things up! Try different fruits or fillings like Nutella; customization will keep this dessert exciting for everyone.
Banana Mochi Recipe FAQs
How do I choose ripe bananas?
When selecting bananas for your Banana Mochi, look for fruit that is fully yellow with just a few brown specks. This indicates they are ripe yet still firm enough to hold their shape. Avoid bananas with dark spots all over, as they may be too soft and mushy for filling.
What is the best way to store leftover Banana Mochi?
Store any leftover Banana Mochi in an airtight container at room temperature for up to 24 hours. If you need to keep them longer, refrigerate for up to 3 days. Just be aware that the texture may become firmer when chilled, but they’ll still taste amazing!
Can I freeze Banana Mochi?
Absolutely! To freeze Banana Mochi, wrap individual pieces in plastic wrap or place them in a freezer bag, ensuring you remove as much air as possible. They can be stored in the freezer for up to 2 months. When you’re ready to enjoy, thaw them overnight in the fridge and lightly steam them for a couple of minutes to restore their chewy texture.
What should I do if my mochi dough is too sticky?
If your mochi dough is overly sticky, it might be due to too much moisture or not enough cornstarch. To fix this, lightly dust your hands and the dough with cornstarch while kneading. If needed, you can sprinkle in a little more cornstarch until the dough is pliable and easier to handle.
Are there any dietary considerations for making Banana Mochi?
Yes! This Banana Mochi recipe is vegetarian and can easily be made gluten-free by ensuring you use certified gluten-free glutinous rice flour and dairy-free milk options, like almond milk. This makes it a great option for those with dietary restrictions. Just keep an eye on dietary needs for filling substitutes, like using nut-free options if allergies are a concern.
Delightful Banana Mochi: Your New Favorite Sweet Snack
Ingredients
Equipment
Method
- In a mixing bowl, combine glutinous rice flour, cornstarch, sugar, and milk. Stir until smooth and free of lumps.
- Pour the prepared dough into a heatproof dish, cover tightly, and steam for about 20 minutes.
- Remove from the steamer, let cool slightly, then knead in oil and juice if using.
- Pinch off small portions of dough, flatten out, and place a banana piece in the center, then seal.
- Roll each shaped mochi in coconut flakes for a crunchy coating.
- Optionally dust with powdered sugar before serving.
- Serve fresh with tea or ice cream and enjoy!
Leave a Reply