
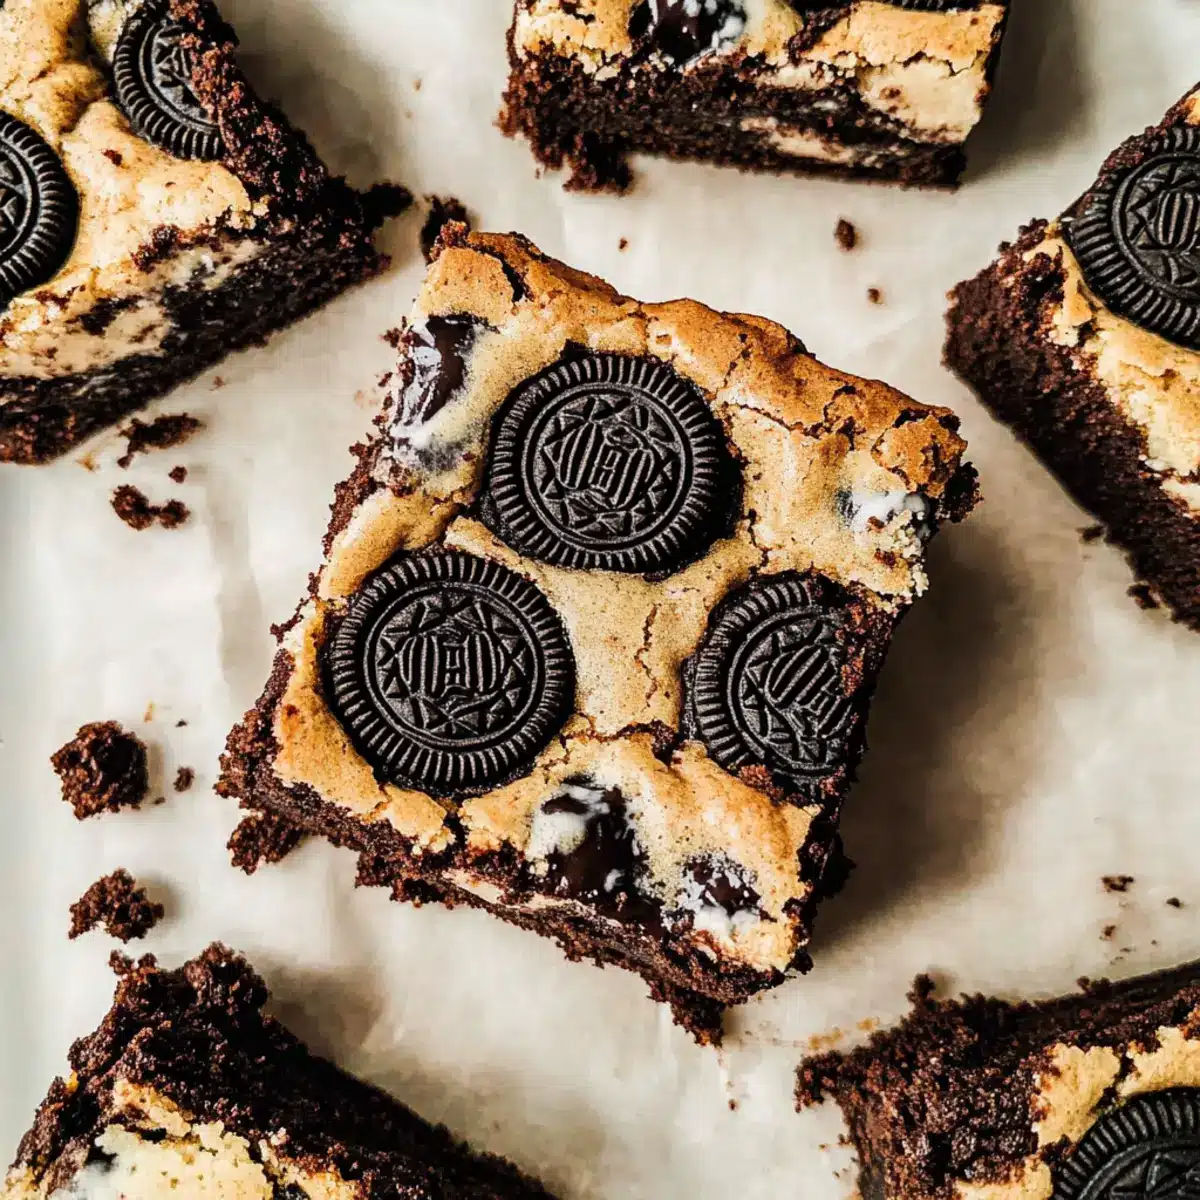
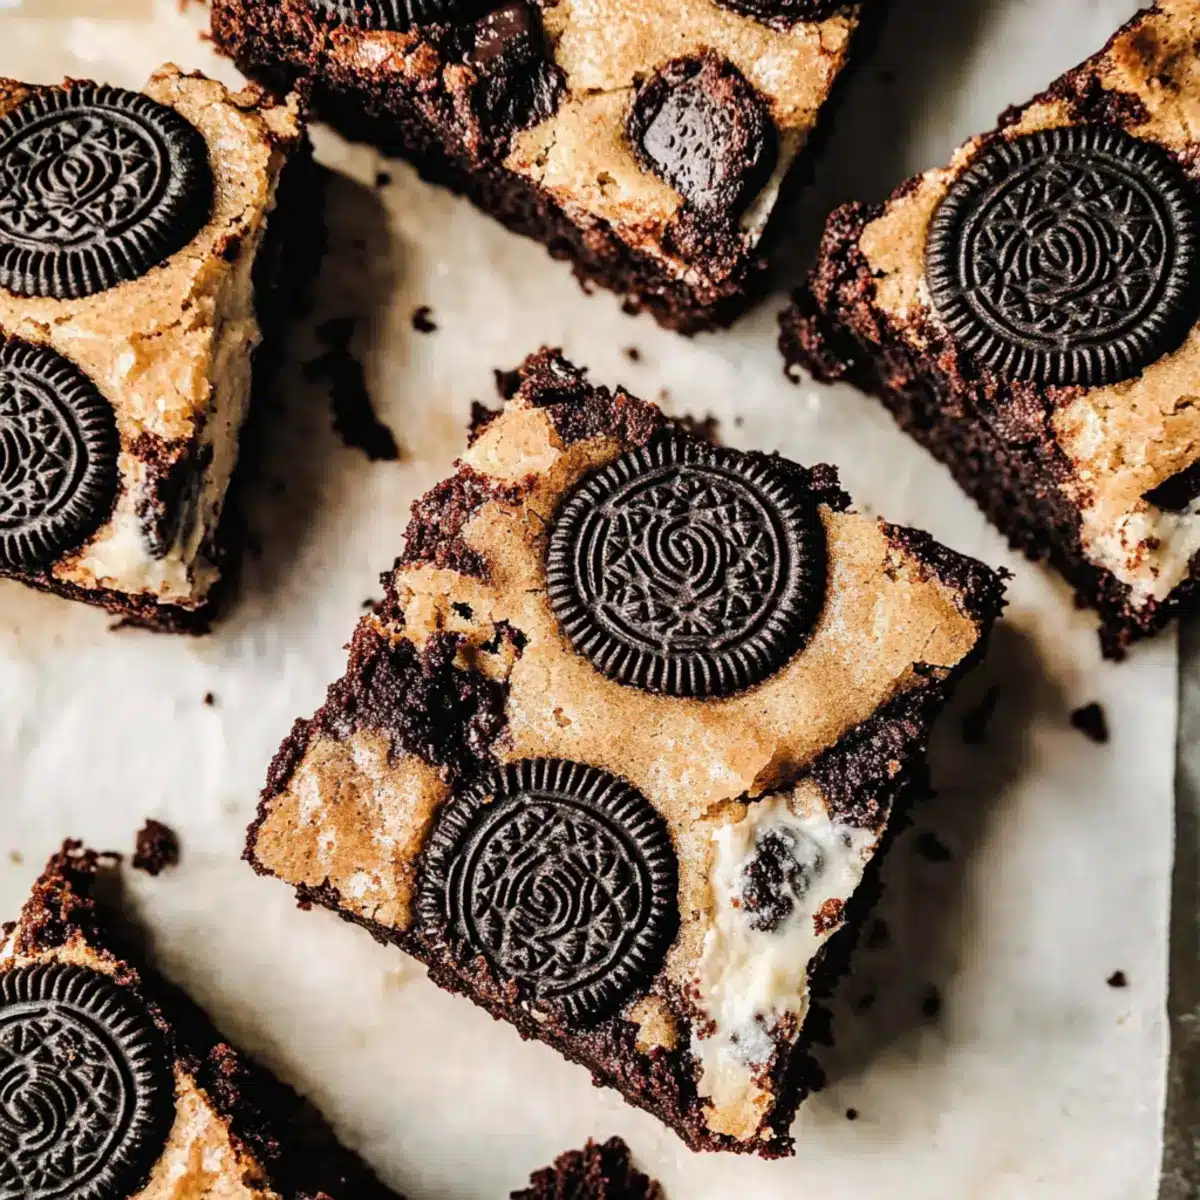
As I unwrapped a pack of Oreos the other day, the childhood snack welcomed me back like an old friend, and I had an idea. Why not marry the beloved Oreo with the rich, fudgy goodness of brownies? That’s how my indulgent Oreo brookies recipe was born! This delightful treat combines a thick, moist brownie base with chewy cookie dough and chunks of crushed Oreos tucked inside. Not only are these brookies incredibly simple to make, but they also stay fresh for days, making them perfect for family gatherings or a cozy night in. With every bite, you experience an irresistible blend of flavors and textures that will make you wonder why you haven’t tried this heavenly treat sooner. So, ready to dive into the world of Oreo brookies and whip up a batch of pure bliss? Let’s get started!

Why Are Oreo Brookies So Irresistible?
Indulgence at its Peak: Every bite of these Oreo brookies combines the rich, fudgy goodness of brownies with the irresistible crunch of Oreos.
Easy to Make: You’ll love how simple the recipe is—perfect for home cooks of any skill level!
Crowd-Pleaser: Whether it’s a family gathering or a cozy night in, these brookies will impress everyone, proving to be a hit every time.
Stay Fresh for Days: These tasty treats maintain their gooey texture and flavor, making them perfect for making ahead and enjoying later.
Versatile Delight: Feel free to experiment with different fillings or toppings. You could even customize them with flavored sandwich cookies for a fun twist!
Oreo Brookie Ingredients
• Discover the delicious components you need!
For the Brownie Base
- Unsalted Butter – Adds richness and moisture; substitute with margarine for a dairy-free option.
- Granulated Sugar – Provides sweetness and texture; no direct substitute, but coconut sugar works well.
- Brown Sugar – Adds moisture and a hint of caramel flavor; light or dark brown sugar can be used interchangeably.
- Cocoa Powder – Contributes depth of chocolate flavor; always use unsweetened for the best results.
- Eggs – Binds ingredients and helps with leavening; can substitute with a flax egg for a vegan option.
- Vanilla Extract – Elevates the overall flavor profile; opt for pure vanilla for the richest taste.
- All-Purpose Flour – Provides essential structure; use gluten-free flour for a gluten-free version.
- Baking Powder – Helps the brownies rise; ensure it’s fresh for optimal baking results.
- Salt – Balances sweetness and enhances flavors; crucial for a well-rounded taste.
- Chocolate Chips – Adds extra chocolatey goodness; feel free to choose semi-sweet or dark chocolate chips.
For the Cookie Topping
- Unsalted Butter – Creates a rich, creamy texture; can use margarine for a dairy-free version.
- Granulated Sugar – Sweetens the cookie dough layer; substitutes aren’t recommended for best results.
- Brown Sugar – Enhances moisture and adds a caramel-like flavor; interchangeable with other brown sugars.
- Egg – Binds everything together; flax egg can be used for a vegan cookie dough.
- Vanilla Extract – Boosts flavor; again, pure extract yields the best results.
- All-Purpose Flour – Provides structure; choose a gluten-free variety if needed.
- Baking Powder – Encourages a nice rise in the cookie dough; ensure it’s fresh.
- Salt – Enhances flavor and balances sweetness; it’s a small but mighty ingredient.
- Chocolate Chips – Personalize the flavor by using semi-sweet or dark chocolate; experiment with mix-ins for fun.
For the Topping
- Oreo Cookies – The star, adding a delightful crunch and flavor; any sandwich cookie can substitute if you’re adventurous!
Step‑by‑Step Instructions for Oreo Brookies
Step 1: Prepare the Brownie Base
In a mixing bowl, melt 1 cup of unsalted butter in the microwave, then stir in 1 cup granulated sugar and 1 cup brown sugar until smooth. Add 1 cup of unsweetened cocoa powder, followed by 4 large eggs and 2 teaspoons of vanilla extract. Mix until fully combined, then fold in 1 cup of all-purpose flour, 1 teaspoon of baking powder, ½ teaspoon of salt, and 1 cup of chocolate chips until a thick batter forms.
Step 2: Transfer to Pan
Line a 9×13 inch baking pan with parchment paper for easy removal, then pour the brownie batter into the pan. Use a spatula to spread the batter evenly across the bottom, ensuring it reaches the corners. This brownie base will provide that fudgy foundation for your Oreo brookies.
Step 3: Layer with Oreos
Gently place whole Oreo cookies over the brownie layer, pressing them slightly into the batter to embed them. Aim for an even distribution to ensure every bite of your Oreo brookies is filled with that signature cookie crunch. This adds a delightful contrast to the fudginess of the brownies!
Step 4: Make the Cookie Dough
In a clean bowl, cream together ½ cup of softened unsalted butter with ½ cup of granulated sugar and ½ cup of brown sugar until light and fluffy. Beat in 1 egg and 1 teaspoon of vanilla extract until well combined. Gradually fold in 1 ½ cups of all-purpose flour, ½ teaspoon of baking powder, and ¼ teaspoon of salt until the cookie dough is smooth and cohesive.
Step 5: Top and Bake
Spread the cookie dough over the layer of Oreos, smoothing it out evenly. If you desire, sprinkle additional chocolate chips or Oreo chunks on top for an extra treat. Preheat your oven to 350°F (180°C) and bake for 30-35 minutes, until the edges are set and the center is slightly soft, creating that gooey texture that makes Oreo brookies so irresistible.
Step 6: Cool and Serve
Allow the Oreo brookies to cool completely in the pan on a wire rack, which may take about an hour. Once cooled, lift the parchment paper to remove the brookies from the pan, then slice into squares. For cleaner cuts, refrigerate for an hour before serving these delicious treats to family and friends!

Make Ahead Options
These fudgy Oreo brookies are perfect for meal prep enthusiasts looking to save time during busy weeks! You can make the brownie base up to 24 hours in advance; just prepare it as directed, cover it tightly, and refrigerate it to keep its rich flavor intact. The cookie dough topping can also be prepped ahead and stored in the refrigerator for up to 3 days. When you’re ready to bake, simply layer the cookie dough over the chilled brownie base, sprinkle with additional Oreos if desired, and bake as instructed. By prepping ahead, you’ll enjoy fresh, gooey Oreo brookies with minimal effort!
What to Serve with Fudgy Oreo Brookies?
Indulging in gooey Oreo brookies is a treat, but pairing them with the right accompaniments transforms your dessert into a delightful experience.
- Vanilla Ice Cream: Creamy vanilla ice cream balances the rich chocolate flavors, providing a refreshing contrast that everyone craves.
- Chocolate Syrup: A drizzle of chocolate syrup enhances the decadence, adding a luscious sweetness that makes each bite even more indulgent.
- Fresh Berries: Bright strawberries or raspberries add a burst of tangy freshness, cutting through the sweetness and beautifully complementing the fudgy texture.
- Whipped Cream: Light and airy whipped cream creates a delightful texture play, making your dessert feel even more luxurious.
- Milkshake: A thick chocolate milkshake pairs perfectly, providing a nostalgic twist that amplifies the chocolatey goodness of your brookies.
- Coffee: A steaming cup of coffee contrasts beautifully with the sweetness, enhancing the dessert experience with its robust flavor.
- Peanut Butter Drizzle: A warm drizzle of peanut butter adds a savory edge and richness that makes each bite irresistible.
- Caramel Sauce: Sweet and gooey caramel sauce provides a buttery richness, enhancing the treat’s overall flavor and glistening appeal.
- Chocolate Chip Cookies: For the ultimate dessert experience, serve these brookies alongside classic chocolate chip cookies, tapping into that childhood nostalgia.
Oreo Brookies Variations & Substitutions
Feel free to get creative with your Oreo brookies—adding your own twist can make them even more delicious!
-
Flavored Cookies: Replace Oreos with flavored sandwich cookies, like peanut butter or mint, for a new taste sensation. These unique flavors can elevate the classic brookie experience, bringing a fun surprise in every bite!
-
White Chocolate Chips: Swap in white chocolate chips instead of semi-sweet for a sweeter finish. This will create a luxurious flavor profile that pairs beautifully with the fudgy brownie base.
-
Add Nuts: Toss in chopped walnuts or pecans for a delightful crunch in both the brownie and cookie dough layers. The combination of nuts with the rich chocolate creates a comforting texture that keeps you coming back for more.
-
Dried Fruits: Include dried cherries or cranberries for a chewy surprise that complements the sweetness. This can add a touch of tartness that beautifully contrasts the rich flavors of the brookies.
-
Gluten-Free Option: Use gluten-free flour in both the brownie and cookie layers to make this delightful treat accessible for all. Everyone deserves a taste of indulgence, even with dietary restrictions!
-
Extra Chocolate Swirl: Incorporate a swirl of melted chocolate on top before baking for an extra decadent touch. It adds an even richer chocolate experience, enhancing the overall flavor profile that chocolate lovers crave.
-
Spice it Up: Add a dash of cinnamon or a sprinkle of chili powder in the brownie mix for a subtle kick. Warm spices can transform the dessert into a unique fusion treat, adding depth without overpowering the classic flavors.
As you embark on your baking adventure, consider pairing your delicious brookies with a scoop of ice cream or drizzling them with chocolate sauce for that perfect finishing touch!
Storage Tips for Oreo Brookies
Room Temperature: Store leftover Oreo brookies in an airtight container at room temperature for up to 5 days to maintain their gooey texture.
Fridge: For longer freshness, refrigerate Oreo brookies in an airtight container for up to 1 week. Enjoy chilled or at room temperature.
Freezer: If you’d like to save some for later, freeze the brookies for up to 3 months! Wrap them tightly in plastic wrap before placing in a freezer bag.
Reheating: To enjoy warm, simply place a brookie in the microwave for 10-15 seconds. This will revive that delightful fudgy consistency you love!
Tips for the Best Oreo Brookies
-
Monitor Baking Time: Make sure to take your Oreo brookies out of the oven when the center is slightly soft. This will ensure that you achieve the perfect fudgy texture.
-
Chill the Dough: If you find the cookie dough difficult to spread over the Oreos, try chilling it for a little while. This helps it firm up, making it easier to work with.
-
Quality Ingredients Matter: Use high-quality chocolate chips to enhance the overall flavor of your brookies. This makes a significant difference in taste!
-
Avoid Overmixing: When combining your ingredients, mix just until they are incorporated. Overmixing can lead to tougher brookies rather than the desired fudgy texture.
-
Cool for Cleaner Cuts: Let the Oreo brookies cool completely before slicing. Chilling them in the fridge for an hour can improve the cuts and make them look more appealing!
Oreo Brookies Recipe FAQs
What type of Oreos should I use for the best flavor?
I recommend using classic Oreo cookies to maintain that beloved crunch and chocolate flavor. However, you can also experiment with flavored sandwich cookies (like peanut butter or mint) for unique twists.
How should I store leftover Oreo brookies?
To keep your Oreo brookies fresh, store them in an airtight container at room temperature for up to 5 days. If you’d like to maintain their gooey texture longer, refrigerate them in an airtight container for up to 1 week.
Can I freeze Oreo brookies?
Absolutely! To freeze, wrap individual brookies tightly in plastic wrap and place them in a freezer bag. They can be stored for up to 3 months. When you’re ready to enjoy them, simply thaw them in the fridge overnight and reheat briefly in the microwave.
What if my brownie base is overbaked?
If you find that your brownie base has overbaked, it can become dry. To remedy this, ensure your oven temperature is accurate, as ovens can vary. Use a toothpick inserted in the center to check doneness; it should come out with moist crumbs for that fudgy texture.
Are these Oreo brookies suitable for dietary restrictions?
Yes, you can make these brookies accommodating for different diets! Use margarine instead of butter for a dairy-free option, substitute with a flax egg for a vegan alternative, and choose gluten-free flour to make them gluten-free. Always double-check ingredient labels for any allergies!
Can I make these ahead of time for an event?
Absolutely! You can make Oreo brookies a day in advance. They actually taste better as they sit and the flavors meld together. Just store them in an airtight container, and they’ll be ready to impress your guests!
Decadent Oreo Brookies You'll Crave Again and Again
Ingredients
Equipment
Method
- In a mixing bowl, melt 1 cup of unsalted butter in the microwave, then stir in 1 cup granulated sugar and 1 cup brown sugar until smooth. Add 1 cup of unsweetened cocoa powder, followed by 4 large eggs and 2 teaspoons of vanilla extract. Mix until fully combined, then fold in 1 cup of all-purpose flour, 1 teaspoon of baking powder, ½ teaspoon of salt, and 1 cup of chocolate chips until a thick batter forms.
- Line a 9x13 inch baking pan with parchment paper for easy removal, then pour the brownie batter into the pan. Use a spatula to spread the batter evenly across the bottom, ensuring it reaches the corners.
- Gently place whole Oreo cookies over the brownie layer, pressing them slightly into the batter to embed them.
- In a clean bowl, cream together ½ cup of softened unsalted butter with ½ cup of granulated sugar and ½ cup of brown sugar until light and fluffy. Beat in 1 egg and 1 teaspoon of vanilla extract until well combined. Gradually fold in 1 ½ cups of all-purpose flour, ½ teaspoon of baking powder, and ¼ teaspoon of salt until the cookie dough is smooth and cohesive.
- Spread the cookie dough over the layer of Oreos, smoothing it out evenly. Preheat your oven to 350°F (180°C) and bake for 30-35 minutes, until the edges are set and the center is slightly soft.
- Allow the Oreo brookies to cool completely in the pan on a wire rack, which may take about an hour. Once cooled, lift the parchment paper to remove the brookies from the pan, then slice into squares.
Leave a Reply