
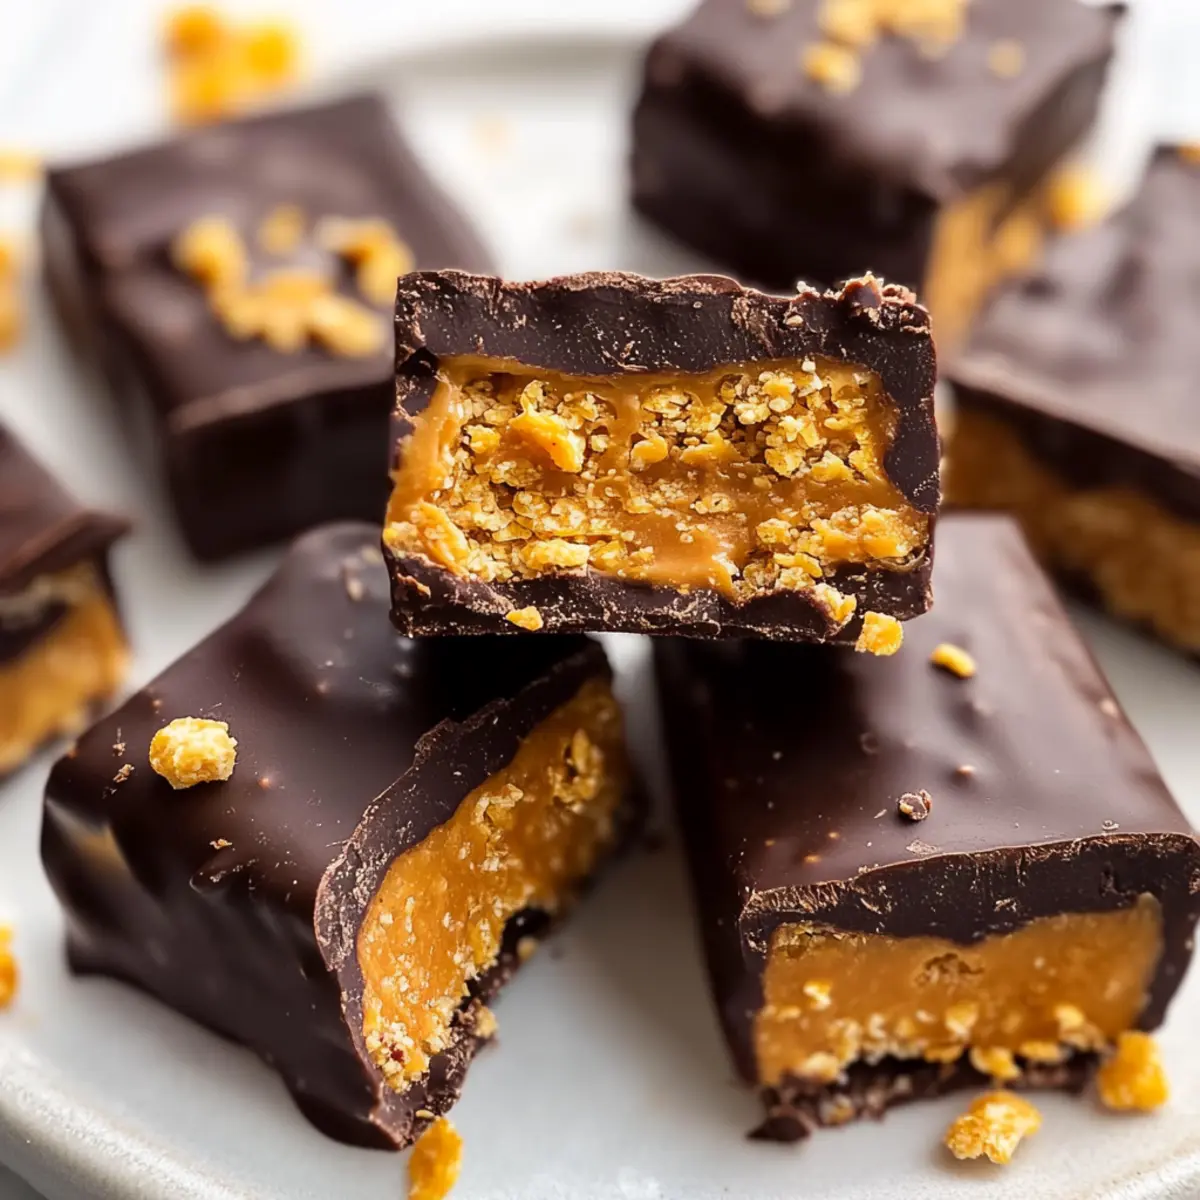
If you’ve ever found yourself craving the crispy-sweet delight of a Butterfinger bar but want to keep things healthy, you’re in the right place. My Healthy Homemade Butterfingers are a game-changer, featuring just five simple ingredients that allow you to enjoy that classic treat guilt-free. These bars are gluten-free and dairy-free, making them a great option for those with dietary restrictions, and they’ll satisfy your sweet tooth without a hefty sugar crash. Perfect as a post-workout snack or an afternoon pick-me-up, they combine creamy peanut butter with a crunchy texture that’s simply irresistible. Ready to learn how to whip up these wholesome treats? Let’s dive in!
Why are These Butterfingers Irresistible?
Simplicity: With just five ingredients, making these homemade treats is a breeze, perfect for both novice and seasoned chefs.
Guilt-Free Indulgence: They’re gluten-free and dairy-free, allowing you to satisfy your cravings without compromising your health goals.
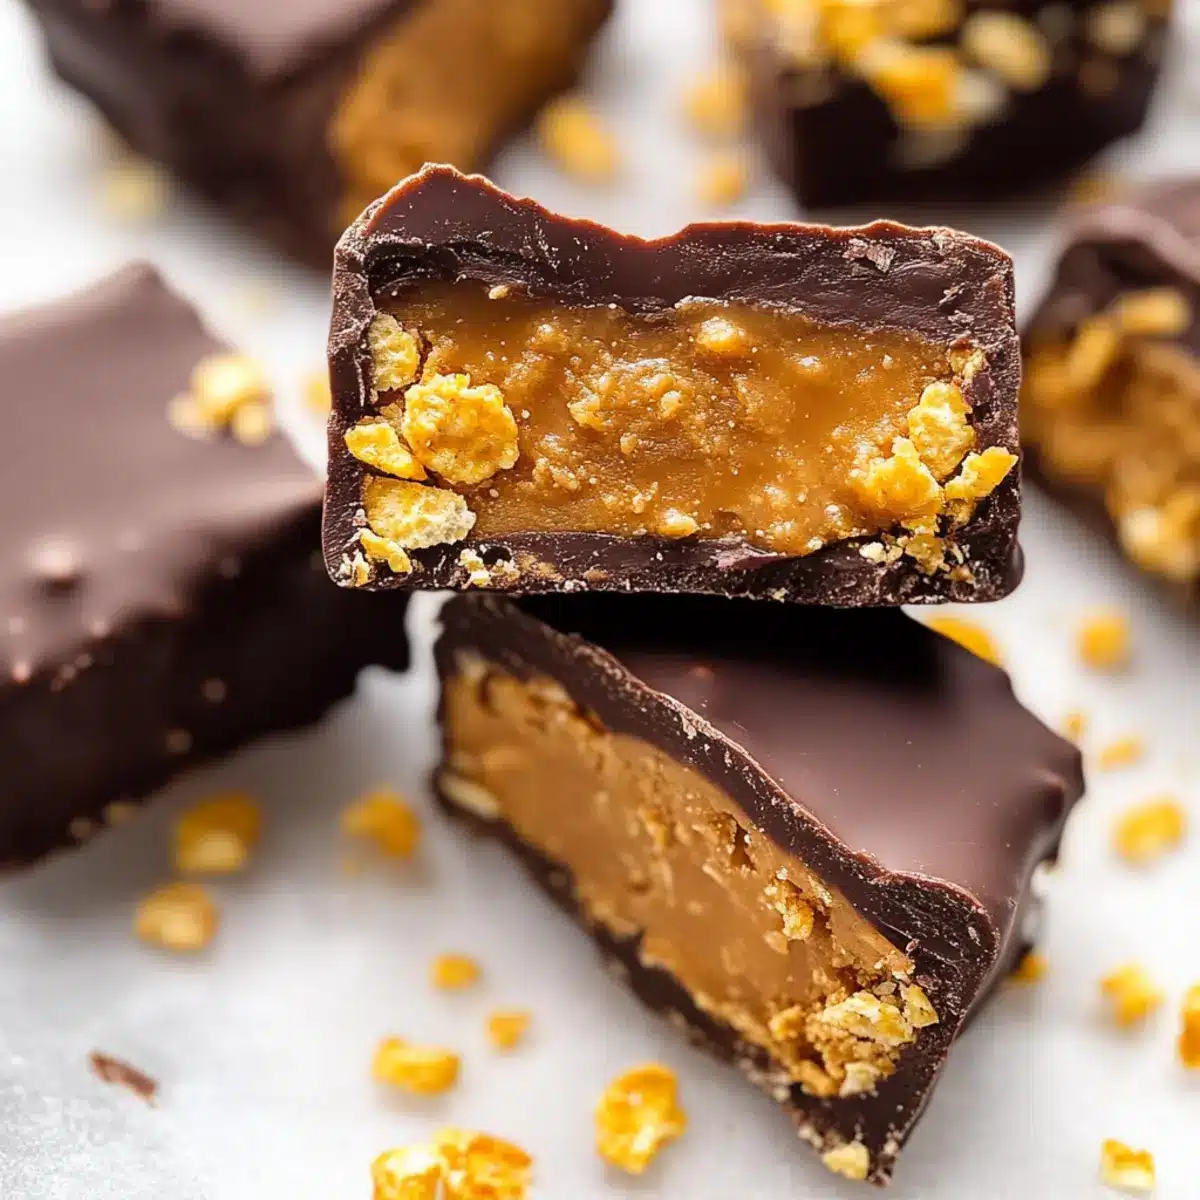
Flavor Explosion: The rich blend of peanut butter and chocolate provides a delightful taste experience, reminiscent of your favorite candy bar.
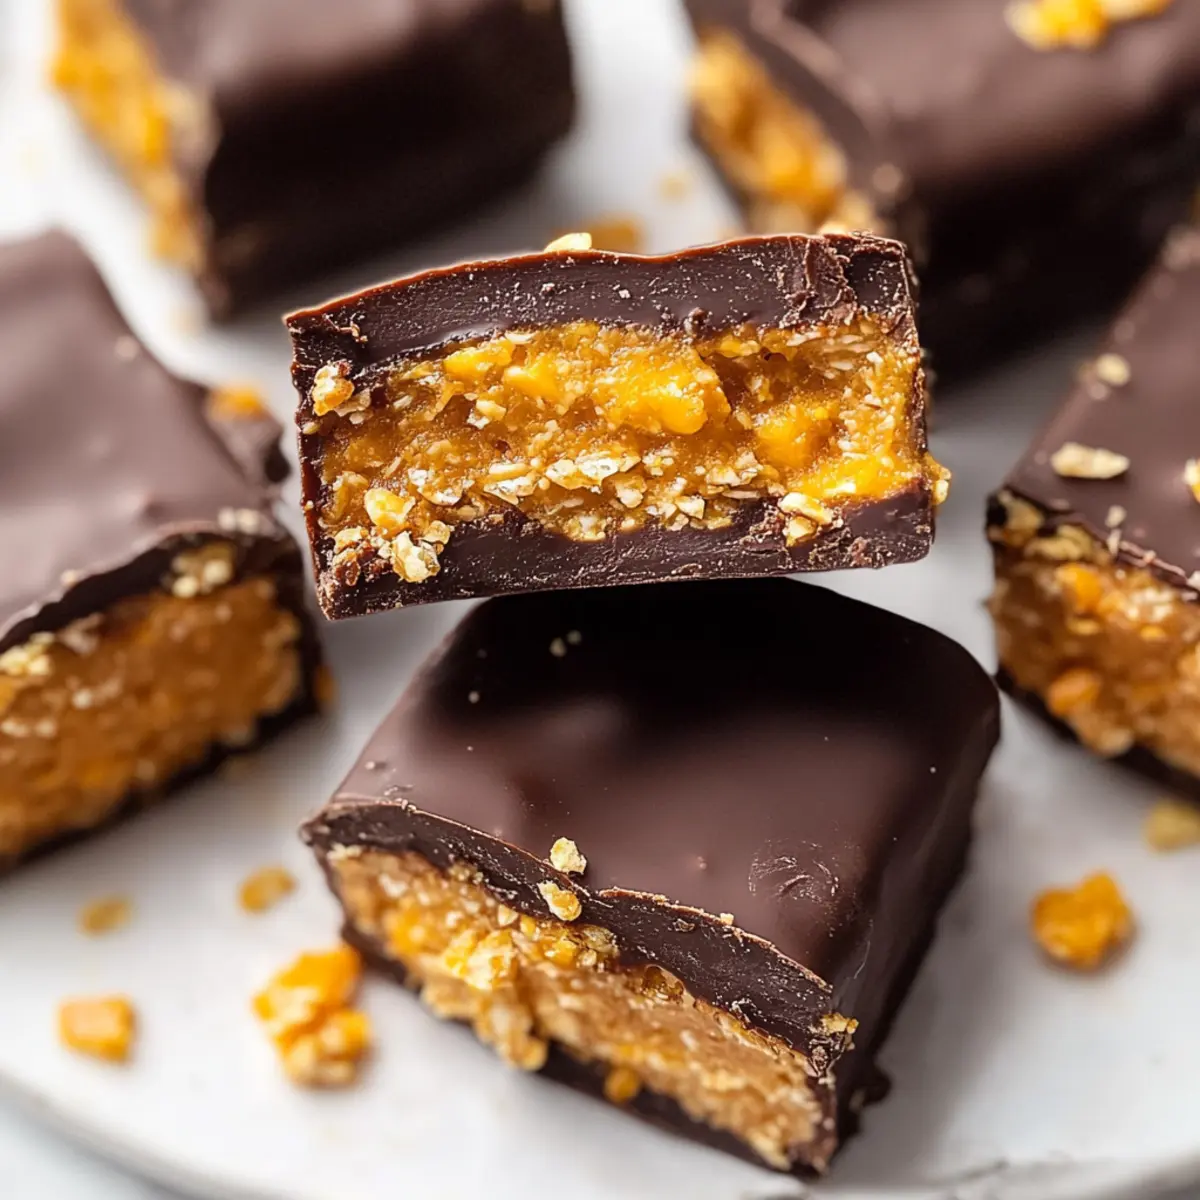
Texture Perfection: Enjoy the delightful crunch of corn flakes combined with a chewy center that makes each bite a pleasure.
Versatile Treat: These bars can easily double as an energizing post-workout snack or a sweet afternoon pick-me-up. If you’re looking to elevate your cooking game, check out our Pumpkin Scones Homemade for another great recipe!
Get ready to impress your family and friends with these tasty bars—they’ll be begging you for the recipe!
Healthy Homemade Butterfingers Ingredients
For the Butterfingers
- Peanut Butter – This creamy nut butter acts as the base for your Healthy Homemade Butterfingers, giving them a rich flavor; opt for unsweetened for a healthier twist.
- Maple Syrup or Honey – This natural sweetener binds the ingredients together; feel free to substitute with agave syrup if you’re going vegan.
- Corn Flakes – These provide the necessary crunch; choose gluten-free corn flakes to keep this treat suitable for all diets.
- Chocolate Chips – Used to coat the bars, these add a touch of sweetness; dark chocolate chips are an excellent option for a lower sugar version.
- Coconut Oil – Essential for achieving that smooth chocolate coating; if needed, you can swap this with a neutral oil, but it may slightly change the flavor.
Get ready to experience the delightful combination of flavors and textures in these tasty bars!
Step‑by‑Step Instructions for Healthy Homemade Butterfingers
Step 1: Crush the Corn Flakes
Begin by placing your gluten-free corn flakes in a sealed zip-top bag. Using a rolling pin or your hands, crush them into small pieces, being careful not to make them too fine. This should take about 2–3 minutes, resulting in a mix of small crumbs and larger pieces to provide that perfect crunch for your Healthy Homemade Butterfingers.
Step 2: Mix Peanut Butter and Sweetener
In a large mixing bowl, combine 1 cup of natural peanut butter with 1/4 cup of maple syrup or honey. Use a spatula or whisk to blend until the mixture is smooth and creamy, which should take about 2 minutes. This will serve as the deliciously rich and sticky base for your butterfingers, ensuring they hold together beautifully.
Step 3: Combine Corn Flakes with Mixture
Add the crushed corn flakes to the peanut butter and sweetener mixture. Stir thoroughly with a spatula for about 1–2 minutes, ensuring that all corn flakes are evenly coated. The mixture should resemble a thick paste and be slightly sticky, which is ideal for forming your bars.
Step 4: Press Mixture into Loaf Pan
Line a loaf pan with parchment paper for easy removal. Transfer the peanut butter-corn flake mixture into the prepared pan and press it down firmly with your hands or the back of a spatula. Aim for an even thickness, about 1 inch, and make sure it’s compact to hold together well. Freeze for at least 1 hour to set.
Step 5: Slice the Bars
Once the mixture has hardened, carefully remove it from the loaf pan using the parchment paper. Place it on a cutting board and slice it into 12 equal bars with a sharp knife. Each bar should hold its shape well; set them aside as you prepare the chocolate coating.
Step 6: Melt Chocolate and Coconut Oil
In a microwave-safe bowl, combine 1 cup of chocolate chips and 1 tablespoon of coconut oil. Heat in the microwave, stopping every 20 seconds to stir, until melted and smooth—this should take about 1 minute in total. Be cautious to avoid overheating the chocolate, as it should be glossy and well-blended.
Step 7: Coat Each Bar
Using a fork, dip each bar into the melted chocolate, ensuring it’s fully coated. Allow the excess chocolate to drip off, then place the bars onto a parchment-lined plate. Repeat this process until all bars are coated, keeping a clear, chocolaty layer on each Healthy Homemade Butterfinger.
Step 8: Freeze to Set
Once all bars are coated, place them in the freezer for an additional 10 minutes. This step allows the chocolate to harden properly, creating a delightful snap when you bite into your healthy treats. Enjoy the anticipation as these bars chill and solidify into a satisfying snack!
What to Serve with Healthy Homemade Butterfingers
There’s nothing like pairing these luscious treats with complementary dishes that heighten the delight of their sweet, nutty flavors.
-
Creamy Almond Milk: The subtle sweetness and creaminess of almond milk enhances the rich taste of the Butterfingers, making for a delightful combination.
-
Fresh Fruit Salad: A vibrant mix of berries and citrus adds a refreshing brightness, perfectly balancing the sweetness of the bars. Enjoy the chorus of flavors and textures!
-
Vanilla Coconut Yogurt: The tropical notes of coconut yogurt create a creamy dip that pairs well with the crunchy Butterfingers for an indulgent yet healthy snack.
-
Nutty Granola: Sprinkling a handful of nutty granola adds a delightful crunch and complements the peanut butter flavor, creating a satisfying sweet-and-savory balance.
-
Dark Hot Chocolate: Sip on a warm mug of dark hot chocolate to enhance your Butterfingers experience, as the rich cocoa pairs beautifully with the peanut butter and corn flakes.
-
Matcha Green Tea: Enjoy a cup of matcha green tea for a slightly earthy, antioxidant-rich beverage that perfectly complements the sweetness of your Healthy Homemade Butterfingers, enlightening your palate.
Make Ahead Options
These Healthy Homemade Butterfingers are a fantastic choice for meal prep, saving you time in your busy week! You can prepare the peanut butter and corn flake mixture up to 24 hours in advance. Simply place it in the loaf pan, cover it, and refrigerate. On the day you plan to serve, take it out, cut the bars, and melt the chocolate for coating. Make sure the chocolate cools slightly before dipping to keep the bars intact. By prepping ahead, you’ll enjoy this delicious treat with just the finishing touches needed—a time-saving benefit that’s just as delicious as when freshly made!
How to Store and Freeze Healthy Homemade Butterfingers
-
Room Temperature: These Healthy Homemade Butterfingers are best stored in the freezer; however, if kept at room temperature, consume them within 2 days to maintain their crunch.
-
Fridge: If you prefer to refrigerate, place them in an airtight container and enjoy within 1 week. They may lose some crunch but will remain delicious.
-
Freezer: For long-term storage, keep the bars in an airtight container in the freezer, where they’ll last for up to 3 months, preserving their texture and flavor perfectly.
-
Reheating: When ready to indulge, simply thaw at room temperature for about 10 minutes or microwave for 10-15 seconds for a warm treat—a delightful way to enjoy your Healthy Homemade Butterfingers!
Expert Tips for Healthy Homemade Butterfingers
-
Choose Quality Peanut Butter: Opt for natural peanut butter without added sugars or unhealthy oils. It enhances the flavor and keeps your Healthy Homemade Butterfingers nutritious.
-
Firm Pressing: Ensure you firmly press the corn flake mixture into the loaf pan to help the bars hold together better after slicing.
-
Chill Chocolate: Allow the melted chocolate to cool slightly before dipping your bars. This helps prevent the chocolate from melting the peanut butter layer.
-
Storage Advice: Store your Healthy Homemade Butterfingers in an airtight container in the freezer to maintain freshness and texture for up to three months.
-
Creative Variations: Feel free to swap peanut butter for almond butter or use rice cereal instead of corn flakes for a unique taste and texture.
Healthy Homemade Butterfingers Variations
Feel free to explore these delightful twists for your Healthy Homemade Butterfingers, making them uniquely yours!
-
Almond Butter: Swap peanut butter for almond butter for a nutty twist and a creamy texture. Both options are delicious, but almond adds a unique flavor profile that’s equally satisfying.
-
Rice Cereal: Replace corn flakes with puffed rice cereal for a gluten-free alternative that still keeps that satisfying crunch. It’s a lovely way to change things up while sticking to your dietary needs.
-
Coconut Flour: For a lower-carb option, mix in a couple of tablespoons of coconut flour to the base mixture. This will not only enhance flavor but also add a subtle nutty taste.
-
Maple Syrup Twist: Experiment with different sweeteners, such as coconut sugar or agave syrup, to customize the sweetness to your liking. Each option brings its flavors to the mix!
-
Spicy Kick: Add a pinch of cayenne pepper or chili powder to the chocolate for a sweet and spicy experience that dances on your tongue. It’s a fun surprise for adventurous snackers!
-
Nutty Crumble: Incorporate chopped nuts, like walnuts or pecans, into the corn flake mixture for extra crunch and nuttiness. It elevates the texture for those who love a bit more bite.
-
Superfood Boost: Add chia seeds or flaxseeds into the peanut butter mixture for an extra dose of nutrition. It’s an easy way to pack some healthy Omega-3 fatty acids into each bar!
-
Chocolate Variations: Switch dark chocolate chips with white chocolate or dairy-free chocolate for a different flavor dimension. This simple swap can transform the entire taste of the bars.
And if you’re eager for another tasty treat, why not try our summery Pumpkin Scones Homemade alongside your delightful butterfingers? Let your creativity run wild in the kitchen!
Healthy Homemade Butterfingers Recipe FAQs
What type of peanut butter should I use?
Absolutely! For the best flavor and health benefits, I recommend using natural peanut butter that is unsweetened. This will really enhance the richness of your Healthy Homemade Butterfingers and avoid any unnecessary added sugars or oils.
How should I store the Healthy Homemade Butterfingers?
To keep your tasty bars fresh, store them in an airtight container in the freezer. They can last up to 3 months this way! If you keep them at room temperature, make sure to consume them within 2 days to maintain their delightful crunch.
Can I freeze the Healthy Homemade Butterfingers?
Yes! Freezing is a fantastic option. Once your bars are coated and fully set, place them in an airtight container in the freezer. They’ll be good for up to 3 months. When you’re ready to enjoy them, just let them sit at room temperature for about 10 minutes, or microwave them for 10-15 seconds to warm them up a bit!
What if my mixture is too crumbly?
Very! If your mixture is crumbling and not holding together, try adding a little more peanut butter or a splash of maple syrup to bring it together. When you press the mixture into the pan, make sure you’re really compacting it, which helps it stick together when cut into bars later.
Are these Butterfingers suitable for those with allergies?
It’s essential to consider dietary restrictions! While these Healthy Homemade Butterfingers are naturally gluten-free and dairy-free, always check labels on your ingredients to ensure there are no unwanted allergens. If making them for pets, remember that chocolate is toxic to dogs, so keep these yummy bars out of their reach!
Can I use different ingredients for a variation?
Absolutely! Feel free to substitute almond butter for a change in flavor, and you can also swap the corn flakes for rice cereal to keep it gluten-free. The more the merrier, especially when it comes to creating flavors that fit your preference!

Delicious Healthy Homemade Butterfingers You’ll Love to Snack On
Ingredients
Equipment
Method
- Crush the Gluten-Free Corn Flakes in a sealed zip-top bag using a rolling pin or your hands.
- Mix 1 cup of peanut butter with 1/4 cup of maple syrup or honey in a bowl until smooth.
- Combine the crushed corn flakes with the peanut butter mixture; stir thoroughly.
- Press the mixture into a lined loaf pan evenly, about 1 inch thick, and freeze for 1 hour.
- Slice the hardened mixture into 12 bars.
- Melt 1 cup of chocolate chips with 1 tablespoon of coconut oil in the microwave, stirring until smooth.
- Dip each bar into the melted chocolate, allowing excess to drip off.
- Freeze the coated bars for an additional 10 minutes to set the chocolate.
Leave a Reply