
The moment I first rolled one of these Cottage Cheese Wraps, I could hardly believe my taste buds. With over 21 grams of protein packed into a single wrap, they cater perfectly to anyone keen on a low-carb or keto lifestyle. What’s more, they come together in a snap—just blend, bake, and roll! Imagine having a quick meal prep option that’s not just nutritious but also incredibly versatile. Whether you’re filling them with savory veggies, rotisserie chicken, or even a sweet cream cheese spread, these wraps are bound to become a go-to in your kitchen. Curious to discover how easily you can whip them up? Let’s dive into the recipe!
Why Choose Cottage Cheese Wraps?
Protein-Packed Power: With over 21 grams of protein per serving, these wraps make for an excellent high-protein option that’s perfect for a filling meal.
Quick and Easy: Just blend, bake, and roll—these wraps come together in no time, ideal for busy schedules.
Versatile Fillings: Whether you prefer savory burrito-style fillings or sweet options like cream cheese and fruit, the customization possibilities are endless!
Low-Carb Delight: They fit seamlessly into keto and low-carb diets, allowing you to enjoy delicious wraps without the guilt.
Meal Prep Marvel: Perfect for meal prepping, you can whip up a batch and have nutritious wraps on-hand all week! Consider pairing them with fresh veggie sticks or a crisp salad for a complete meal.
Crowd-Pleaser: These wraps are not just healthy; they’re surprisingly satisfying, making them a hit at lunches, picnics, or casual dinners. So why not try them alongside other favorites like Cream Cheese Chicken or Pumpkin Cream Cheese? Your taste buds will thank you!
Cottage Cheese Wraps Ingredients
For the Wrap Base
- Cottage Cheese – Use full-fat for a creamy texture and protein boost.
- Eggs – Acts as a binder; you can try flax eggs for a vegan alternative.
- Parmesan Cheese – Adds rich flavor; substitute with mozzarella for a milder taste.
For Flavor Enhancement
- Garlic Powder – Provides a savory note; fresh minced garlic is a great substitute for a punchier flavor.
- Italian Seasoning – Offers a delightful herb blend; feel free to swap in your favorite individual herbs like oregano or basil.
These Cottage Cheese Wraps are not just refreshing and delicious; they are a step toward healthier eating while remaining incredibly satisfying. Enjoy them stuffed with your favorite fillings!
Step‑by‑Step Instructions for Cottage Cheese Wraps
Step 1: Preheat the Oven
Begin by preheating your oven to 350°F (175°C) to ensure it reaches the perfect baking temperature. While the oven is heating, line a baking sheet with parchment paper. Lightly grease the paper to prevent the wraps from sticking once baked. This step is essential for achieving easy removal and a smooth, intact wrap.
Step 2: Blend the Ingredients
In a blender, combine your cottage cheese, eggs, grated Parmesan, garlic powder, and Italian seasoning. Blend these ingredients on high for about one minute, or until the mixture is fully smooth without any lumps. The creamy consistency is crucial as it forms the base for your Cottage Cheese Wraps, creating a delightful texture once baked.
Step 3: Spread the Mixture
Carefully pour the blended mixture onto the prepared baking sheet. Using a spatula, spread it into a thin and even rectangle, approximately ¼ inch thick. This ensures that the wraps will bake evenly, achieving that perfect softness and pliability. Visual indicators to look for include a smooth, consistent surface across the entire area.
Step 4: Bake the Wraps
Place the baking sheet into the preheated oven and bake for 30-35 minutes. Keep an eye on the wraps as they bake; they should be set and lightly golden in color when done. If needed, bake a bit longer, checking for the right firmness. The aroma of the Italian seasoning will fill your kitchen, signaling they’re almost ready!
Step 5: Cool the Wraps
Once baked, remove the sheet from the oven and allow the wrap to cool completely on the tray. This crucial step helps the wrap firm up, making it much easier to peel off the parchment without tearing. Be patient as it cools, as rushing this process may affect the final texture of your Cottage Cheese Wraps.
Step 6: Cut and Fill
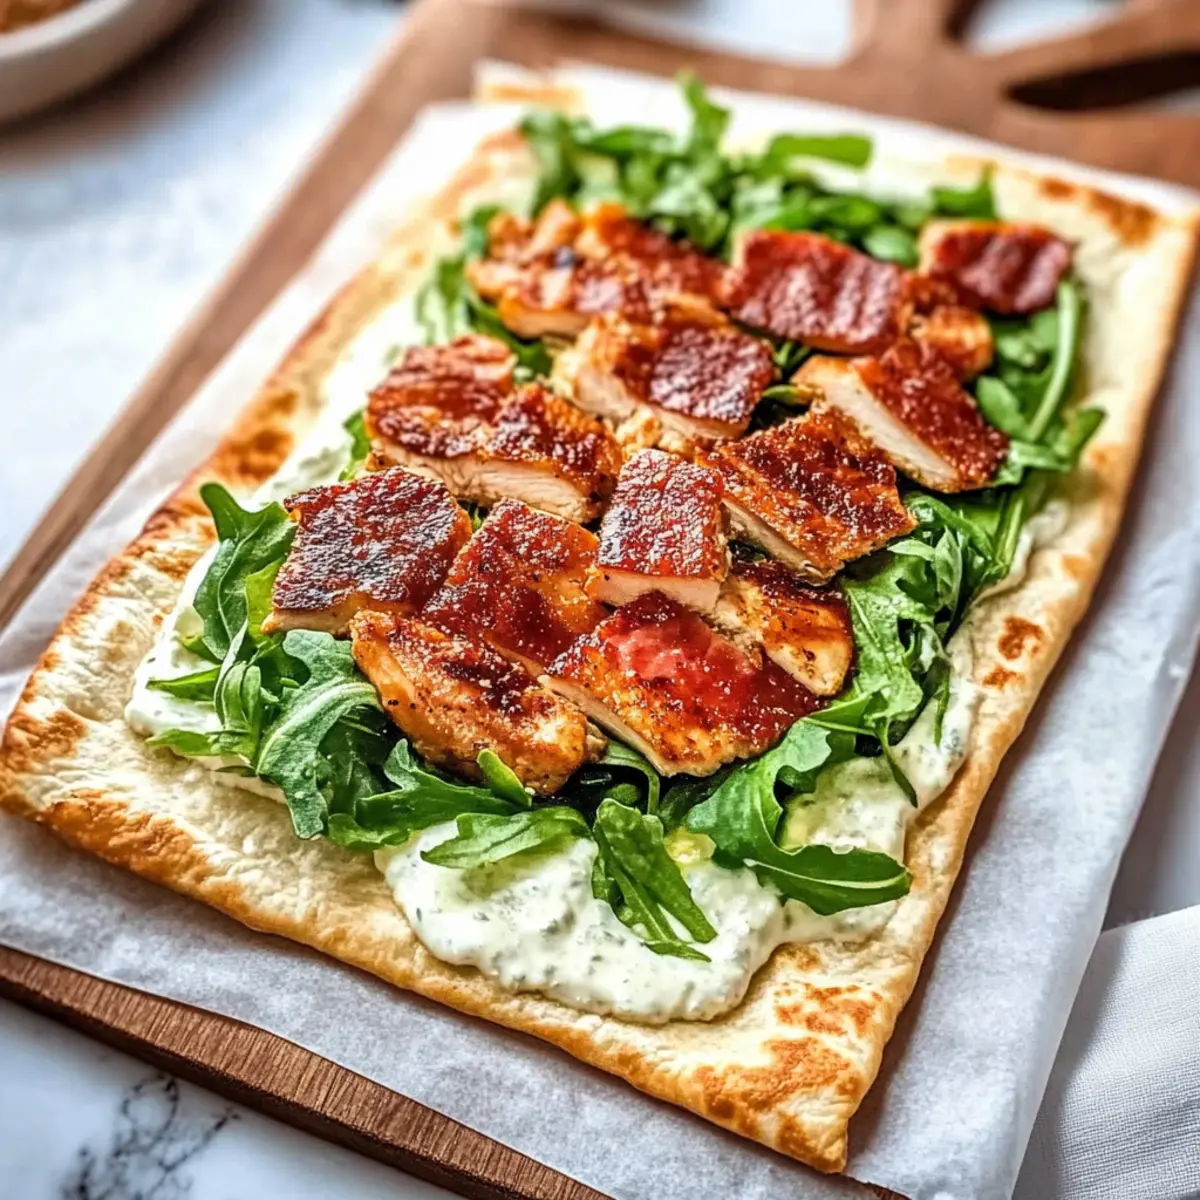
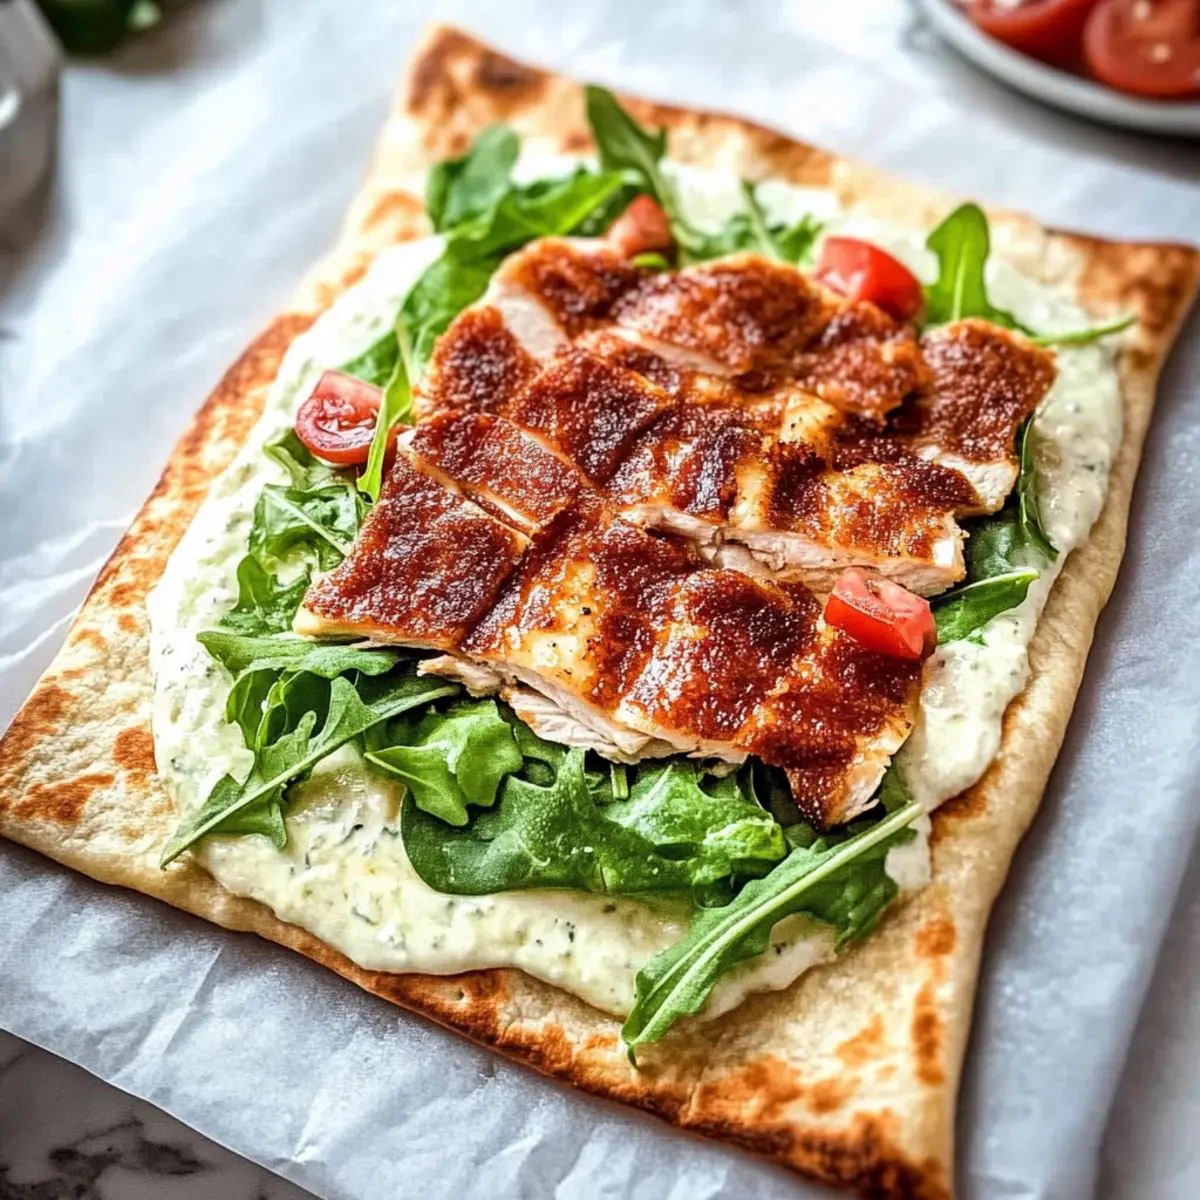
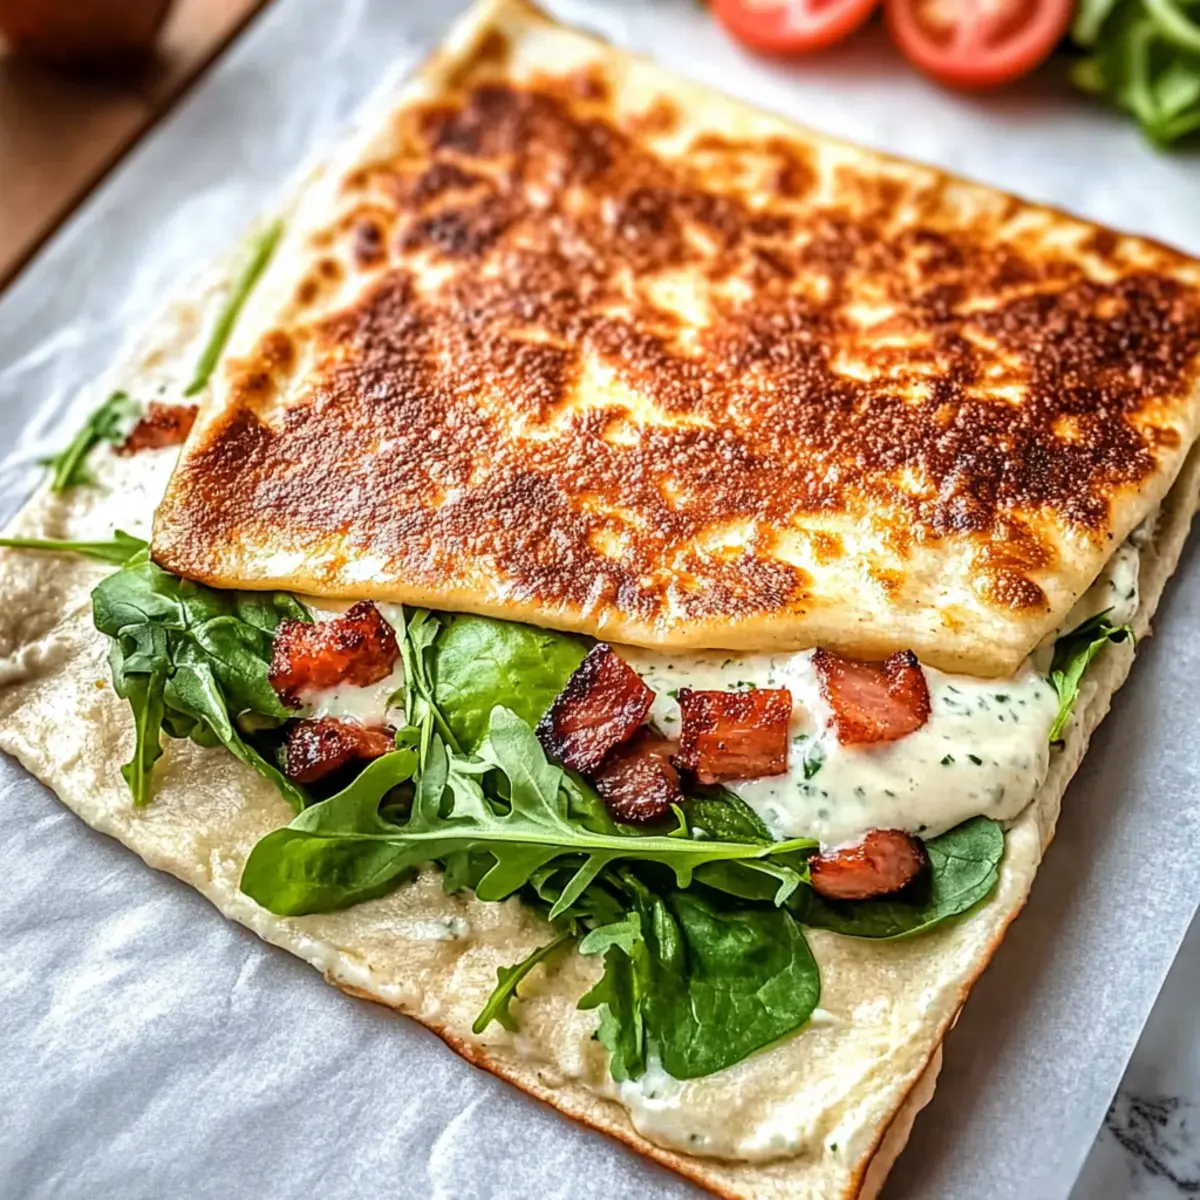
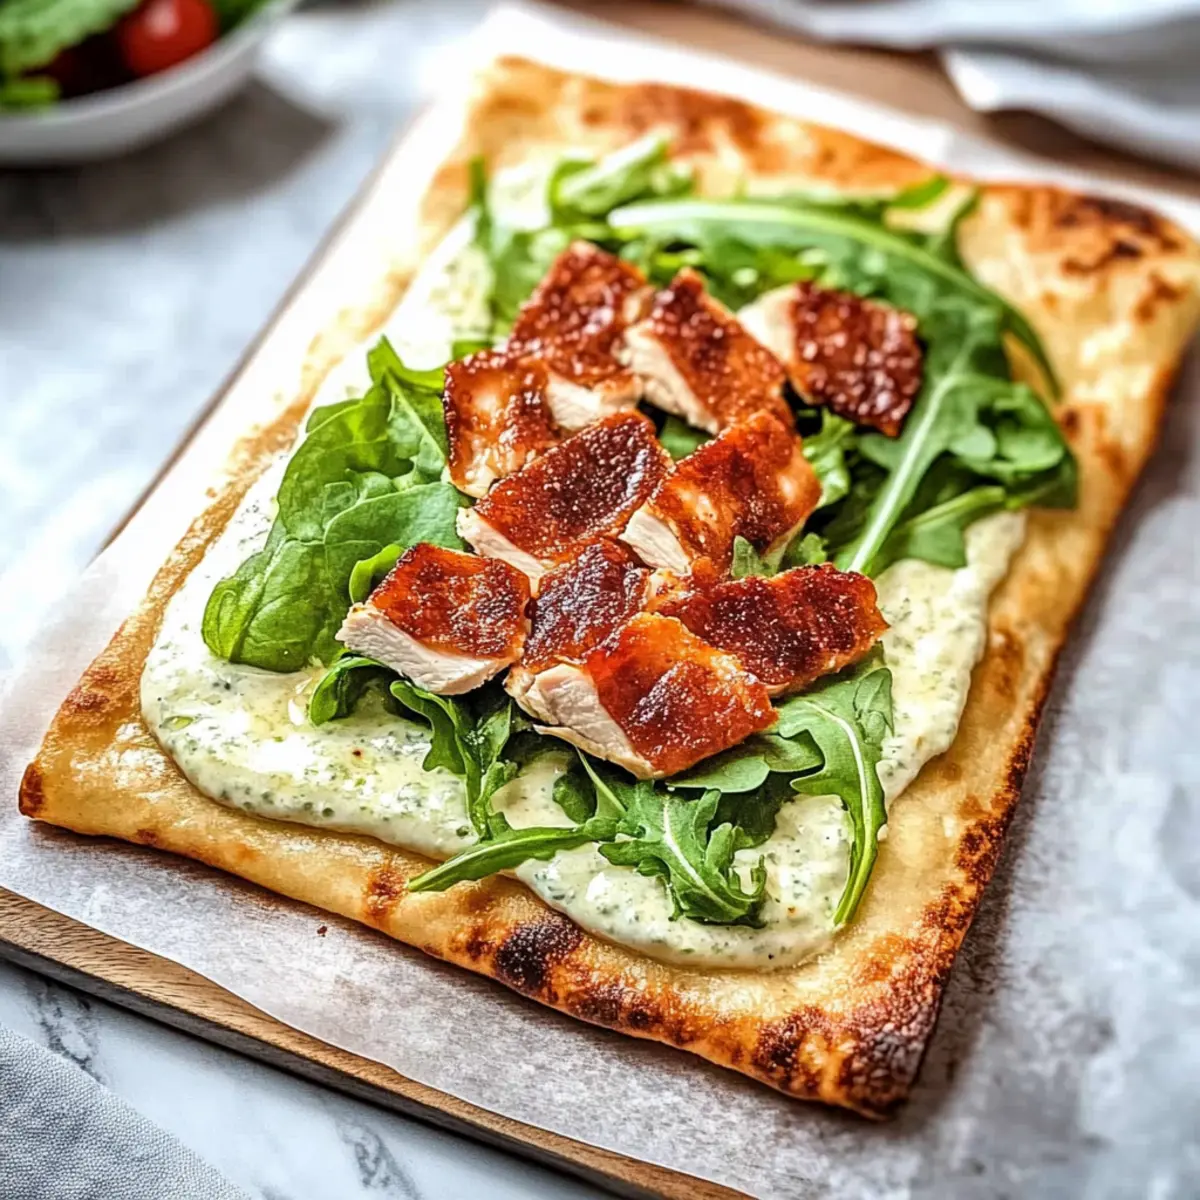
When the wrap is completely cool, gently peel it off the parchment paper. You can now cut the wrap into sections or keep it whole depending on your serving preferences. Fill your Cottage Cheese Wraps with your choice of ingredients like cream cheese and bacon, or grilled chicken and veggies, to suit your taste and dietary needs.
What to Serve with Cottage Cheese Wraps
Creating the perfect meal is an art, and these flavorful wraps offer a wonderful base for a delightful dining experience.
-
Fresh Vegetable Sticks: Crisp, colorful carrot and cucumber sticks provide a refreshing crunch that complements the soft texture of the wraps.
-
Zesty Salad: A light salad of mixed greens tossed in a lemon vinaigrette brings brightness to the meal, enhancing the subtle flavors of the wraps.
-
Savory Dips: Pair with a creamy hummus or tzatziki sauce for added flavor and richness, perfect for dipping those tasty wraps.
-
Roasted Veggies: Oven-roasted seasonal vegetables add a sweet caramelized flavor; they will meld beautifully with your choice of wrap fillings.
-
Protein-Packed Soup: A hearty lentil or minestrone soup can transform your meal into a cozy feast, bringing warmth and depth to each bite.
-
Sparkling Water: A refreshing drink like sparkling water with a twist of lime can cleanse the palate and add a delightful, fizzy touch.
When building your meal, think of textures and flavors that contrast and complement those delicious Cottage Cheese Wraps. Enjoy exploring this eclectic mix!
Expert Tips for Cottage Cheese Wraps
• Blend Smoothly: Ensure your cottage cheese mixture is completely blended until smooth to avoid lumps in your wraps. Lumpy mixtures can lead to uneven baking.
• Grease the Parchment: Don’t skip greasing the parchment paper; it’s essential to prevent your wraps from sticking and tearing when you remove them.
• Cool Completely: Allow the wraps to cool completely on the tray before peeling them off. This crucial step ensures they set firmly for easy handling.
• Experiment with Fillings: Feel free to get creative! Try adding your favorite fillings, like smoked salmon or roasted veggies, but avoid overstuffing to maintain the wrap’s integrity.
• Storage Plan: Store leftover wraps in an airtight container in the fridge for up to 5 days, or freeze them with parchment in between to enjoy later.
Cottage Cheese Wraps Variations & Substitutions
Feel free to explore fun twists on your Cottage Cheese Wraps—your kitchen adventure awaits!
-
Herb Swaps: Try fresh basil or cilantro instead of Italian seasoning for a fresh flavor twist.
-
Cheese Alternatives: Substitute Parmesan with feta for a tangy bite or cheddar for a creamy richness.
-
Vegan Option: For a plant-based version, replace eggs with flax eggs and use dairy-free cheese.
-
Spice It Up: Add chili powder or crushed red pepper to the batter for a pleasant kick that pairs beautifully with savory fillings.
-
Flavor Infusion: Mix in sun-dried tomatoes or olives into the batter for an Italian flair that sings with every bite.
-
Sweet Delight: For a dessert wrap, blend in a hint of vanilla extract and fill with your favorite fruit and cream cheese blend for a sweet surprise.
-
Crunch Factor: Mix in some finely chopped nuts for additional texture and a delightful crunch.
-
Serving Ideas: Pair these delicious wraps with a refreshing spinach salad or a side of Cream Cheese Chicken for a well-rounded, satisfying meal!
Storage Tips for Cottage Cheese Wraps
Fridge: Store your Cottage Cheese Wraps in an airtight container for up to 5 days, keeping them fresh and ready for quick meals.
Freezer: For longer storage, freeze the wraps for up to 2 months. Place parchment paper between each wrap to prevent them from sticking together.
Reheating: To reheat, simply place the wrap in a skillet over medium heat for 2-3 minutes on each side or warm them in the microwave for about 30 seconds until heated through.
Serving Ideas: Enjoy these wraps with your choice of fillings straight from the fridge or after reheating—perfect for busy weeknights or quick lunches!
Make Ahead Options
These Cottage Cheese Wraps are a fantastic meal prep solution, allowing you to streamline your cooking efforts for the week ahead! You can blend the wrap mixture and prepare it up to 24 hours in advance, simply refrigerating it in an airtight container. For optimal flavor and texture, bake the wraps the day you plan to serve them. Once cooled, they can be stored in the refrigerator for up to 5 days or frozen for up to 2 months—just be sure to layer parchment paper between each wrap to prevent sticking. When ready to enjoy, fill them with your favorite ingredients, and you’ll have a delicious, high-protein meal ready in no time!
Cottage Cheese Wraps Recipe FAQs
How do I select the best cottage cheese for my wraps?
Absolutely! When choosing cottage cheese, look for full-fat versions for a creamier texture and more flavor. Avoid brands with added sugars or artificial ingredients. The cottage cheese should be fresh, with no excess liquid on the surface, indicating quality and taste retention.
What’s the best way to store leftover Cottage Cheese Wraps?
Very simply! Store your wraps in an airtight container in the refrigerator for up to 5 days. If you think you won’t finish them within that timeframe, consider freezing. Just make sure to place parchment paper between each wrap to prevent them from sticking together.
Can I freeze Cottage Cheese Wraps, and how should I do it?
Absolutely! To freeze your Cottage Cheese Wraps, first allow them to cool completely. Then, place parchment paper between each wrap and stack them in a freezer-safe container or zip-top freezer bag. They can last for up to 2 months in the freezer. When you’re ready to eat, simply thaw in the fridge overnight and reheat on a skillet for the best texture.
What should I do if my wraps tear when I try to peel them off the parchment?
No worries! If your wraps tear, it could be due to insufficient cooling or the parchment paper sticking too closely. To prevent this, ensure that you grease the parchment paper well before pouring on the wrap mixture. If they do tear, just use a spatula to gently piece them back together, and fill them as best as you can; they’ll still taste amazing!
Are Cottage Cheese Wraps suitable for people with dairy allergies?
No, these wraps contain dairy, making them unsuitable for those with dairy allergies. However, you can substitute the cottage cheese with a dairy-free alternative, like tofu blended until smooth, and use nut-based cheese or nutritional yeast for flavor. Just ensure to check labels for allergens!
Can I customize the flavor of my Cottage Cheese Wraps?
Absolutely! You can vary the spices or herbs in the recipe to suit your taste. For instance, adding smoked paprika or red pepper flakes can add a nice kick. Don’t hesitate to experiment with different cheeses or add-ins like spinach or sundried tomatoes to create a unique wrap that excites your palate!
Cottage Cheese Wraps: Delicious, High-Protein Meal Prep Joy
Ingredients
Equipment
Method
- Preheat your oven to 350°F (175°C) and line a baking sheet with greased parchment paper.
- Blend cottage cheese, eggs, Parmesan, garlic powder, and Italian seasoning until smooth.
- Spread the blended mixture onto the prepared baking sheet into a thin, even rectangle.
- Bake in the preheated oven for 30-35 minutes until set and lightly golden.
- Remove the sheet from the oven and allow the wrap to cool completely.
- Peel off the parchment paper, cut the wrap into sections or keep it whole, and fill as desired.
Leave a Reply