
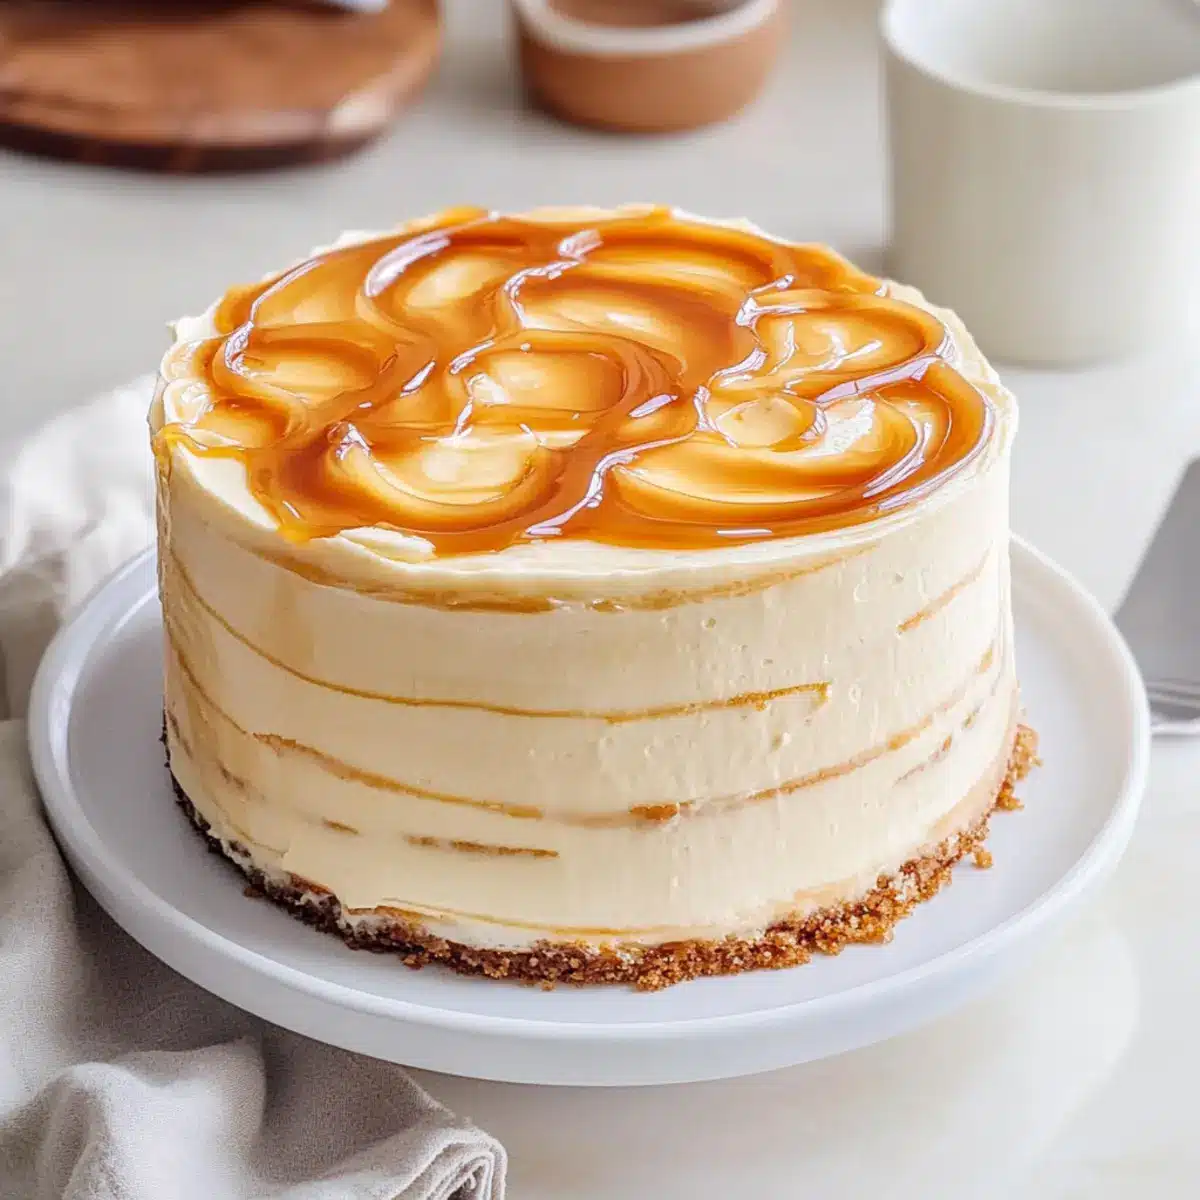
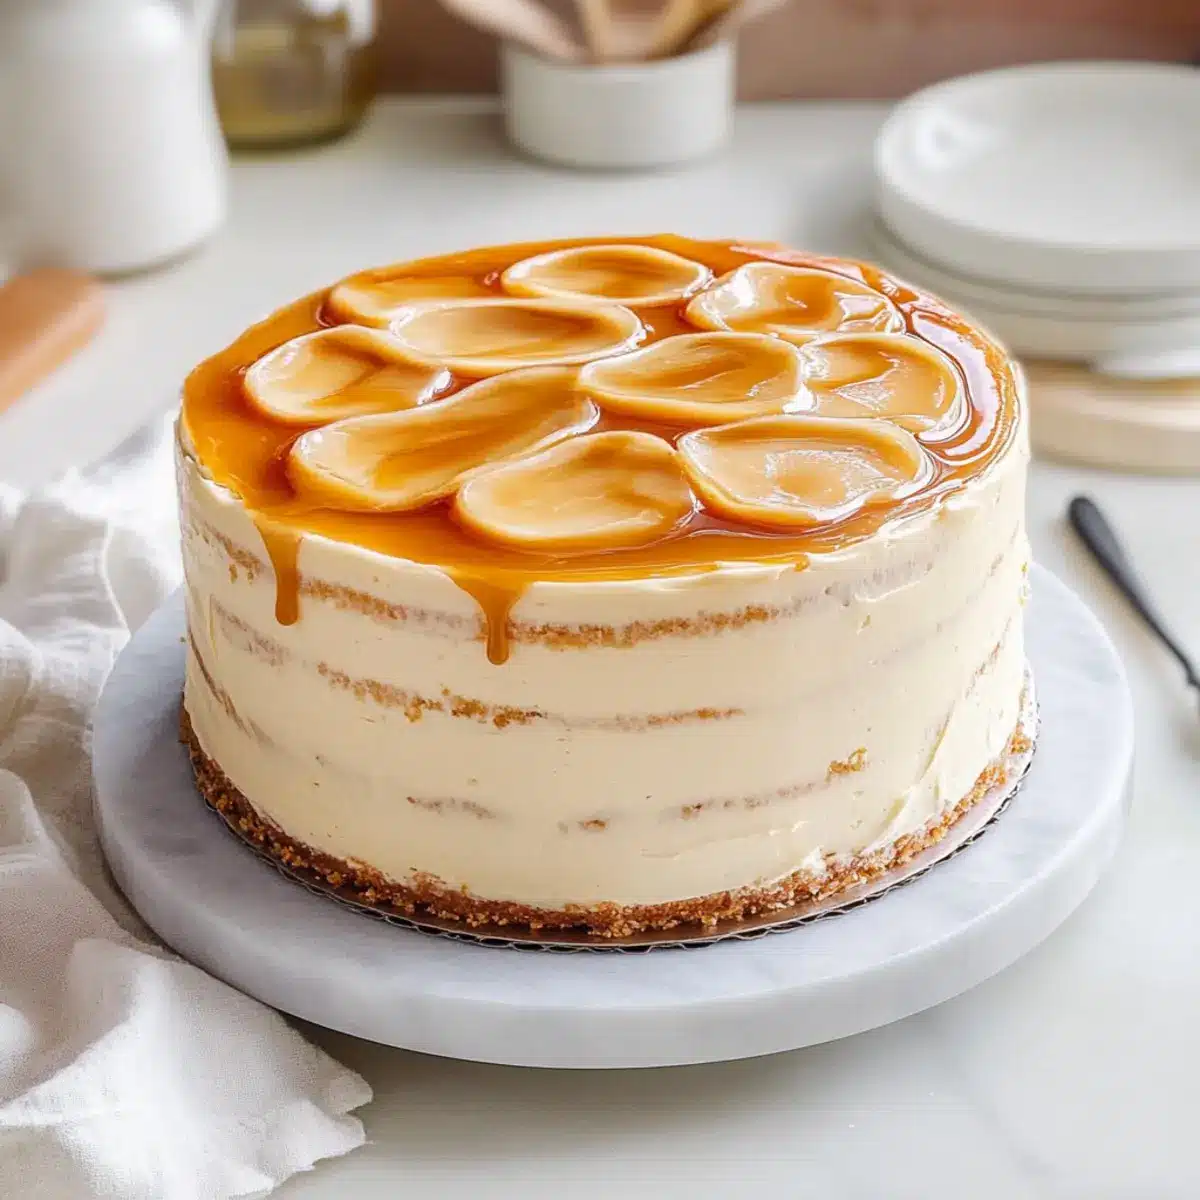
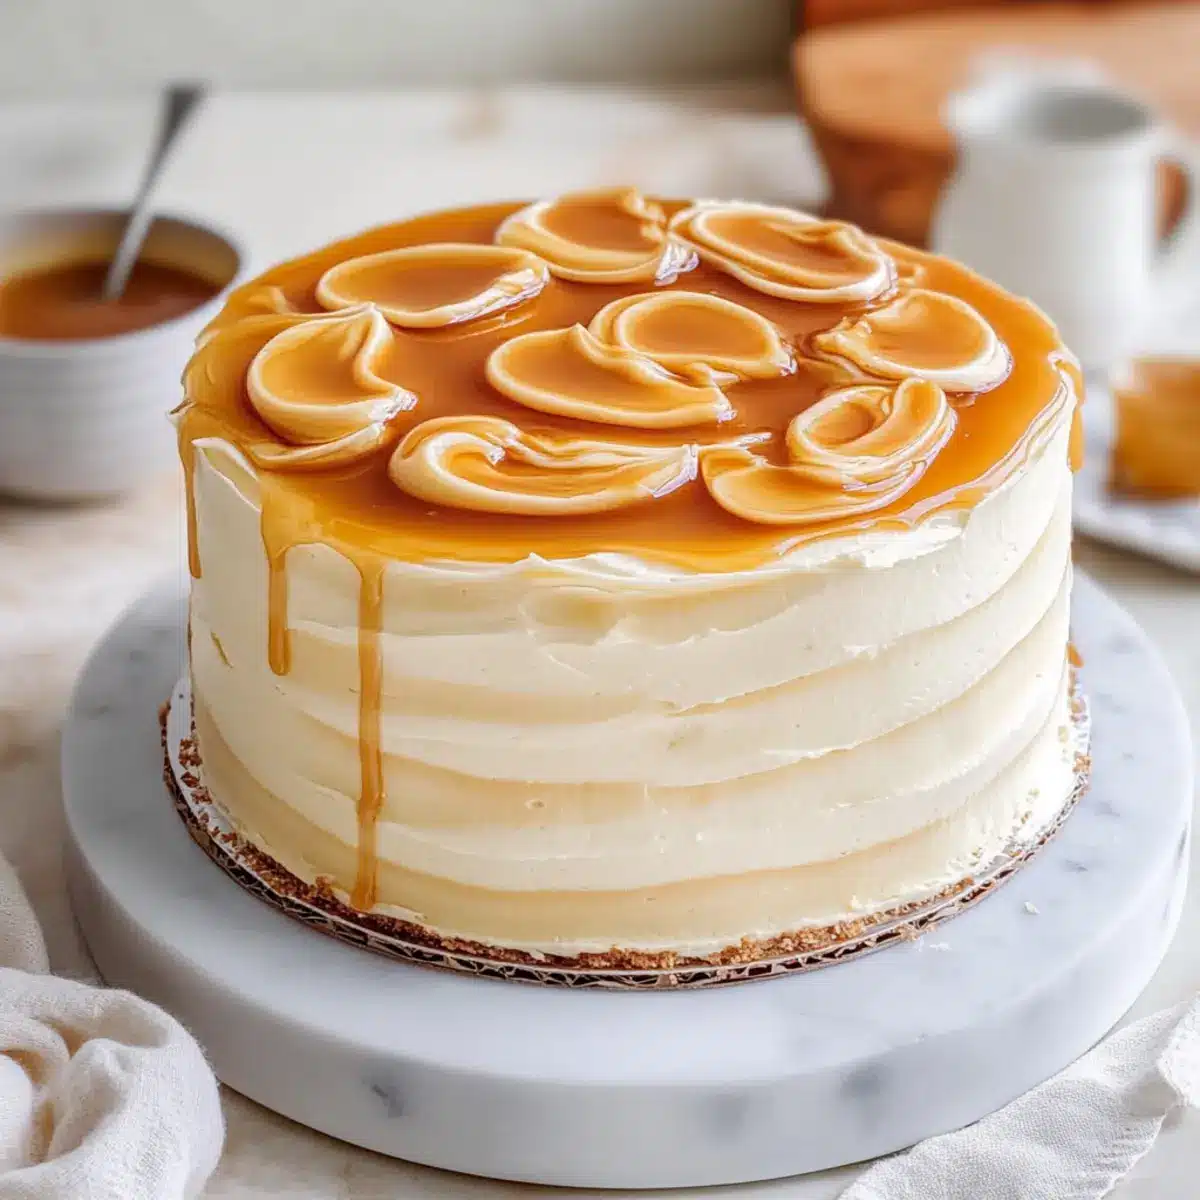
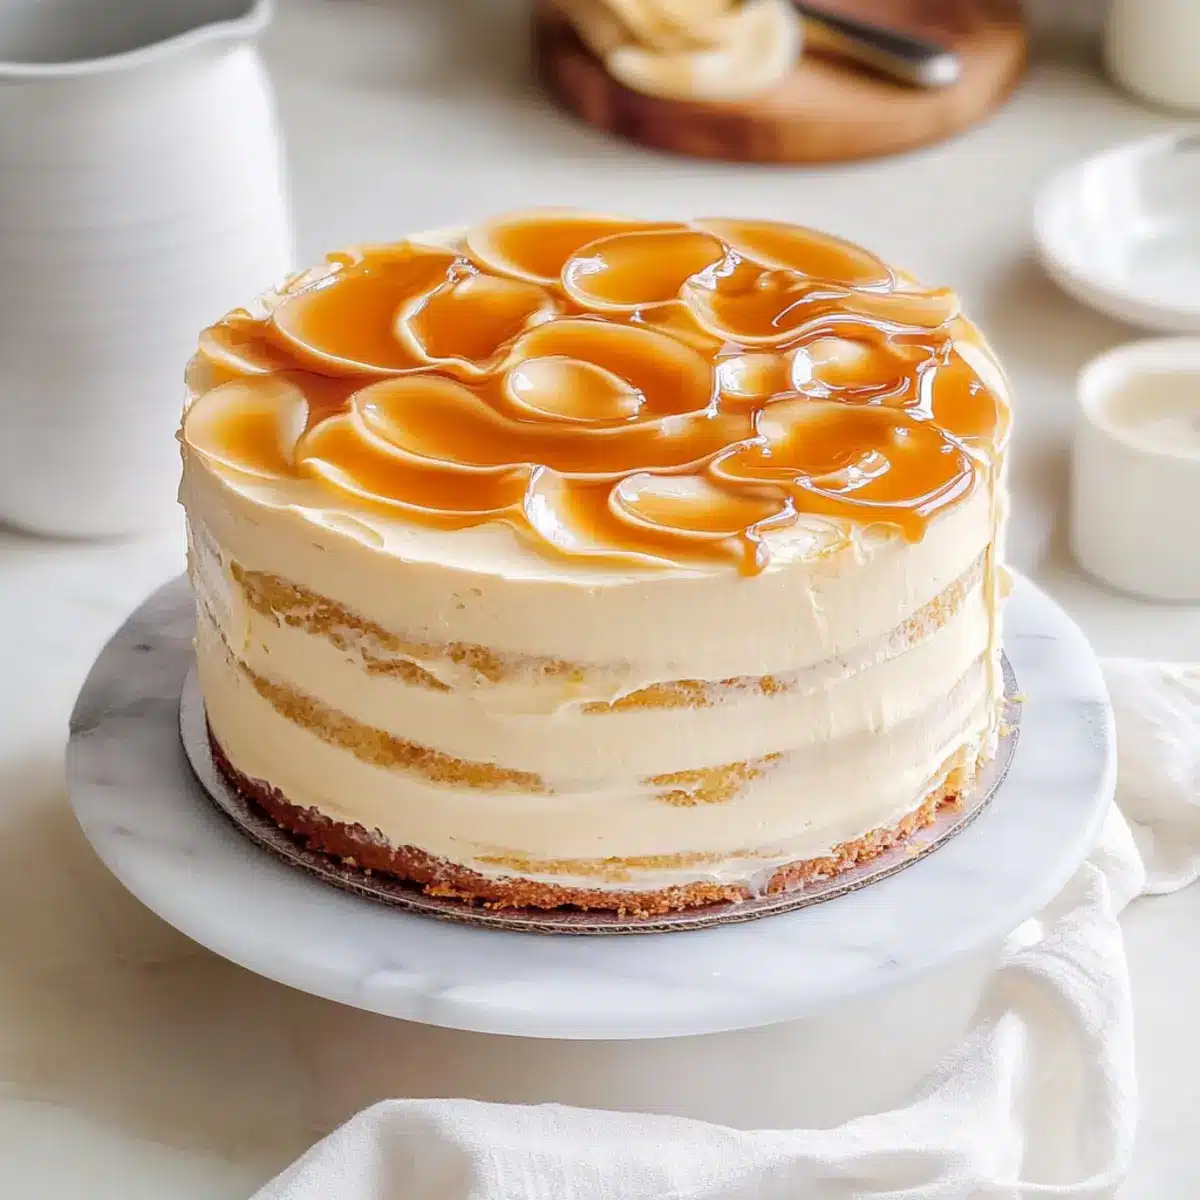
As I walked through the bustling farmers market, the sweet scent of caramel wafted through the air, instantly transporting me to childhood memories of fair treats and joyful celebrations. That captivating aroma inspired my creation of this Salted Caramel Cake, where moist vanilla layers meet rich, homemade salted caramel for the ultimate indulgence. Not only is this dessert a stunning centerpiece for any gathering, but it also boasts a delightful balance of sweet and salty that’s simply irresistible. Perfect for special occasions or as a weekend treat, this recipe brings comfort and joy to the table with minimal fuss—ideal for busy home chefs like us. Are you ready to elevate your dessert game with this show-stopping delight?
Why is Salted Caramel Cake so special?
Decadent Flavor Explosion: The combination of rich, homemade salted caramel and fluffy vanilla layers creates a flavor profile that’s hard to resist.
Simplified Steps: Don’t worry about complicated techniques; this recipe is straightforward, allowing even novice bakers to shine!
Stunning Presentation: With its gorgeous caramel drizzle and smooth buttercream, this cake is a true showstopper for any gathering.
Endless Pairing Options: Enjoy it with a scoop of ice cream or alongside a cup of coffee for an indulgent treat. Consider serving it with Caramel Apple Dessert for a delightful combo!
Time-Saving Make-Ahead: You can prepare all the components ahead of time, making it stress-free for special occasions. Each slice promises to bring comfort and smiles, proving that homemade desserts can be both easy and impressive!
Salted Caramel Cake Ingredients
-
For the Caramel Sauce
• Granulated Sugar – Essential for caramelization to develop that rich flavor.
• Water – Helps dissolve the sugar evenly while cooking.
• Butter – Adds a creamy texture to the caramel; can substitute with margarine if needed.
• Heavy Cream – Creates a luscious texture in the sauce; half-and-half works as a lighter option.
• Salt – Balances sweetness and enhances the overall flavor of the caramel. -
For the Cake Layers
• All-Purpose Flour – Forms the structure of the cake; for a gluten-free option, use gluten-free flour.
• Cornstarch – Softens the cake crumb, keeping it tender and fluffy.
• Baking Powder/Baking Soda – Vital leavening agents that help the cake rise beautifully.
• Sour Cream – Adds moisture and a subtle tang; Greek yogurt can be swapped in.
• Vegetable Oil – Ensures a moist cake; melted coconut oil serves as an alternative.
• Vanilla Extract – Imparts a lovely depth of flavor; pure vanilla is best for optimal taste. -
For the Buttercream
• Powdered Sugar – Sweetens and ensures a smooth consistency for your buttercream.
This Salted Caramel Cake is not just a dessert; it’s a delightful journey of flavors waiting to be explored!
Step‑by‑Step Instructions for Salted Caramel Cake
Step 1: Prepare the Caramel Sauce
In a medium saucepan, combine 1 cup of granulated sugar and 1/4 cup of water over medium heat. Stir gently until the sugar dissolves, then let it boil undisturbed for about 10 minutes, until it turns a deep amber color. Slowly add 1/2 cup of butter and 1 cup of heavy cream, whisking continuously to prevent splattering. Remove from heat and let cool in the refrigerator while you prepare the cake.
Step 2: Make Cake Batter
In a large mixing bowl, sift together 2 cups of all-purpose flour, 2 tablespoons of cornstarch, 1 tablespoon of baking powder, and a pinch of salt. In another bowl, beat 1/2 cup of softened butter with 1 cup of granulated sugar until light and fluffy, about 3-4 minutes. Add 3 eggs, one at a time, then mix in the dry ingredients, 1 cup of sour cream, 1/2 cup of vegetable oil, and 2 teaspoons of vanilla extract until just combined.
Step 3: Bake Cake Layers
Preheat your oven to 170ºC (340ºF) and grease two 9-inch round cake pans. Pour the prepared cake batter evenly into the pans, smoothing the tops with a spatula. Bake for 20-23 minutes, or until a toothpick inserted into the center comes out clean. Once done, remove the pans from the oven and let them cool on a wire rack for 10 minutes before removing the cakes from the pans.
Step 4: Prepare Buttercream
In a large mixing bowl, beat 1 cup of softened butter until creamy. Gradually mix in 4 cups of powdered sugar, a pinch of salt, and 1 teaspoon of vanilla extract until well blended. Next, add 1/2 cup of the cooled salted caramel sauce and beat the mixture until light and fluffy, about 5 minutes, ensuring it’s smooth for easy spreading.
Step 5: Assemble the Cake
Once the cakes are completely cooled, place one layer on a serving plate. Spread a generous layer of buttercream on top, then drizzle some of the salted caramel over it. Place the second cake layer on top, then cover the entire cake with a crumb coat of buttercream, refrigerating it for about 20 minutes to set. Finish decorating with the remaining buttercream and drizzle more salted caramel sauce on top for a stunning finish.
Make Ahead Options
These Salted Caramel Cakes are perfect for busy home cooks who love the convenience of meal prep! You can prepare the cake layers and caramel sauce up to 3 days in advance. Simply bake the cake layers and allow them to cool completely before wrapping them tightly in plastic wrap and refrigerating. The caramel sauce can be stored in an airtight container in the fridge. When it’s time to serve, take out the cake layers and caramel, prepare the buttercream (which can also be made ahead), and assemble the cake. Just remember to bring the cake to room temperature before serving to ensure it’s just as delicious as the day it was made!
Salted Caramel Cake Variations & Substitutions
Feel free to personalize your Salted Caramel Cake with fun and delicious twists that will make every bite unique and special!
- Nutty Crunch: Add chopped pecans or walnuts between the cake layers for a delightful crunch that complements the smoothness of the caramel.
- Spice It Up: Mix in a teaspoon of cinnamon or nutmeg to the cake batter for a warm, cozy flavor reminiscent of autumn spices.
- Chocolate Lovers: Swirl in a bit of chocolate ganache for a luscious, chocolatey layer that pairs beautifully with the caramel.
- Dairy-Free Delight: Substitute the heavy cream with coconut cream and butter with margarine to create a dairy-free version without sacrificing taste.
- Gluten-Free Goodness: Use a gluten-free flour blend in place of all-purpose flour to accommodate gluten sensitivities while keeping the taste superb.
- Sea Salt Finish: Sprinkle a pinch of flaky sea salt on top of the caramel drizzle before serving. This enhances the sweet-salty flavor that makes salted caramel irresistible.
- Fruity Twist: Layer slices of fresh bananas or strawberries between the cake and buttercream for a refreshing pop of flavor.
- Mini Cakes: Make adorable mini salted caramel cakes by using a muffin tin. These bite-sized treats are perfect for gatherings or afternoon snacks!
Feel free to explore these variations and make this cake your own! You might also love pairing it with a rich coffee or serving it alongside delightful treats such as Crisp Mini Cheesecakes or Apple Crumble Cupcakes for a beautiful dessert spread!
Expert Tips for Salted Caramel Cake
- Cool the Caramel: Always let your caramel sauce cool completely before using it. This prevents it from melting your buttercream during assembly.
- Check for Doneness: Insert a toothpick into the center of the cake; it should come out clean. Undercooking can lead to dense layers, so keep a close eye!
- Layering Technique: When assembling, spread a thin layer of buttercream on the first cake layer to help the caramel adhere. This keeps each bite perfectly balanced.
- Storage Solution: Store any leftover cake in an airtight container in the fridge. Allow it to come to room temperature before serving for optimal flavor.
- Flavor Variations: For an extra twist, consider adding a sprinkle of sea salt on top of the caramel drizzle. This enhances the salted caramel flavor beautifully!
How to Store and Freeze Salted Caramel Cake
Fridge: Keep the assembled Salted Caramel Cake in an airtight container; it will stay fresh for up to 3 days. Bring it to room temperature before serving to enhance flavor.
Freezer: If you need to freeze the cake, wrap individual layers tightly in plastic wrap and aluminum foil. They can last up to 3 months in the freezer; thaw overnight in the fridge before assembly.
Leftover Buttercream: Store any excess buttercream in the fridge for up to 1 week or freeze for up to 3 months in an airtight container. Bring to room temperature and re-whip before using.
Reheating: If the cake has been refrigerated, warm individual slices in the microwave for about 10-15 seconds to soften the buttercream, creating a delightful texture.
What to Serve with Salted Caramel Cake?
Elevate your dessert experience with these delightful pairings that beautifully complement the rich flavors of salted caramel.
-
Creamy Vanilla Ice Cream: This classic pairing adds a refreshing sweetness to the rich cake, creating a perfect balance of flavors.
-
Rich Espresso: A bold coffee contrast brightens the sweet layers and enhances the caramel’s depth, making every bite a decadent delight.
-
Fresh Berries: The tartness of raspberries, blueberries, or strawberries adds a refreshing touch, cutting through the richness with a burst of flavor.
-
Whipped Cream: Light and fluffy, whipped cream gives a velvety finish that harmonizes wonderfully with the cake’s salted caramel notes.
-
Chocolate Sauce: Drizzling warm chocolate sauce over a slice creates a luxurious, indulgent treat that’s sure to impress any dessert lover.
-
Cheese Board: Pairing the cake with a selection of creamy cheeses like goat or brie can introduce a savory contrast, evoking delightful flavor profiles.
-
Mint Tea: A soothing herbal tea can refresh the palate after a rich slice, enhancing the sweet and salty flavors of the cake.
-
Caramel Apple Dessert Cups: For an extra sweet touch, consider serving them alongside these delightful cups for a charming double dessert twist!
Salted Caramel Cake Recipe FAQs
How do I select the right ripeness of ingredients for the cake?
Absolutely! For the best results, use room temperature butter and eggs; they help create a light and fluffy cake. Make sure your butter is soft but not melted, and your eggs shouldn’t be cold; let them sit out for about 30 minutes before using. For sour cream, choosing a fresh tub is crucial for optimal moisture and tanginess.
How should I store the Salted Caramel Cake?
Very! After you’ve assembled the Salted Caramel Cake, it’s best to store it in an airtight container in the fridge. It will stay fresh for up to 3 days. When you’re ready to indulge, let it come to room temperature for the best flavor. If you’ve got any leftovers, try to bring them out from the fridge around 30 minutes before serving.
Can I freeze the Salted Caramel Cake?
Absolutely, and it’s super easy! If you want to freeze the cake, wrap each individual layer tightly in plastic wrap, followed by aluminum foil to prevent freezer burn. You can freeze it for up to 3 months. When you’re ready to enjoy, simply thaw the layers overnight in the fridge. Re-assemble with fresh buttercream and caramel, and you’ll have a cake just as delicious as fresh!
What are some common troubleshooting tips for this recipe?
If your caramel sauce is crystallizing, ensure that during cooking, you’re not stirring too much after the sugar has completely dissolved. Stick to gentle swirls until it reaches that lovely amber color! For the cake, if it’s coming out dense, it might be due to overmixing the batter or not measuring your flour correctly; use a kitchen scale for precision!
Are there any dietary considerations for the Salted Caramel Cake?
Certainly! This Salted Caramel Cake contains common allergens like wheat and dairy. If you’re looking for alternatives, consider using gluten-free flour for a gluten-free option, and coconut or vegan butter for dairy-free. Always double-check labels for other potential allergens like nuts, especially if you decide to add them as toppings. Enjoy the cake while ensuring it’s safe for everyone at your gathering!
Irresistible Salted Caramel Cake: A Sweet Celebration Delight
Ingredients
Equipment
Method
- In a medium saucepan, combine 1 cup of granulated sugar and 1/4 cup of water over medium heat. Stir gently until the sugar dissolves, then let it boil undisturbed for about 10 minutes, until it turns a deep amber color. Slowly add 1/2 cup of butter and 1 cup of heavy cream, whisking continuously to prevent splattering. Remove from heat and let cool in the refrigerator while you prepare the cake.
- In a large mixing bowl, sift together 2 cups of all-purpose flour, 2 tablespoons of cornstarch, 1 tablespoon of baking powder, and a pinch of salt. In another bowl, beat 1/2 cup of softened butter with 1 cup of granulated sugar until light and fluffy, about 3-4 minutes. Add 3 eggs, one at a time, then mix in the dry ingredients, 1 cup of sour cream, 1/2 cup of vegetable oil, and 2 teaspoons of vanilla extract until just combined.
- Preheat your oven to 170ºC (340ºF) and grease two 9-inch round cake pans. Pour the prepared cake batter evenly into the pans, smoothing the tops with a spatula. Bake for 20-23 minutes, or until a toothpick inserted into the center comes out clean. Once done, remove the pans from the oven and let them cool on a wire rack for 10 minutes before removing the cakes from the pans.
- In a large mixing bowl, beat 1 cup of softened butter until creamy. Gradually mix in 4 cups of powdered sugar, a pinch of salt, and 1 teaspoon of vanilla extract until well blended. Add 1/2 cup of the cooled salted caramel sauce and beat until light and fluffy, about 5 minutes.
- Once the cakes are completely cooled, place one layer on a serving plate. Spread a generous layer of buttercream on top, then drizzle salted caramel over it. Place the second cake layer on top, then cover the entire cake with a crumb coat of buttercream, refrigerating for about 20 minutes to set. Decorate with the remaining buttercream and drizzle more salted caramel sauce on top for a stunning finish.
Leave a Reply