
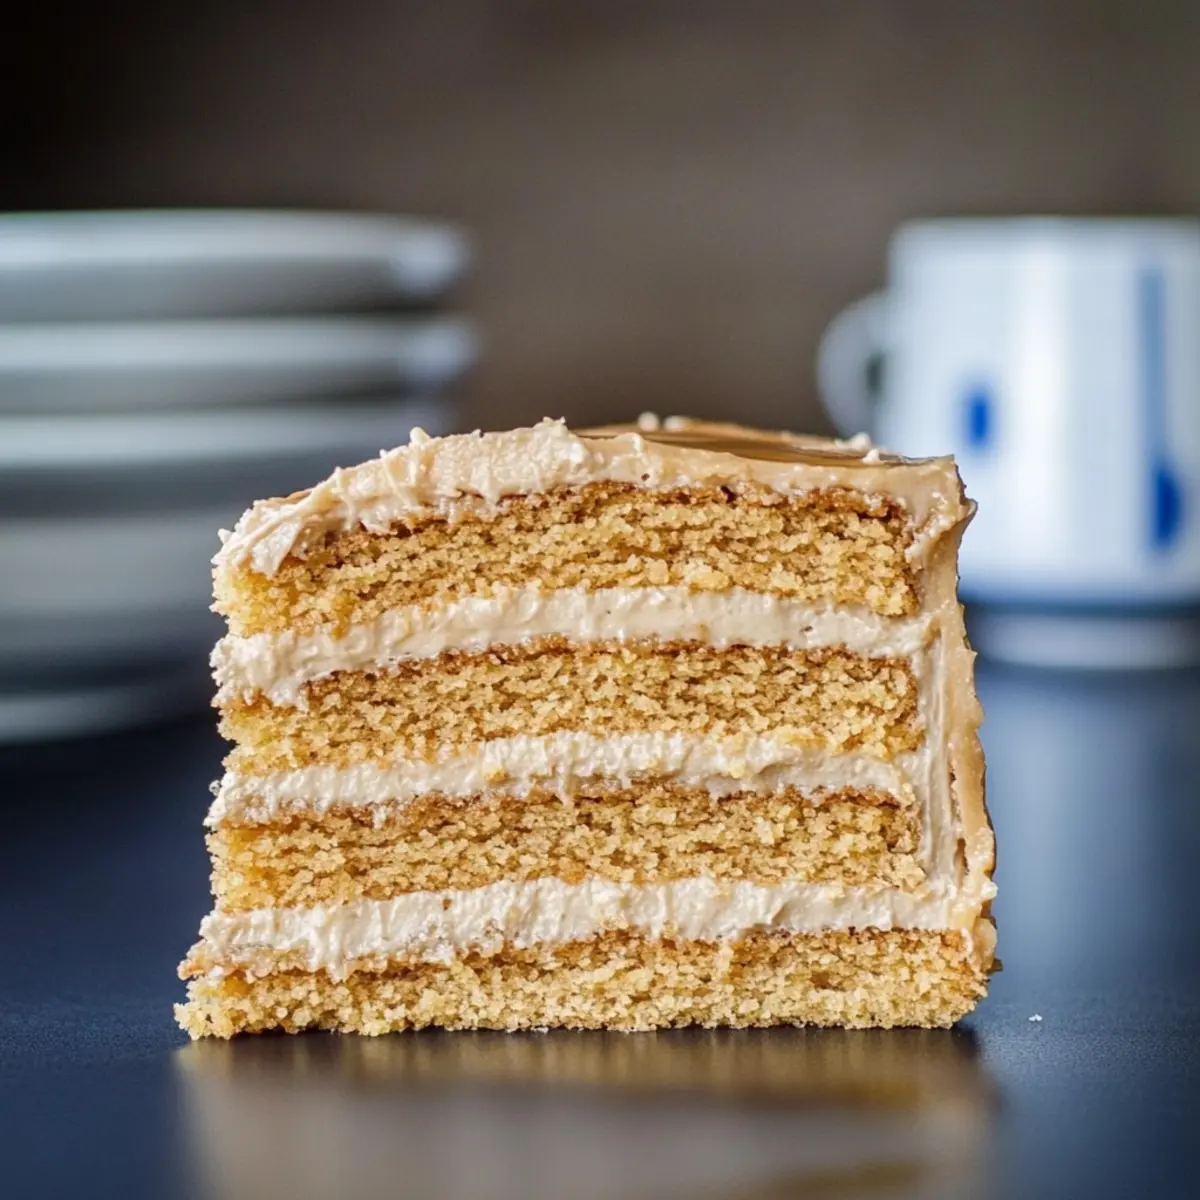
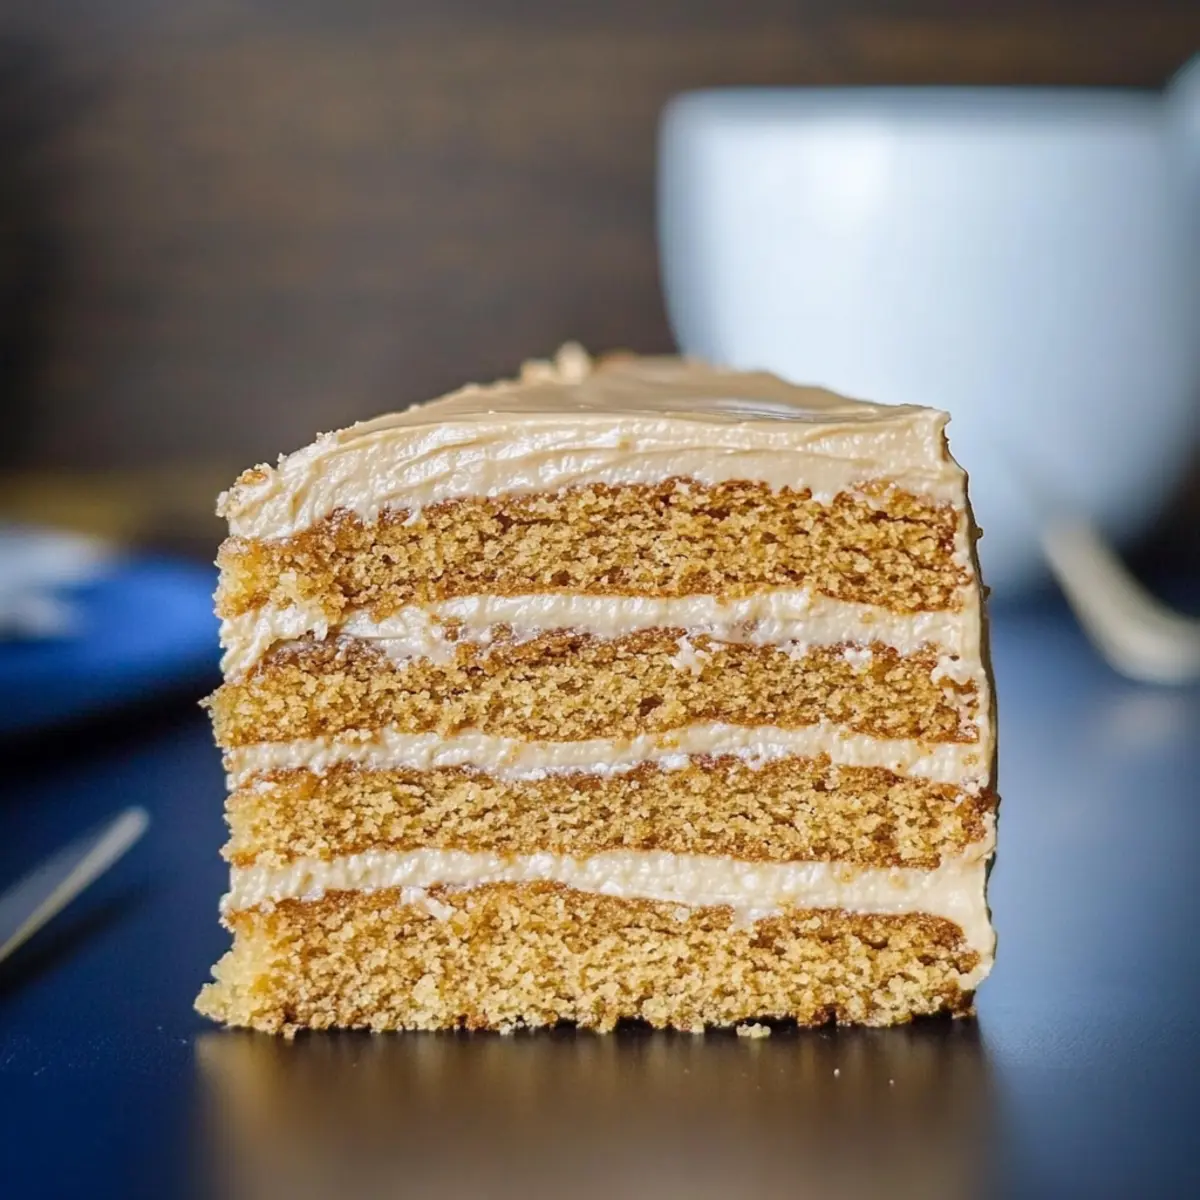
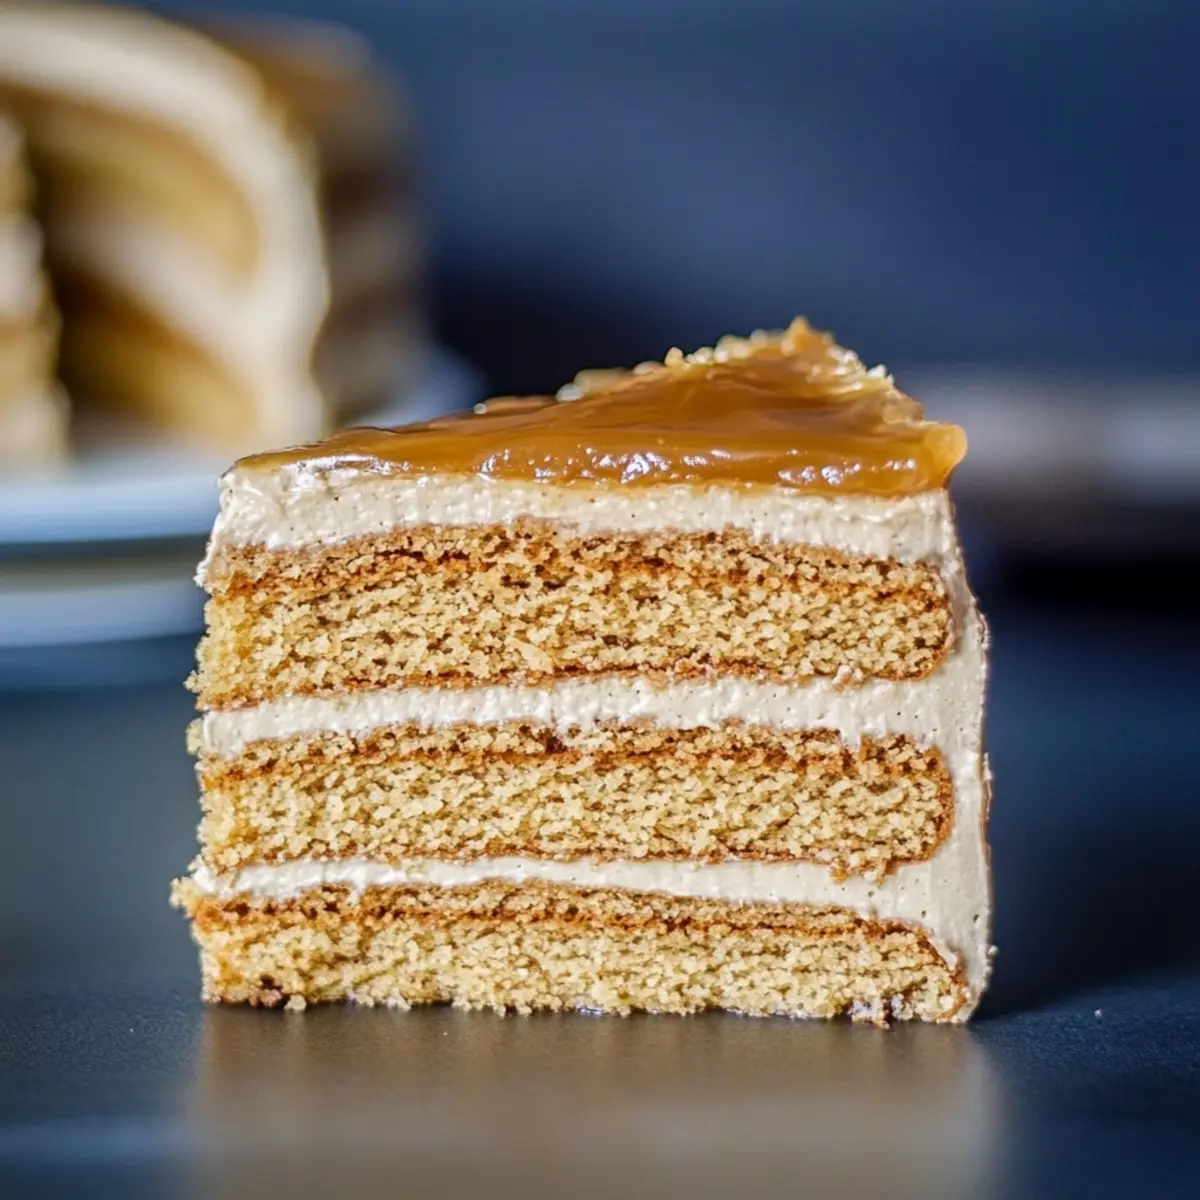
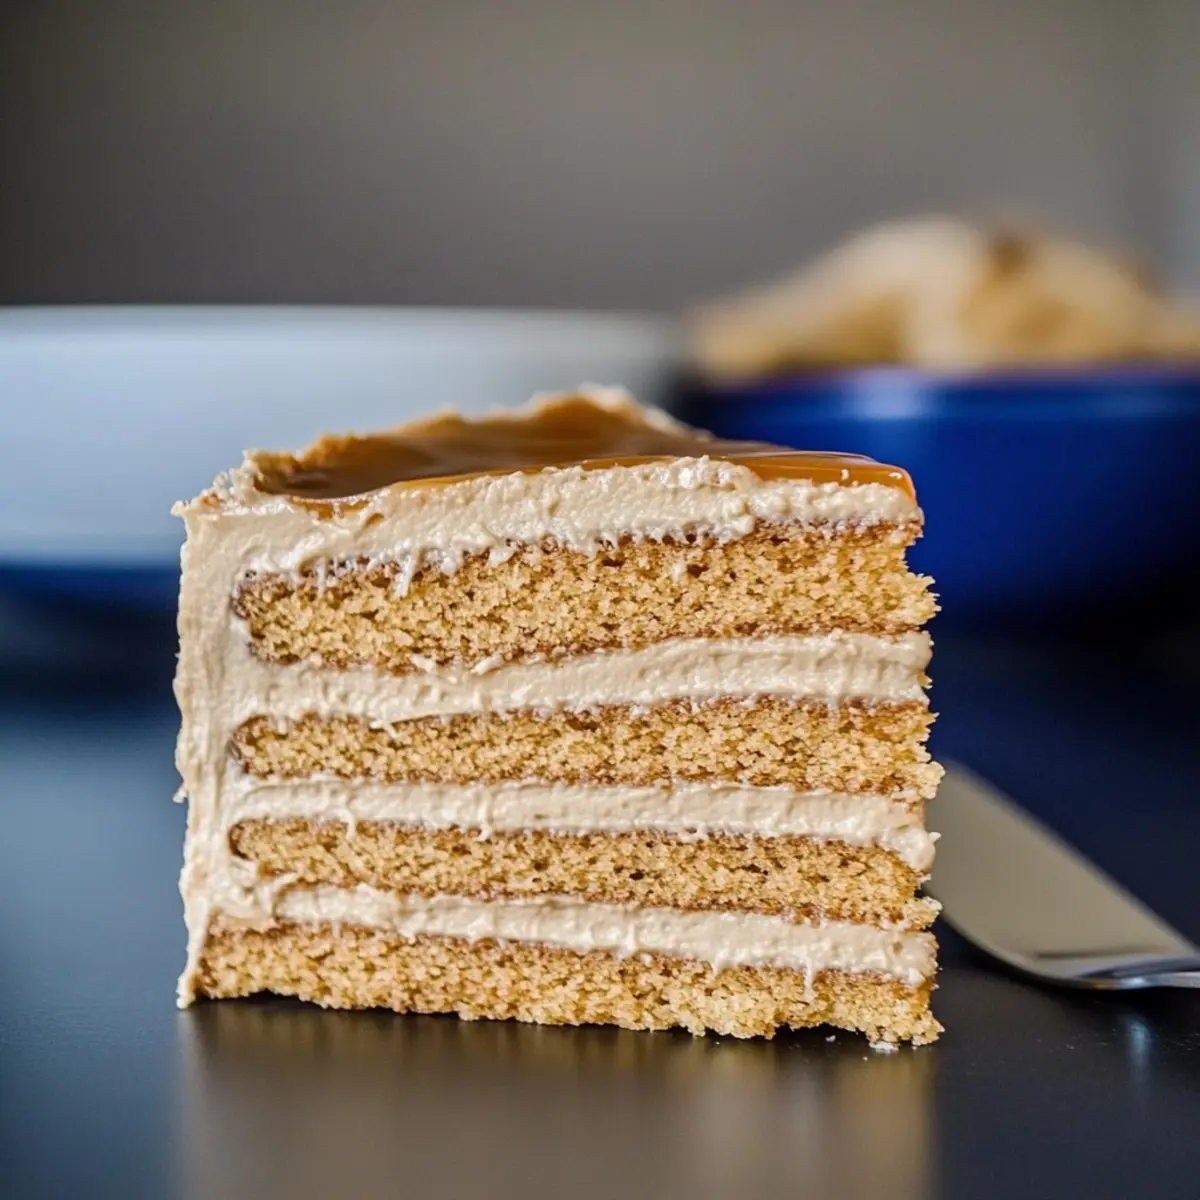
As I stood over the simmering pot, the intoxicating aroma of melting butter and honey cascaded around me, reminiscent of cherished family gatherings filled with laughter and sweet indulgences. Today, I’m excited to share a traditional Russian Honey Cake, or medovik, that captures both heart and palate. This delightful dessert features layers of crisp, golden cake, lovingly engulfed in a luscious dulce de leche frosting. What’s not to love? Not only is this medovik a show-stopper for special occasions, but it also brings a comforting, homemade touch to any gathering. Plus, it’s surprisingly easy to make, perfect for anyone seeking to elevate their dessert game without spending hours in the kitchen. Ready to dive into the layers of this rich culinary story? Let’s whip up a medovik that will surely be a hit at your next celebration!
Why is Medovik the Ultimate Dessert?
Delightful Layers: Each bite of Russian Honey Cake reveals thin layers that melt in your mouth, perfectly balanced with creamy dulce de leche.
Aromatic Experience: The enticing scent of honey and vanilla fills your kitchen, evoking warm memories and making your home feel inviting.
Easily Customizable: Whether sticking to tradition or experimenting with variations like a Jam Layered Honey Cake or even fruit jam, this medovik can be tailored to suit any palate.
Impressive Yet Simple: This dessert dazzles guests with its beauty, yet it’s surprisingly straightforward to prepare—perfect for those who might typically shy away from complex baking.
Perfect for Gatherings: Serve this cake at celebrations or family events, and watch how it quickly becomes the star of the table, bringing delight to both kids and adults alike!
Russian Honey Cake Ingredients
• Get ready to layer the love!
For the Cake Layers
- Unsalted Butter – Adds richness and moisture; make sure it’s melted for smooth mixing.
- Honey – The soul of the Russian Honey Cake; choose high-quality honey for an authentic taste.
- Sugar – Sweetens the batter; finely granulated sugar ensures easy incorporation into the mix.
- Eggs – Essential for structure and moisture; beat them until pale for the best texture.
- Baking Soda – A leavening agent that creates airy layers; don’t skip this vital step.
- Vanilla Extract – Adds aromatic depth; opt for pure extract for an enhanced flavor.
- All-Purpose Flour – Forms the cake structure; avoid cake flour to achieve the right texture.
For the Frosting
- Cream Cheese – Brings creaminess to the frosting; allow it to soften for easier blending.
- Heavy Whipping Cream – Creates a light, fluffy frosting; whip until stiff peaks form for best results.
- Dulce de Leche – The sweet, caramel-like treat that perfectly complements the honey flavors; drizzle generously!
Step‑by‑Step Instructions for Russian Honey Cake
Step 1: Prepare the Steam Bath
Begin by boiling water in a pot, creating a steam bath that will help melt your cake ingredients. Place a heat-safe bowl on top, and then add the melted unsalted butter, honey, and sugar. Stir gently until the mixture is smoothly combined and glossy, about 5 minutes. Make sure the mixture is warm but not boiling, creating a fragrant base for your Russian Honey Cake.
Step 2: Beat the Eggs and Baking Soda
In a separate bowl, vigorously beat two eggs with baking soda until the mixture is smooth and pale, approximately 3–5 minutes. This step is crucial for incorporating air into your batter, ensuring lightness in your cake layers. Gradually add this egg mixture to your warm honey mixture, stirring continuously to combine as the heat from the bowl gently cooks the eggs.
Step 3: Cook the Batter
Now it’s time to cook the combined mixture in the steam bath for about 30–40 minutes. Stir occasionally, watching as the batter deepens in color and thickens, achieving a rich caramel shade. This step is key to developing the flavors in your Russian Honey Cake, so be patient and maintain a gentle heat to prevent any curdling.
Step 4: Incorporate the Flour
Once the batter has thickened, remove the bowl from the heat and stir in the vanilla extract. Let it cool for 10 minutes before gradually folding in the all-purpose flour. This will result in a sticky dough—a sign of your hard work paying off. Be careful to fold gently to keep the airiness you’ve created, which is essential for the delicate layers of your cake.
Step 5: Preheat and Prepare Baking Sheets
Preheat your oven to 350°F (175°C) while you prepare your baking sheets. Line them with parchment paper to prevent sticking and make your life easier when it’s time to remove the layers. Ensure everything is ready so you can quickly bake those beautiful cake layers once your dough is shaped.
Step 6: Shape and Bake the Layers
Divide your sticky dough into 12–14 equal pieces, rolling each into thin circles. Place them on the prepared baking sheets and bake in the preheated oven for 5–7 minutes. Watch closely for a golden hue and slight puffing, indicating they’re ready. Remove each layer promptly to prevent overbaking, which can make your Russian Honey Cake dry.
Step 7: Cool the Layers
Allow the baked layers to cool completely on wire racks. This cooling process is vital, as it ensures the crispy texture of each cake layer, which will beautifully contrast with the creamy frosting. Take your time here, as careful cooling is key for assembling your medovik.
Step 8: Prepare the Frosting
For the frosting, combine softened cream cheese with whipped heavy cream and dulce de leche in a mixing bowl. Use an electric mixer to blend until smooth and fluffy. This mix should reach a light, airy consistency, ensuring your frosting will generously envelop each layer of the Russian Honey Cake perfectly.
Step 9: Frost and Assemble the Cake
Generously spread the frosting between each cooled cake layer, stacking them carefully as you go. Once all layers are stacked, frost the outer layer to achieve a beautiful finish. Sprinkle any excess cake crumbs on top for a decorative touch, adding a homemade charm to your dessert.
Step 10: Chill and Serve
To enhance the flavors and help the cake set, refrigerate the assembled Russian Honey Cake overnight. Before serving, allow it to reach room temperature for about 30 minutes. This step improves the texture, making each slice a delectable blend of creaminess and honey sweetness that your guests will adore.
What to Serve with Russian Honey Cake
As you savor each delightful layer of this sweet treasure, consider creating an inviting meal that complements the rich flavors of honey and cream.
- Fresh Berries: Their natural tartness balances the sweetness of the cake, adding a refreshing contrast that brightens each bite.
- Vanilla Ice Cream: A scoop of creamy vanilla ice cream melts into the cake, enhancing its texture and temperature for a luxurious experience.
- Mint Tea: The aromatic notes of mint tea provide a calming contrast, making it a perfect sip alongside a rich dessert like medovik.
- Dark Chocolate: A few shards of dark chocolate offer a sophisticated pairing; the bitterness rounds out the sweetness of the cake beautifully.
- Fruit Salad: A light, vibrant fruit salad with a drizzle of honey amplifies the medovik’s honey notes while adding texture and freshness.
- Coffee: A warm cup of coffee is the ultimate companion, its bold flavors harmonizing with the richness of the cake for a comforting treat.
- Cheese Platter: Soft cheese, like brie, introduces a creamy, mild flavor profile that pairs wonderfully with the sweetness of the honey cake.
- Whipped Cream: A dollop of lightly sweetened whipped cream adds airiness and softness, making each bite even more indulgent.
Expert Tips for Russian Honey Cake
-
Quality Ingredients: Always choose high-quality honey and fresh eggs; they are key to enhancing the flavors in your Russian Honey Cake.
-
Proper Mixing: Ensure melted butter and honey are combined smoothly before adding to the eggs—this helps achieve a consistent batter and perfect texture.
-
Thick Batter Caution: When cooking the batter in the steam bath, avoid overheating; a gentle simmer is essential to develop flavor without curdling the eggs.
-
Cooling Layers: Let the cake layers cool completely on wire racks to maintain their crisp texture; this prevents sogginess when frosted.
-
Frosting Technique: To avoid over-mixing the heavy cream, whip until you reach stiff peaks, ensuring a light and airy frosting that complements the cake perfectly.
Make Ahead Options
This Russian Honey Cake is a fantastic choice for meal prep, allowing busy home cooks to enjoy delicious desserts without the last-minute rush! You can prepare the cake layers up to 3 days in advance—simply store them in an airtight container in the refrigerator to maintain their crisp texture. If you’re pre-making the frosting, it can be whipped and chilled for up to 24 hours; just give it a quick stir before spreading between the layers. When ready to serve, assemble the cake by frosting the layers and allowing it to chill overnight. This downtime helps the flavors mingle beautifully, ensuring your medovik remains just as delicious and impressive as fresh!
Russian Honey Cake Variations & Substitutions
Feel free to experiment with these delightful twists on the classic medovik to make it your very own!
-
Dulce de Leche Twist: Replace traditional dulce de leche with sweetened condensed milk for a creamier, richer flavor. This change offers a delightful sweetness that pairs beautifully with honey.
-
Fruit Jam Layers: For a fruity enhancement, spread your favorite fruit jam between the layers along with the frosting. Options like raspberry or apricot will add a delightful zing, making it a fruit-lover’s dream.
-
Nutty Texture: Incorporate ground nuts, such as walnuts or almonds, into your frosting for a crunchy contrast. This addition introduces a lovely texture and nutty undertone.
-
Spice it Up: Add cinnamon or nutmeg to the cake batter for a warm, spiced flavor that’s perfect for cozy gatherings. Just a hint will transform your Russian Honey Cake into a spiced delight.
-
Lemon Zest Frosting: Brighten up the creamy frosting by mixing in some lemon zest. The citrus note will provide a refreshing balance to the sweetness of the cake.
-
Gluten-Free Option: Substitute all-purpose flour with a gluten-free blend, ensuring the right proportions for moisture and texture. This way, everyone can enjoy a slice of this delicious treat!
-
Vegan Version: Swap eggs for flaxseed meal combined with water, and use plant-based butter and cream cheese alternatives to create a delightful vegan Russian Honey Cake without sacrificing flavor.
-
Layered Delight: Try stacking layers with other flavors, like chocolate frosting or a rich caramel sauce. The contrast will create a stunning presentation and added flavor complexity.
Feel inspired yet? With these variations and substitutions, your Russian Honey Cake can become a personalized masterpiece that suits every palate! Don’t forget to serve it with a side of fresh berries or a cup of tea for a delightful pairing. For more delicious ideas, check out my recipe for Sweet Spicy Honey or even treat yourself to a slice of Blueberry Coffee Cake. Happy baking!
How to Store and Freeze Russian Honey Cake
Fridge: Keep the assembled Russian Honey Cake in an airtight container in the refrigerator for up to 5 days. This will help maintain its creamy frosting and layer integrity.
Freezer: For longer storage, freeze individual cake layers wrapped in plastic wrap or stored in a freezer-safe container for up to 1 month. Thaw in the fridge or at room temperature before frosting.
Wrap Layers: If you’ve baked the layers ahead of time, wrap them tightly in plastic wrap to prevent drying out, ensuring they stay fresh until you’re ready to assemble.
Reheating Tips: If serving after freezing, allow the cake to come to room temperature before slicing for the best texture and flavor experience.
Russian Honey Cake Recipe FAQs
What type of honey should I use for the Russian Honey Cake?
I highly recommend using high-quality, traditional honey for the best flavor in your medovik. Look for a light-colored honey, preferably from a local source, as it will add a beautiful sweetness that enhances the cake’s overall taste.
How should I store the Russian Honey Cake, and how long does it last?
Store your assembled Russian Honey Cake in an airtight container in the refrigerator for up to 5 days. This will help maintain its delightful creamy frosting and the integrity of the layers, ensuring it stays fresh and delicious!
Can I freeze the Russian Honey Cake?
Absolutely! You can freeze individual cake layers wrapped in plastic wrap or placed in a freezer-safe container for up to 1 month. To use, simply thaw the layers in the fridge or at room temperature before frosting so they’re ready to enjoy.
What should I do if my cake layers are too thick or uneven?
If your cake layers end up too thick, don’t fret! You can carefully trim the edges to create a more uniform shape. For even baking, ensure each layer is rolled to the same thickness, about ¼ inch, and keep a close eye on them while baking to achieve that golden finish.
Are there any dietary considerations I should be aware of with this recipe?
When making Russian Honey Cake, consider allergies to dairy, eggs, or gluten since the recipe contains cream cheese and all-purpose flour. For a dairy-free version, experiment with plant-based cream cheese and non-dairy whipped cream alternatives. Always check ingredient labels to ensure they fit your dietary needs!
Irresistibly Sweet Russian Honey Cake That Delights Every Bite
Ingredients
Equipment
Method
- Prepare the steam bath by boiling water and placing a heat-safe bowl on top. Add melted butter, honey, and sugar. Stir for 5 minutes until glossy.
- Beat two eggs with baking soda until smooth and pale (3–5 minutes). Gradually mix into the warm honey mixture.
- Cook the combined mixture in the steam bath for 30–40 minutes, stirring occasionally until thickened.
- Once thickened, remove from heat, stir in vanilla and cool for 10 minutes before folding in flour.
- Preheat oven to 350°F (175°C) and prepare baking sheets with parchment.
- Divide dough into 12–14 pieces, roll into thin circles, and bake for 5–7 minutes until golden.
- Cool baked layers completely on wire racks.
- Combine cream cheese, whipped cream, and dulce de leche until smooth for frosting.
- Spread frosting between each cooled layer and on the outer layer, using excess crumbs for decoration.
- Chill assembled cake overnight, then allow to reach room temperature before serving.
Leave a Reply