
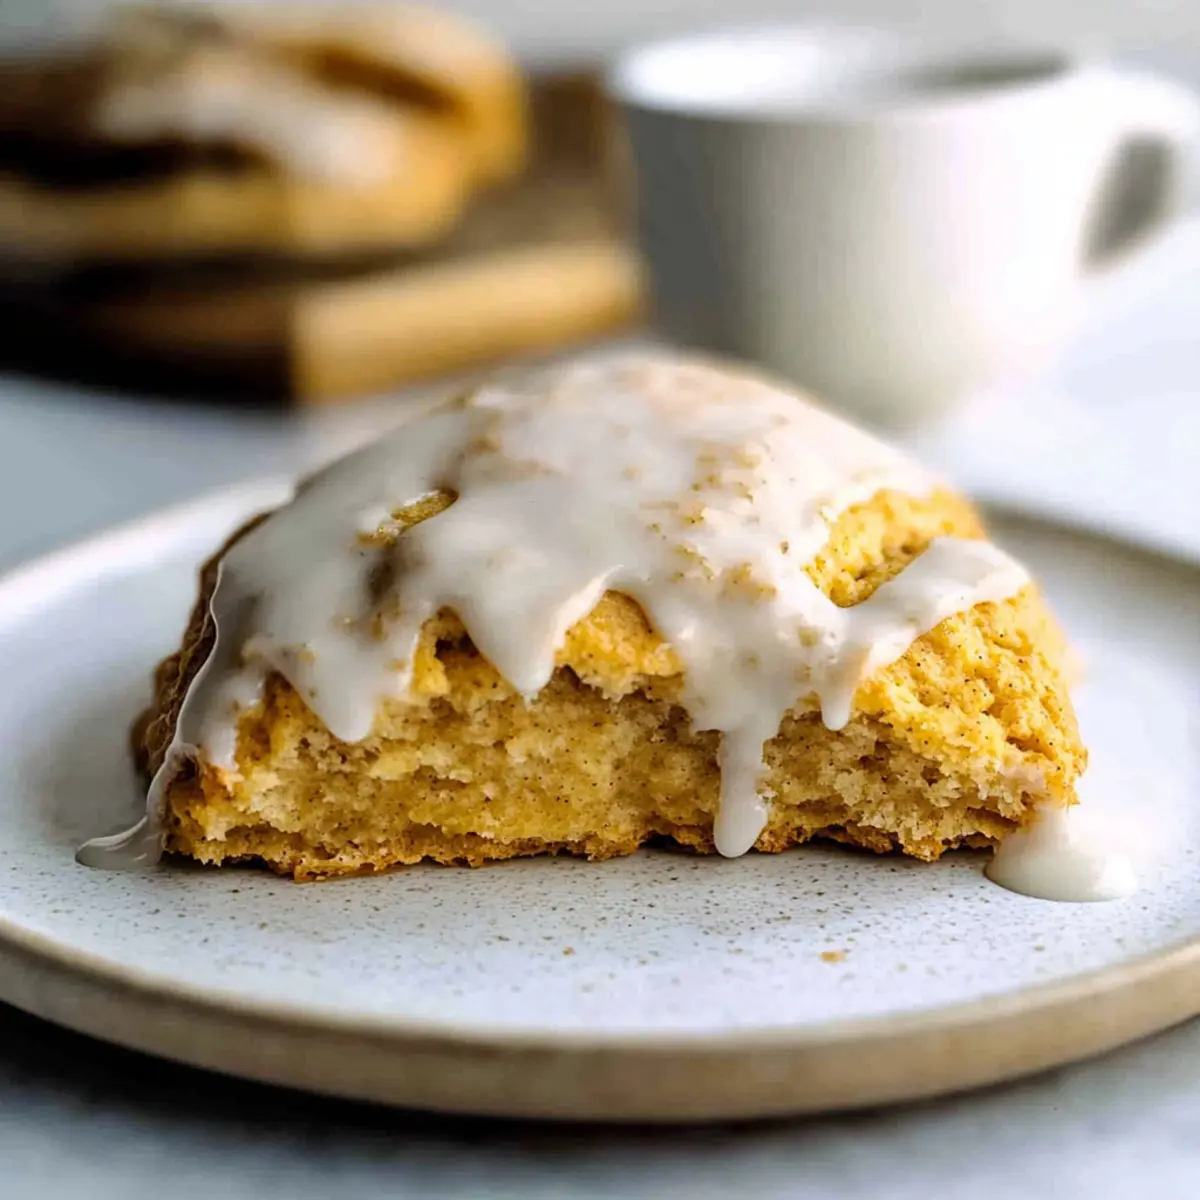
The scent of warm spices and sweet pumpkin wafting through your kitchen can transport you to your favorite fall café in an instant. Today, I’m excited to share my version of Homemade Pumpkin Scones – a delightful, budget-friendly copycat of the beloved Starbucks treat. These scones boast a light, flaky texture that pairs perfectly with your morning coffee or afternoon tea, making them a versatile addition to any occasion. Plus, they’re surprisingly simple to whip up, ensuring that you can impress your friends and family without spending hours in the kitchen. Ready to fill your home with the cozy aromas of autumn? Let’s dive into this delicious recipe!
Why Make Pumpkin Scones at Home?
Irresistible aroma: Nothing beats the delightful scent of warm pumpkin and spices filling your kitchen, instantly creating a cozy atmosphere.
Budget-friendly treat: These scones provide a delicious alternative to pricey coffee shop offerings. Enjoy a luxurious breakfast without breaking the bank!
Simple preparation: With easy-to-follow steps, even beginner bakers can create impressive scones that look and taste gourmet.
Versatile pairings: Perfect for breakfast, afternoon tea, or entertaining guests—the options are endless! Enjoy them warm with coffee or spiced chai tea for the perfect fall treat.
Customizable flavors: Don’t hesitate to experiment! You can add chocolate chips or nuts, or even try a maple glaze for a unique twist. For a fantastic autumn dish, check out my Pumpkin Alfredo Pasta as a perfect side!
Pumpkin Scones Ingredients
For the Scone Base
• All-Purpose Flour – Acts as the foundation of the scones; you can substitute with whole-wheat flour for added nutrition.
• Baking Powder – Essential for helping the scones rise; check the expiration date for best results.
• Baking Soda – Provides tenderness for a lighter, fluffy texture; don’t confuse it with baking powder without proper adjustments.
• Cinnamon – Brings that cozy fall flavor; opt for freshly ground for maximum potency.
• Cloves, Ginger, Nutmeg – Add a delightful warmth; mix to your taste for a personal spice blend.
• Brown Sugar & Granulated Sugar – Sweetens and adds depth; feel free to decrease the sugar for a lower-sweetness option.
For the Wet Ingredients
• Cold Butter – The key to flaky layers; cube it and keep it cold until mixing.
• Canned Pumpkin Puree – Moisture and flavor come from this star ingredient; avoid pumpkin pie filling for a true pumpkin essence.
• Milk – Hydrates the dough perfectly; non-dairy alternatives like almond or oat milk work well.
• Egg – Binds the mixture together; use applesauce or a flax egg for a vegan twist.
For the Glaze
• Powdered Sugar – Gives sweetness to the glaze; sift it to prevent clumps for a smooth finish.
• Heavy Cream – Ensures a rich glaze; substitute with milk for a lighter version.
These pumpkin scones ingredients blend together to create a delightful fall treat that’ll warm your heart and home!
Step‑by‑Step Instructions for Homemade Pumpkin Scones
Step 1: Preheat the Oven
Start by preheating your oven to 400°F (200°C). This ensures a hot baking environment that will help your pumpkin scones rise beautifully. While the oven warms up, prepare your baking sheet by lining it with parchment paper, ready to catch those golden, flaky delights.
Step 2: Mix the Wet Ingredients
In a medium bowl, whisk together the cold pumpkin puree, milk, beaten egg, and a splash of vanilla extract until fully combined. Aim for a smooth mixture without any lumps. Make sure your wet ingredients are cold, as this helps in creating a tender, airy texture in your pumpkin scones.
Step 3: Combine the Dry Ingredients
In a large bowl, mix the all-purpose flour, both sugars, baking powder, baking soda, salt, and your chosen spices—cinnamon, cloves, ginger, and nutmeg—until everything is well incorporated. This blend of dry ingredients will provide structure and warm fall flavors to your pumpkin scones, enhancing their deliciousness.
Step 4: Cut in the Butter
Add your cold, cubed butter to the dry mixture. Using a pastry cutter or your fingers, cut the butter into the flour mixture until it resembles coarse crumbs with pea-sized chunks of butter remaining. This step is crucial for achieving that sought-after flaky texture in your homemade pumpkin scones.
Step 5: Combine Wet and Dry Mixtures
Gently pour the wet mixture into the dry ingredients, stirring until just combined. Be careful not to overmix; aim for a slightly sticky dough—this helps maintain the flaky quality of your scones. If your dough feels too dry, you can add a touch more milk to achieve the right consistency.
Step 6: Shape the Dough
Turn the dough out onto a lightly floured surface and gently form it into an 8×5 inch rectangle, about 1 inch thick. Using a sharp knife, cut the dough into six equal squares or triangles. Handling the dough lightly is key to ensuring your pumpkin scones remain tender and airy.
Step 7: Prepare for Baking
Place the cut scones on your prepared parchment-lined baking sheet, making sure to space them about 2 inches apart for even baking. If desired, you can chill them in the fridge for 15-20 minutes before baking to help them retain their shape and enhance flakiness.
Step 8: Bake the Scones
Slide the baking sheet into your preheated oven and bake the pumpkin scones for 17-18 minutes, or until they turn a lovely golden brown. To check for doneness, insert a toothpick into the center of a scone; it should come out clean, indicating that they are perfectly baked.
Step 9: Cool and Glaze
Once baked, remove your pumpkin scones from the oven and let them cool on a wire rack for a few minutes. While still slightly warm, prepare your glaze by mixing sifted powdered sugar with heavy cream until smooth and drizzle over the scones for a sweet finishing touch.
What to Serve with Homemade Pumpkin Scones
The comforting aroma of warm spices pairs beautifully with these delightful scones, creating a cozy breakfast or snack experience.
- Creamy Chai Latte: The fragrant spices in chai enhance the scones’ flavor, offering a warm, comforting drink for chilly mornings.
- Fresh Fruit Salad: Bright, tangy fruits complement the sweetness of the scones, adding a refreshing balance to the meal.
- Maple Syrup Drizzle: A touch of maple adds a sweet, earthy note that harmonizes perfectly with pumpkin, elevating every bite.
- Savory Bacon Strips: The salty, crispy texture of bacon contrasts beautifully with the scones’ sweetness, making for a well-rounded breakfast.
- Pecans or Walnuts: A handful of roasted nuts adds a delightful crunch, enhancing the scone experience with extra flavor and texture.
- Hot Apple Cider: Sip on this fall favorite alongside your scones for a nostalgic and heartwarming taste of the season.
- Whipped Cream Cheese Spread: Spread a light layer of cream cheese for a creamy touch that perfectly complements the warm pumpkin flavors.
- Dark Chocolate Drizzle: Add a decadent twist with a drizzle of melted dark chocolate for an indulgent afternoon snack option.
- Pumpkin Spice Coffee: Keep the pumpkin theme going by pairing with a flavored coffee that echoes the spices in your scones.
Expert Tips for Pumpkin Scones
• Keep It Cold: Ensure your butter and wet ingredients are cold to achieve the best flaky texture in your pumpkin scones.
• Avoid Overmixing: Gently combine the wet and dry ingredients until just mixed. Overworking the dough can lead to dense scones.
• Chill Before Baking: For a more defined shape, chill shaped scones for 15-20 minutes before baking. This helps them retain their form during baking.
• Fresh Ingredients: Use fresh spices and ensure your baking powder is not expired for maximum flavor and rise in your scones.
• Customize Wisely: Experiment with flavors, but be cautious not to overload with extras like chocolate chips, which can affect texture; balance is key!
How to Store and Freeze Pumpkin Scones
Room Temperature: Store unglazed pumpkin scones in an airtight container at room temperature for up to 3 days to maintain freshness and prevent them from drying out.
Fridge: If you prefer your scones chilled, wrap them tightly in plastic wrap and store them in the fridge for up to 5 days. They may lose some flakiness but remain delicious.
Freezer: For longer storage, freeze unglazed pumpkin scones in a single layer on a baking sheet. Once frozen solid, transfer them to a freezer-safe bag or container for up to 3 months.
Reheating: To enjoy your scones warm, reheat from frozen in the oven at 350°F (175°C) for about 10-15 minutes, or until warmed through. Glaze after reheating to maintain that sweet finish.
Pumpkin Scones Variations & Substitutions
Feel free to get creative with these pumpkin scones and tailor them to your taste preferences!
- Whole Wheat: Substitute half the all-purpose flour with whole wheat flour for a nuttier flavor and extra nutrition.
- Dairy-Free: Use almond milk or oat milk instead of regular milk, and replace butter with coconut oil for a vegan option.
- Egg-Free: Swap the egg for 1/4 cup of unsweetened applesauce or a flax egg made from 1 tablespoon ground flaxseed mixed with 2.5 tablespoons water.
- Extra Spice: Add an extra pinch of cinnamon or nutmeg for a more robust fall flavor—don’t be shy to experiment with your spice blend!
- Sweet Twist: For a unique glaze, replace the vanilla glaze with a maple glaze by whisking together powdered sugar and pure maple syrup.
- Add-Ins: Toss in chocolate chips, walnuts, or chopped pecans for added texture and a delicious flavor contrast. These scones can become a delightful treat with a variety of textures.
- Gluten-Free: Use a 1:1 gluten-free baking blend to replace all-purpose flour—deliciously accommodating for gluten-sensitive friends!
- Maple Pecan Pumpkin Scones: Incorporate finely chopped pecans and a splash of maple syrup into the dough for a delightful upgrade. Pair with a cup of spiced chai for an unforgettable experience!
Whichever variation you choose, you can also consider serving these delectable treats alongside a warm cup of coffee or my Pumpkin Alfredo Pasta for a cozy meal. Enjoy exploring these delicious options!
Make Ahead Options
These homemade pumpkin scones are perfect for meal prep enthusiasts looking to save time during busy mornings! You can prepare the dough up to 24 hours in advance—simply mix the wet and dry ingredients, shape the scones, and refrigerate them until you’re ready to bake. This way, you’ll maintain their flaky texture and rich flavor. Additionally, feel free to freeze unglazed scones for up to 3 months; when craving a cozy treat, bake them straight from the freezer, adding a couple of extra minutes to the bake time. Just drizzle with the glaze before serving, and you’ll have scrumptious pumpkin scones that taste as fresh as the day you made them!
Pumpkin Scones Recipe FAQs
How do I choose the best pumpkin for my scones?
Absolutely! When selecting canned pumpkin puree, look for 100% pumpkin with no additives. Brands like Libby’s are highly recommended. Avoid pumpkin pie filling; it contains sugars and spices that could overpower your scones. If using fresh pumpkin, select a sugar pumpkin, which is smaller and sweeter.
What is the best way to store pumpkin scones?
I recommend storing your unglazed pumpkin scones in an airtight container at room temperature for about 3 days. If you want them to last a little longer, you can refrigerate them for up to 5 days, but be aware that they may lose some of their flakiness.
Can I freeze pumpkin scones, and how should I do it?
Very! To freeze your pumpkin scones, first place them in a single layer on a baking sheet until they are frozen solid. Afterward, transfer them to a freezer-safe bag or container, where they can be kept for up to 3 months. When you’re ready to enjoy them, simply reheat in the oven at 350°F (175°C) for about 10-15 minutes.
What should I do if my pumpkin scones are too dense?
If your scones turn out too dense, it might be due to overmixing the dough or using too much flour. Be sure to mix just until combined after adding the wet ingredients, and lightly spoon the flour into your measuring cup rather than scooping it directly, which can compact it. Don’t hesitate to experiment with your technique!
Can I make these scones dairy-free or egg-free?
Absolutely! To make your pumpkin scones dairy-free, simply replace the milk with almond, oat, or any non-dairy milk of your choice. For an egg substitute, use ¼ cup of applesauce or a flax egg (1 tablespoon of flaxseed meal mixed with 2.5 tablespoons of water, let sit for 5 minutes). These adjustments still yield delicious scones.
Are pumpkin scones safe for pets or people with allergies?
Always ensure that any ingredients you use are safe for your pets. While the scones are fine for humans, avoid sharing them with your pets, as the spices and sugar can be harmful. If you have allergies, you can modify the recipe to exclude certain allergens—like gluten, by using a gluten-free flour blend—and still enjoy these delightful pumpkin scones.
Homemade Pumpkin Scones for a Cozy Fall Morning
Ingredients
Equipment
Method
- Preheat your oven to 400°F (200°C) and prepare a baking sheet by lining it with parchment paper.

- In a medium bowl, whisk together the cold pumpkin puree, milk, beaten egg, and a splash of vanilla extract until smooth.
- In a large bowl, mix the flour, both sugars, baking powder, baking soda, salt, and spices until well combined.
- Add cold, cubed butter to the dry mixture and cut in until it resembles coarse crumbs.
- Gently pour the wet mixture into the dry ingredients, stirring until just combined to form a slightly sticky dough.
- Turn the dough onto a floured surface, shape into an 8x5 inch rectangle, and cut into six equal pieces.
- Place scones on a baking sheet, spaced 2 inches apart, and chill in the fridge if desired.
- Bake the scones for 17-18 minutes until golden brown and a toothpick comes out clean.
- Cool on a wire rack and drizzle glaze made from powdered sugar and heavy cream over the scones.
Leave a Reply