
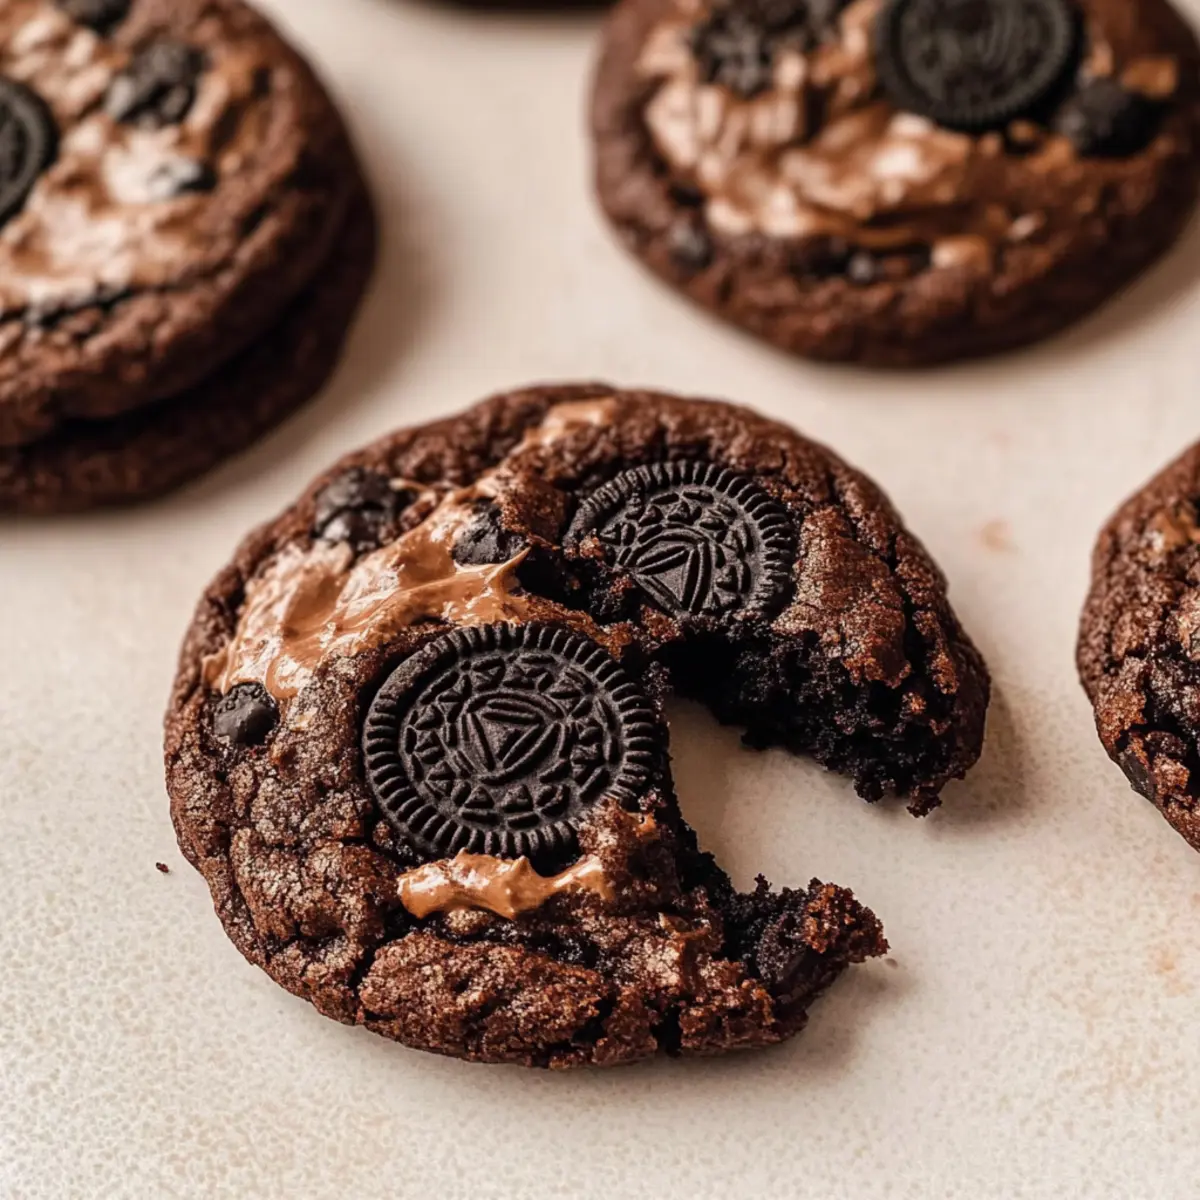
With each bite, these Ultimate Chewy Oreo Brownie Cookies transport me back to carefree afternoons spent in the kitchen, experimenting with gooey chocolate delights. This recipe masterfully merges the rich, fudgy essence of brownies with the classic charm of cookies, all thanks to the delightful addition of crunchy Oreo pieces. Not only are these cookies super quick to whip up, but they’re also an instant crowd-pleaser, perfect for gatherings or just satisfying that sweet tooth craving in the comfort of your home. The chewy centers paired with irresistible crispy edges create an indulgent texture that chocolate lovers simply can’t resist. Curious how to create this delicious harmony? Let’s dive into the recipe!
Why are Oreo Brownie Cookies irresistible?
Decadently Chewy: These cookies deliver a rich, fudgy texture that feels like a warm hug for your taste buds.
Quick and Easy: You’ll be amazed at how fast these come together, making them perfect for spontaneous cravings or surprise guests.
Crowd-Pleasing Flavor: The combination of chocolate and crunchy Oreos guarantees smiles all around, whether you’re hosting friends or enjoying a cozy night in.
Versatile Treat: Feeling adventurous? Swap the Oreos for seasonal flavors or mix in butterscotch chips for a twist!
Perfectly Balanced: The crisp edges paired with chewy centers create a delightful texture that you won’t be able to resist, especially with a glass of milk or ice cream!
Oreo Brownie Cookies Ingredients
These delightful components will help you create the ultimate indulgent treat!
For the Cookie Batter
- Semi-sweet Chocolate – Adds rich chocolate flavor and moisture; dark chocolate can ramp up the intensity.
- All-purpose Flour – Provides essential structure; measuring carefully prevents compacting.
- Dutch Process Cocoa Powder – Enhances the chocolate flavor and deepens color; regular cocoa works too, but may change flavor slightly.
- Baking Powder – Helps the cookies rise slightly for that perfect texture.
- Salt – Balances the sweetness and enhances all the flavors.
- Unsalted Butter – Contributes tenderness; substitute with margarine for a dairy-free option.
- Brown Sugar – Adds moisture and chewiness; light and dark can be swapped interchangeably.
- White Granulated Sugar – Sweetens and aids in browning, giving that lovely golden hue.
- Pure Vanilla Extract – Infuses sweetness and elevates the overall flavor profile.
- Large Eggs – Binds everything together and adds moisture; room temperature works best for mixing.
- Chocolate Chips – Creates pockets of melty goodness; try semi-sweet or dark for varying flavors.
- Oreo Pieces – Adds crunchy texture and distinctive flavor; experiment with different Oreo varieties.
- Oreo Crumbs – Enhances the Oreo flavor throughout the cookies.
Step‑by‑Step Instructions for Ultimate Chewy Oreo Brownie Cookies
Step 1: Melt Chocolate
Begin by chopping the semi-sweet chocolate and placing it in a medium saucepan over low heat. Stir gently until it’s fully melted and smooth, which should take about 5 minutes. Remove it from heat and let the chocolate cool for about 5-10 minutes while you prepare other ingredients, ensuring it’s not too hot when mixing.
Step 2: Prepare Dry Ingredients
In a large mixing bowl, sift together 1 cup of all-purpose flour, ½ cup of Dutch process cocoa powder, ½ teaspoon of baking powder, and ½ teaspoon of salt. This step is crucial for breaking up any lumps, allowing the dry ingredients to blend smoothly into the cookie batter, which enhances the final texture of your Oreo brownie cookies.
Step 3: Mix Wet Ingredients
In a stand mixer bowl, combine ½ cup of unsalted butter, ½ cup of brown sugar, and ¼ cup of granulated sugar. Beat these together at medium speed for about 2 minutes until the mixture is light and fluffy. Next, gradually add the cooled melted chocolate and 1 teaspoon of pure vanilla extract, mixing for another 2 minutes until fully incorporated.
Step 4: Incorporate Eggs
Add in 1 large egg and 1 egg yolk to the wet mixture, blending at medium-high speed for about 2 minutes. This step helps create a richer, fudgy texture in your Ultimate Chewy Oreo Brownie Cookies, as the eggs provide moisture and binding to the dough, making it easier to scoop later.
Step 5: Combine Mixtures
Slowly add the dry ingredient mixture into the chocolate batter, mixing until just combined. Avoid over-mixing; you want to maintain the cookie’s chewy texture. Fold in ½ cup of chocolate chips, 1 cup of crushed Oreo pieces, and ¼ cup of Oreo crumbs, ensuring each component is evenly distributed throughout the dough.
Step 6: Chill Dough
Cover the mixing bowl with plastic wrap and refrigerate the cookie dough for about 30 minutes while preheating your oven to 350°F (175°C). Chilling the dough allows the flavors to meld and prevents spreading during baking, resulting in perfectly chewy Oreo brownie cookies with distinct edges.
Step 7: Scoop and Bake
Using a heaping 2-tablespoon cookie scoop, place six dough balls on a lined baking sheet, keeping them spaced apart. Bake the cookies in the preheated oven for 13-15 minutes. They should have set edges while still looking soft and a bit underbaked in the middle for that gooey brownie texture.
Step 8: Cool
Remove the baking sheet from the oven and let the cookies cool on the sheet for about 5 minutes before transferring them to a wire rack. This allows the cookies to firm up slightly, ensuring they hold their shape. The Ultimate Chewy Oreo Brownie Cookies are best enjoyed warm while still soft and fudgy!
Storage Tips for Oreo Brownie Cookies
Room Temperature: Store your Oreo brownie cookies in an airtight container at room temperature for up to 5 days for optimal freshness and flavor.
Fridge: If you prefer a firmer texture, you can refrigerate the cookies, but they may dry out quicker. Consume within 3 days for the best taste.
Freezer: For longer storage, freeze your cookies in a single layer on a baking sheet first, then transfer them to an airtight container. They can last up to 30 days!
Thawing: To enjoy frozen Oreo brownie cookies, simply thaw them at room temperature for about 1 hour, or warm them slightly in the microwave for that freshly baked feel.
Oreo Brownie Cookies Variations & Substitutions
Feel free to customize these cookies and create your own delicious spin on the classic recipe!
- Seasonal Oreos: Use different flavored Oreos like Pumpkin Spice or Peppermint for a festive twist. Each bite will bring a seasonal surprise that excites your palate!
- Chocolate Alternatives: Swap semi-sweet chocolate for dark chocolate for a richer flavor. The profound taste will satisfy even the most intense chocolate cravings.
- Nutty Crunch: Add chopped walnuts or pecans for an added crunch and delightful nutty richness. They complement the fudginess of your cookies beautifully.
- Dairy-Free Option: Replace unsalted butter with plant-based margarine or coconut oil. This simple switch allows everyone to enjoy these treats, no matter their dietary needs!
- Flavor Boost: Incorporate a teaspoon of espresso powder into the batter for a deepened chocolate flavor. It works wonders without making them taste like coffee!
- Texture Variation: Try adding a handful of crushed pretzels for a sweet and salty combo, creating an unforgettable taste experience with every bite.
- Fruity Twist: Mix in dried cherries or cranberries for a fruity contrast to the chocolate. This unexpected addition adds a delightful tartness!
- White Chocolate Delight: Substitute chocolate chips with white chocolate chips for a sweeter, creamier flavor. They melt beautifully for a different twist on the classic cookie.
If you’re still in the mood for more cookie adventures, check out these delightful Forgotten Cookies Chewy or indulge in some luscious Peppermint Swirl Cookies. Happy baking!
What to Serve with Ultimate Chewy Oreo Brownie Cookies
Indulging in these fudgy delights opens the door to a world of delectable pairings that enhance every bite.
- Creamy Vanilla Ice Cream: A scoop of silky ice cream melts into the warm cookies, balancing their richness with cool sweetness.
- Chilled Whole Milk: Nothing beats the classic pairing of milk with cookies; it complements the chocolate and Oreo flavors perfectly.
- Fresh Berries: The bright acidity of strawberries or raspberries cuts through the sweetness, introducing a refreshing contrast. Serve them on the side for a vibrant touch!
- Whipped Cream: Adding a dollop of whipped cream creates a luscious finish that adds an airy texture and extra sweetness.
- Chocolate Sauce Drizzle: For the chocolate lover in all of us, a drizzle of chocolate sauce intensifies the decadent experience.
- Coffee or Espresso: A bittersweet coffee or espresso heightens the chocolate experience, bringing out the fudgy goodness of the cookies.
- Peanut Butter Swirl: A smear of creamy peanut butter on top of a warm cookie introduces delightful salty notes that contrast the sweetness.
- Milkshake: Blend these cookies into a milkshake for a dessert that’s an indulgent treat all on its own!
Make Ahead Options
These Ultimate Chewy Oreo Brownie Cookies are perfect for meal prep, letting you enjoy homemade indulgence with less fuss on busy days! You can prepare the cookie dough up to 24 hours in advance; simply scoop the dough into balls and refrigerate them in an airtight container. For a longer option, the unbaked dough can be frozen for up to 3 months. Just remember to thaw the dough in the refrigerator overnight before baking to ensure they rise beautifully. When you’re ready to bake, simply preheat your oven and follow the baking instructions as usual, delivering warm, gooey cookies with all the delightful textures and flavors you love, without the rush!
Expert Tips for Oreo Brownie Cookies
Chill for Texture: Refrigerate the dough for at least 30 minutes to enhance chewiness and prevent spreading during baking.
Weigh Your Flour: Use a kitchen scale or spoon and level method to avoid compacting flour, which can dry out your Oreo brownie cookies.
Perfectly Soft Centers: Bake just until edges are set and centers look slightly underbaked for that gooey brownie texture.
Experiment with Flavors: Don’t hesitate to swap in flavored Oreos or different chocolate chips for a unique twist on classic Oreo brownie cookies.
Room Temperature Eggs: Always use room temperature eggs in the mixture, as they blend more easily and contribute to a moist, fudgy texture.
Oreo Brownie Cookies Recipe FAQs
How do I choose the right ripeness of ingredients?
Absolutely! When baking, using room temperature eggs is essential for better mixing. For chocolate, using high-quality semi-sweet or dark chocolate can truly enhance the flavor. If you opt for butter, ensure it’s softened to room temperature; this makes creaming easier and creates a fluffier texture.
How should I store my Oreo brownie cookies?
You can store your Oreo brownie cookies in an airtight container at room temperature for up to 5 days. If you notice them starting to dry, this is usually a signal to pop them in the fridge—as they’re best consumed fresh! Just remember, if you put them in the fridge, try to eat them within 3 days.
Can I freeze these cookies?
Yes, indeed! To freeze your Oreo brownie cookies, first, let them cool completely. Then, lay them out in a single layer on a baking sheet and freeze for about 2 hours. After they’re firm, transfer them to an airtight container or freezer bag. They can be frozen for up to 30 days! To enjoy them later, simply thaw at room temperature for about 1 hour or warm them in the microwave for a few seconds.
What should I do if my cookies turn out too dry?
If your cookies come out too dry, it could be due to compacted flour or overbaking. I recommend using a kitchen scale for precise measurements, and also keeping an eye on the baking time, as every oven varies! Aim for slightly underbaked centers for that chewy, fudgy texture. If you’ve made them already, consider warming them up in the microwave for a few seconds to help soften them again.
Are Oreo brownie cookies suitable for those with allergies?
These Oreo brownie cookies contain common allergens such as flour, eggs, and dairy. For those with gluten sensitivities, try using a gluten-free flour blend; it works wonderfully! If you need a dairy-free option, substitute the butter with margarine or coconut oil. Always check the specific Oreo variety you’re using, as some might contain dairy or gluten.
Can I customize the recipe for different dietary preferences?
Absolutely! You can adjust this recipe to meet various dietary requirements. For a lower sugar option, you might reduce the sugar by a quarter or use a sugar substitute. Incorporating nuts or other flavored chips can also cater to different tastes or provide texture variation. Get creative—I often encourage experimentation to find what you love most!
Irresistibly Fudgy Oreo Brownie Cookies for Ultimate Indulgence
Ingredients
Equipment
Method
- Begin by chopping the semi-sweet chocolate and placing it in a medium saucepan over low heat. Stir gently until it's fully melted and smooth, which should take about 5 minutes. Remove it from heat and let the chocolate cool for about 5-10 minutes while you prepare other ingredients.
- In a large mixing bowl, sift together 1 cup of all-purpose flour, ½ cup of Dutch process cocoa powder, ½ teaspoon of baking powder, and ½ teaspoon of salt.
- In a stand mixer bowl, combine ½ cup of unsalted butter, ½ cup of brown sugar, and ¼ cup of granulated sugar. Beat these together at medium speed for about 2 minutes until the mixture is light and fluffy. Gradually add the cooled melted chocolate and 1 teaspoon of pure vanilla extract, mixing for another 2 minutes until fully incorporated.
- Add in 1 large egg and 1 egg yolk to the wet mixture, blending at medium-high speed for about 2 minutes.
- Slowly add the dry ingredient mixture into the chocolate batter, mixing until just combined. Fold in ½ cup of chocolate chips, 1 cup of crushed Oreo pieces, and ¼ cup of Oreo crumbs.
- Cover the mixing bowl with plastic wrap and refrigerate the cookie dough for about 30 minutes while preheating your oven to 350°F (175°C).
- Using a heaping 2-tablespoon cookie scoop, place six dough balls on a lined baking sheet, keeping them spaced apart. Bake the cookies for 13-15 minutes, ensuring they set while still looking soft in the middle.
- Remove the baking sheet from the oven and let the cookies cool on the sheet for about 5 minutes before transferring them to a wire rack.
Leave a Reply