
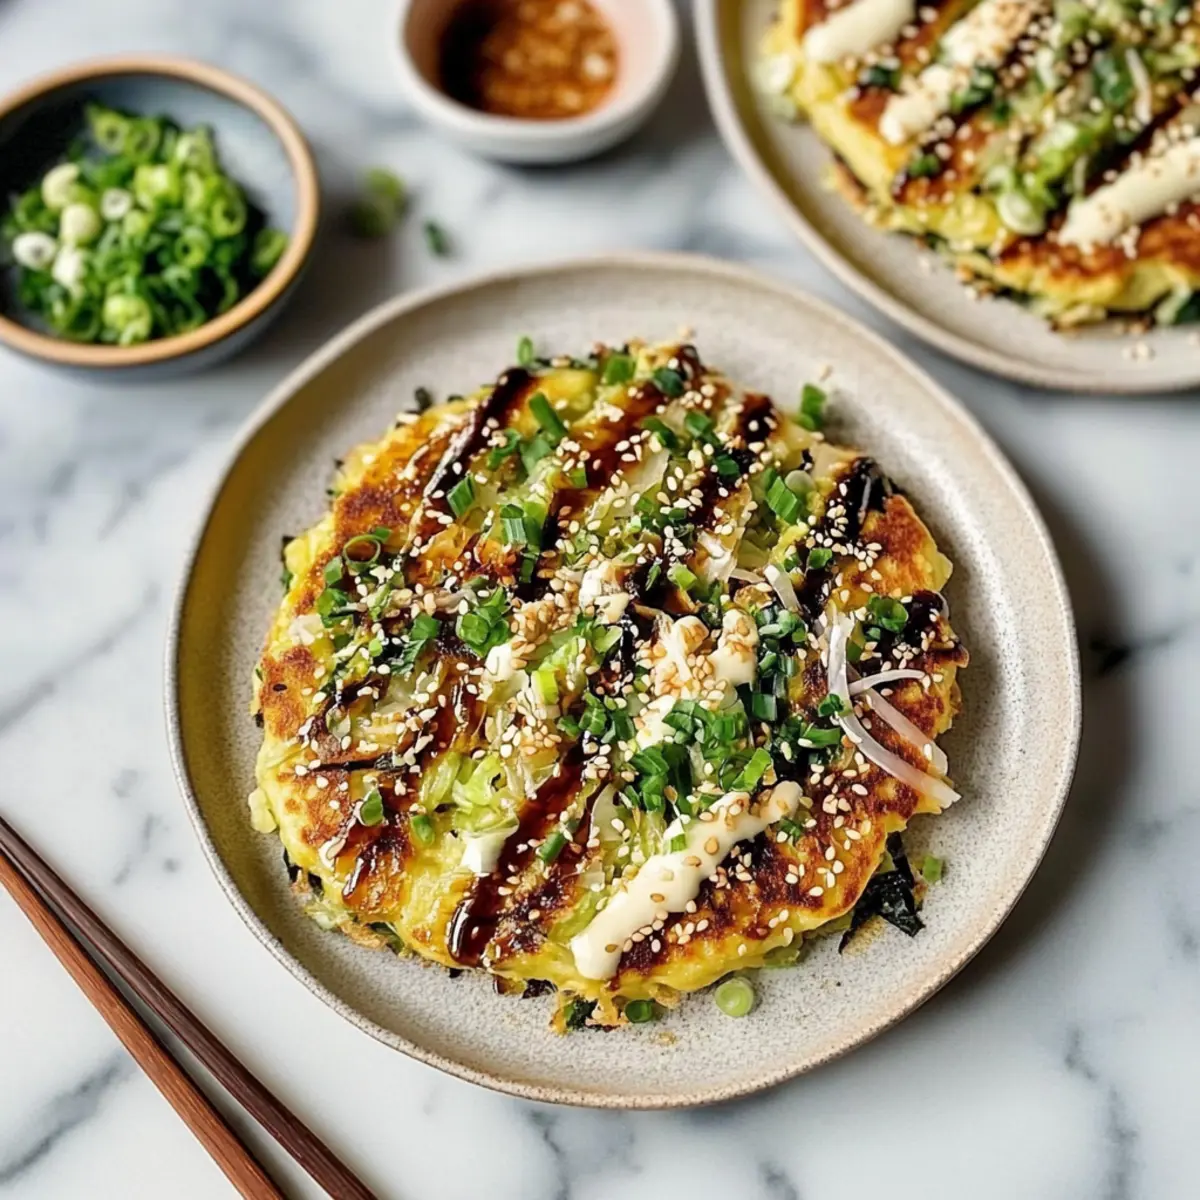
In the heart of Japan, street vendors skillfully flip savory pancakes, enchanting everyone with the tantalizing aroma wafting through the air. Today, I’m excited to share my take on this beloved dish with a Vegetarian Okonomiyaki recipe that’s both quick and delicious—perfect for busy weeknight dinners. With a crispy exterior and a tender, cabbage-packed interior, this savory pancake transforms everyday pantry staples into a satisfying meal in just 25 minutes. What’s even better? It’s a fun dish to customize, allowing you to throw in any leftover veggies you have on hand. Dive into the world of umami-rich flavors and hearty textures with this easy-to-make okonomiyaki that will have everyone asking for seconds. Have you thought about what delightful toppings you’ll create for your batch?
Why is Okonomiyaki the Ultimate Comfort Food?
Quick and Easy: This vegetarian okonomiyaki comes together in just 25 minutes, making it perfect for busy weekdays or a spontaneous culinary adventure.
Endless Customization: Make it your own! With the ability to add any leftover vegetables you have on hand, creativity knows no bounds, as suggested in our make-ahead tips.
Crispy, Tender Perfection: Each bite offers a satisfying contrast, with a golden, crispy exterior enveloping a soft, cabbage-rich center.
Healthy and Wholesome: Packed with fiber and protein, this savory pancake provides a nutritious alternative to typical fast food options, ensuring you stay energized throughout the day.
Family-Friendly Fun: Engage your loved ones in the cooking process—it’s a dish that’s just as enjoyable to make as it is to eat!
Okonomiyaki Ingredients
For the Batter
- Cabbage – Finely shredded for the best texture and bulk.
- Scallions – Fresh, oniony flavor; substitute with green onions if needed.
- Panko Breadcrumbs – Adds a crispy texture; can swap with all-purpose flour for a different taste.
- Sea Salt – Enhances flavor; adjust according to your taste preferences.
- Eggs – Provides binding; ensure they’re well-beaten for a cohesive mixture.
For Cooking
- Extra-virgin Olive Oil – Keeps the pancake from sticking; feel free to use any preferred cooking oil.
For Topping
- Vegan Worcestershire Sauce – Imparts classic flavor; select brands without animal products.
- Mayo – Creamy topping of choice; Kewpie or Sir Kensington’s recommended for authentic flavor.
- Sesame Seeds – Adds a nice crunch and decorative touch.
- Pickled Ginger – Offers a tangy contrast; can replace with quick-pickled vegetables if desired.
- Nori – Brings umami flavor; easy to slice with scissors for convenience.
- Microgreens – Optional garnish for a fresh and vibrant finish.
Step‑by‑Step Instructions for Vegetarian Okonomiyaki
Step 1: Prepare the Vegetable Mixture
In a large mixing bowl, combine 2 cups of finely shredded cabbage and ¼ cup of chopped scallions. Sprinkle in a pinch of sea salt and add ½ cup of panko breadcrumbs. Stir everything together with a wooden spoon until the cabbage and panko are well distributed, creating a colorful, crunchy mixture ready for the next step.
Step 2: Incorporate the Eggs
Gently fold in 2 well-beaten eggs to the vegetable mixture until fully combined. The consistency should be loose and somewhat chunky, with the cabbage still the star of this vegetarian okonomiyaki. If the mixture looks dry, let it sit for about 10 minutes, allowing the cabbage to soften and release some moisture for better binding.
Step 3: Heat the Skillet
Place a nonstick skillet over medium heat and drizzle in 1 tablespoon of extra-virgin olive oil. Allow the oil to heat for about 1-2 minutes until it shimmers slightly. This step is crucial for achieving that perfect crispy edge on your okonomiyaki, so keep a close eye on the skillet as you prepare to cook.
Step 4: Cook the First Pancake
Scoop ¼ cup of the batter into the hot skillet and flatten it gently into a circle about ½ inch thick using the back of a spatula. Let it cook undisturbed for approximately 3-4 minutes, or until the bottom is golden brown. The edges should begin to show some crispiness, bringing out the delightful texture of your okonomiyaki.
Step 5: Flip and Finish Cooking
Carefully flip the pancake using a spatula and cook for another 3-4 minutes on the other side. If the pancake starts to brown too quickly, lower the heat slightly to ensure it’s cooked through while achieving that lovely crispy crust. Repeat this step with the remaining batter, adding more oil to the skillet as needed between pancakes.
Step 6: Add Toppings and Serve
Once cooked, transfer the okonomiyaki to a serving plate and drizzle with vegan Worcestershire sauce and a generous dollop of mayo for a creamy finish. Sprinkle with sesame seeds, garnishing with pickled ginger and strips of nori for added flavor and visual appeal. Serve hot and enjoy this delicious vegetarian okonomiyaki as a satisfying meal!
Make Ahead Options
These vegetarian okonomiyaki are perfect for meal prep enthusiasts! You can prepare the batter up to 24 hours in advance by mixing together the finely shredded cabbage, chopped scallions, panko breadcrumbs, and salt. Keep this mixture covered in the refrigerator to maintain its freshness. When you’re ready to serve, simply fold in the beaten eggs and cook the pancakes in a heated skillet as directed. To ensure optimal quality, avoid combining the wet and dry ingredients until just before cooking; this helps maintain the desired texture. With these make-ahead tips, you’ll have satisfying, homemade okonomiyaki ready in no time, making weeknight dinners a breeze!
What to Serve with Vegetarian Okonomiyaki
Pair your savory pancake with these delightful sides and drinks for a complete meal experience.
-
Crispy Tempura Vegetables: These light and crunchy bites provide a contrast in texture that complements the softness of okonomiyaki beautifully. Try a mix of sweet potatoes, zucchini, and bell peppers for a colorful platter.
-
Miso Soup: Warm and comforting, this traditional soup adds an umami punch while balancing the flavors of the okonomiyaki. Infused with seaweed and tofu, it’s a soothing side that enhances your meal.
-
Edamame Beans: Lightly salted and steamed, these fresh little pods are not only nutritious but also a fun finger food. They bring a lovely green pop to your plate, perfect for nibbling between bites of pancake.
-
Pickled Vegetables: Tangy and vibrant, a medley of pickled radishes and cucumbers refreshes the palate between savory bites. Their crunch and acidity contrast perfectly with the rich flavors of the okonomiyaki.
-
Garlic Soy Dipping Sauce: Whip up a quick sauce using soy sauce, minced garlic, and a hint of sesame oil for drizzling. It enhances every bite and adds a layer of flavor that’s simply irresistible.
-
Japanese Green Tea: A cup of shimmery green tea offers a light and refreshing sip alongside your meal. Its mild flavor and antioxidants make it a perfect pairing for this hearty dish.
-
Simple Cucumber Salad: Toss sliced cucumbers in rice vinegar, sugar, and sesame seeds for a light, refreshing salad. The brightness of this dish cuts through the richness of the okonomiyaki, creating a harmonious balance.
-
Chocolate Mochi Dessert: To finish on a sweet note, these chewy, rice cake treats filled with chocolate are a delightful way to end the meal. Their sweetness contrasts beautifully with the savory pancakes, making each bite memorable.
How to Store and Freeze Okonomiyaki
Fridge: Store leftover okonomiyaki in an airtight container for up to 2 days. Keep them separate if possible to maintain crispiness.
Freezer: For longer storage, freeze individual pieces wrapped tightly in plastic wrap and then in foil or a freezer-safe bag for up to 1 month.
Reheating: When ready to enjoy, reheat frozen okonomiyaki in a skillet over medium heat for about 5 minutes on each side until heated through and crispy.
Make-Ahead Tip: Prepare the batter in advance and refrigerate it for up to 1 day. Cook fresh okonomiyaki when you’re ready for a delicious weeknight treat!
Expert Tips for the Best Okonomiyaki
-
Uniform Shreds: Using a mandoline ensures even shreds of cabbage, leading to a perfectly cooked pancake every time.
-
Moisture Matters: If the mixture seems dry, give it a 10-minute rest before cooking. This softens the cabbage, enhancing the final texture of your okonomiyaki.
-
Control the Heat: Cooking over lower heat allows the pancakes to cook through without burning. Keep a watchful eye to maintain that golden-brown crust!
-
Gentle Flipping: Be kind when flipping your pancakes. A gentle touch maintains their structure and prevents them from falling apart.
-
Topping Creativity: Don’t hesitate to mix and match toppings! Experimenting with different flavors will personalize the okonomiyaki experience for you and your loved ones.
Okonomiyaki Variations & Substitutions
Feel free to personalize your okonomiyaki experience with these delightful twists, enhancing flavor and texture!
-
Dairy-Free: Replace traditional mayo with a vegan option for a creamy topping without dairy.
Add a tangy cashew cream or avocado to create a rich flavor profile that tantalizes the taste buds. -
Gluten-Free: Swap panko with rice flour or almond flour to make this dish gluten-free.
Both options offer a unique texture while still allowing the okonomiyaki to hold its shape beautifully. -
Extra Veggies: Toss in grated zucchini or chopped bell peppers for added nutritional benefits.
These not only enhance the flavor but also add vibrant colors to your savory pancake, making it even more appealing! -
Spicy Kick: For those who love heat, include a teaspoon of Sriracha or chili flakes in the batter.
A dash of heat elevates the flavor profile and adds excitement with every bite—perfect for spice enthusiasts! -
Asian Fusion: Use hoisin sauce in place of Worcestershire for a sweet and savory adventure.
This substitution adds a delightful twist, combining traditional flavors with a modern approach that’s bound to impress. -
Protein Boost: Add cubed tofu or edamame to increase the protein content and make it more filling.
This not only amps up the nutritional value but creates a hearty meal that keeps you satisfied longer. -
Herbal Infusion: Experiment with fresh herbs like cilantro or basil mixed into the batter.
These aromatic additions can transform your okonomiyaki, infusing it with fresh flavors that brighten up this classic dish. -
Savory Seafood: For non-vegetarian options, mix in some cooked shrimp or scallops.
Seafood brings an exciting layer of umami, tantalizing the palate and transforming your okonomiyaki into a gourmet delight!
Each of these variations invites you to explore and play with flavors, reminding you to enjoy the journey of cooking. If you need inspiration for your next batch of toppings, check out our helpful serving suggestions and make this dish uniquely yours!
Okonomiyaki Recipe FAQs
What type of cabbage is best for okonomiyaki?
Absolutely! Finely shredded green cabbage is ideal for okonomiyaki because it provides both bulk and texture. Look for fresh, crisp heads without any dark spots or wilting. If you want to mix it up, Napa cabbage is also a great alternative!
How should I store leftover okonomiyaki?
You can store leftover okonomiyaki in an airtight container in the refrigerator for up to 2 days. Just separate the pancakes with parchment paper to help maintain their crispiness. When you’re ready to indulge again, simply reheat them in a skillet to revive that delightful texture!
Can I freeze okonomiyaki?
Yes, indeed! To freeze, wrap each cooked okonomiyaki tightly in plastic wrap, then in foil or a freezer-safe bag. They can stay fresh in the freezer for up to 1 month. When you’re ready to enjoy, just reheat them in a skillet over medium heat for about 5 minutes on each side until they’re warmed through and crispy.
What should I do if the mixture seems too dry?
If your okonomiyaki mixture appears dry, don’t worry! Let it sit for about 10 minutes before cooking. This extra time allows the shredded cabbage to soften and release moisture, making it easier to form a batter that adheres well together, resulting in a deliciously tender pancake.
Are there any dietary considerations for okonomiyaki?
Yes! This vegetarian okonomiyaki recipe omits meat and seafood, making it a great option for those following a vegetarian diet. If you have allergies, be cautious with the sauces used (like the vegan Worcestershire sauce) and choose brands that meet your dietary needs. For gluten-free diets, you can try substituting panko breadcrumbs with gluten-free breadcrumbs.
Can I customize the toppings on okonomiyaki?
The more the merrier! Toppings are entirely your choice, so feel free to experiment. Besides the classic mayo and Worcestershire sauce, you can add hoisin sauce, the sprightly zing of fresh cilantro, or even switch out the vegetables based on what you have on hand. Get creative and enjoy your personalized okonomiyaki experience!
Savory Okonomiyaki: A Fun Vegetarian Pancake Adventure
Ingredients
Equipment
Method
- In a large mixing bowl, combine finely shredded cabbage and chopped scallions. Sprinkle in sea salt and add panko breadcrumbs. Stir together to create a crunchy mixture.
- Gently fold in the well-beaten eggs until fully combined; allow the mixture to sit for about 10 minutes.
- Place a nonstick skillet over medium heat and drizzle in olive oil. Allow the oil to heat until it shimmers slightly.
- Scoop batter into the skillet and flatten into a circle about ½ inch thick. Cook undisturbed for approximately 3-4 minutes until golden brown.
- Carefully flip the pancake and cook another 3-4 minutes on the other side. Repeat with remaining batter, adding more oil as needed.
- Transfer cooked okonomiyaki to a serving plate and drizzle with vegan Worcestershire sauce and mayo. Sprinkle with sesame seeds and garnish with pickled ginger and nori.
Leave a Reply