
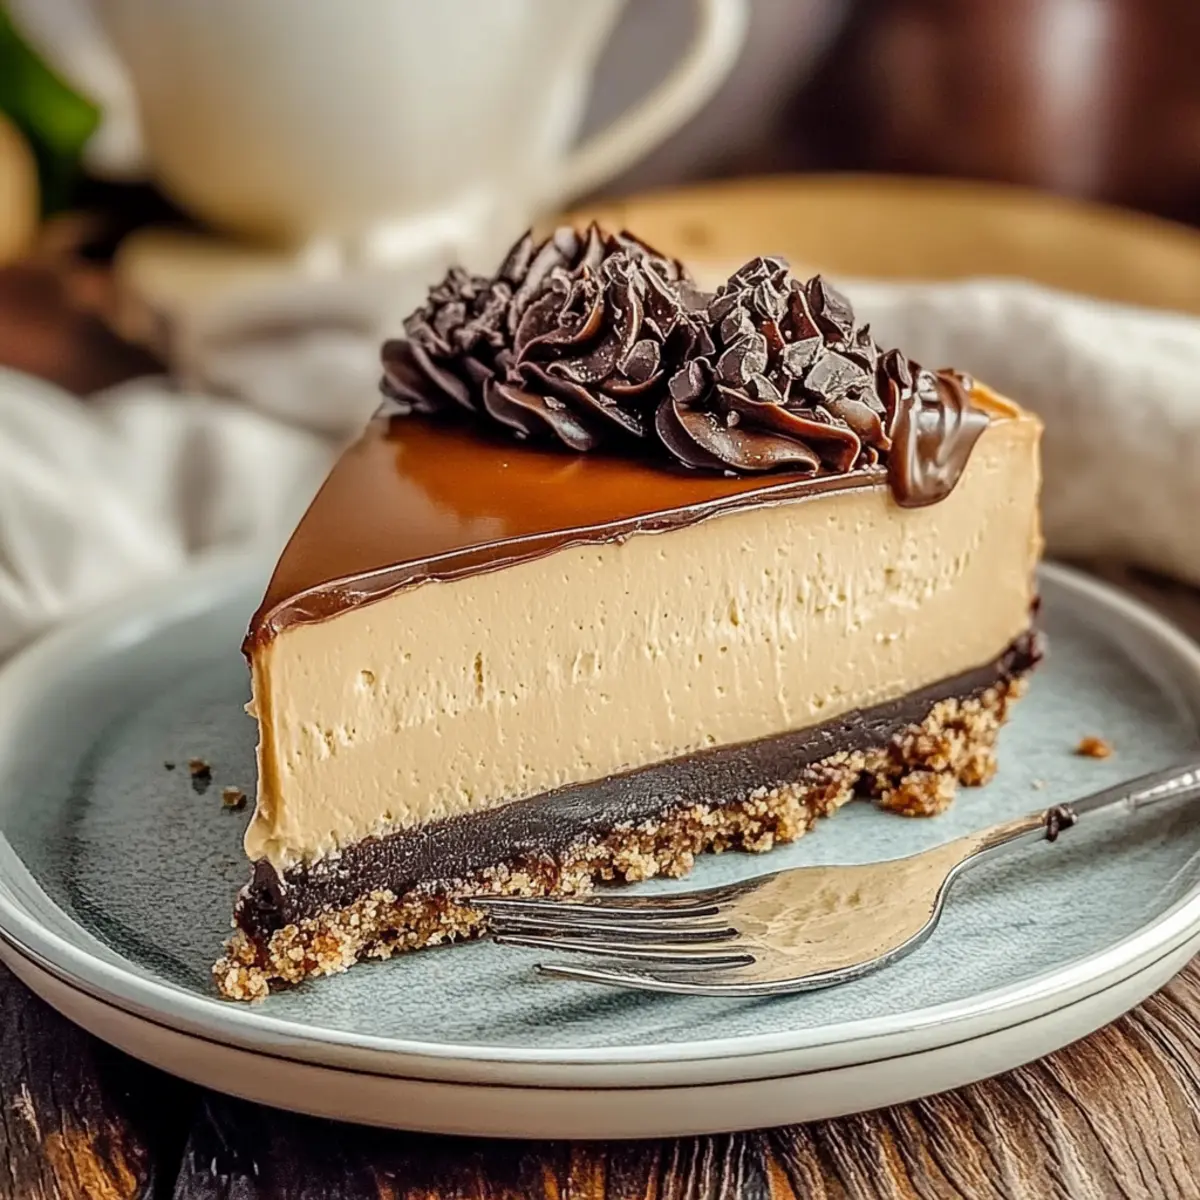
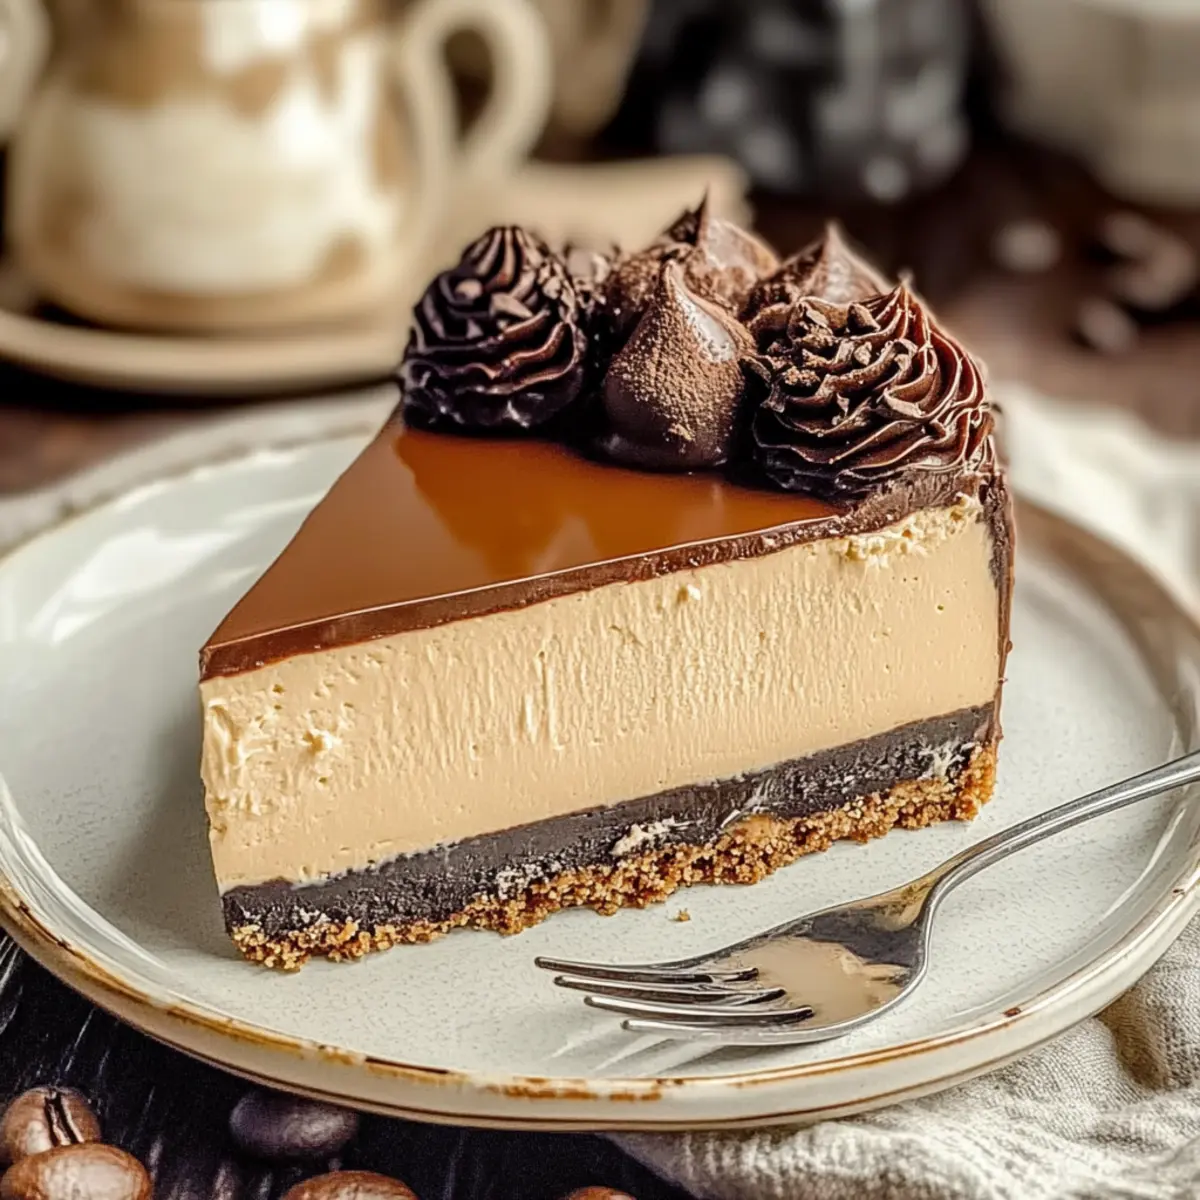
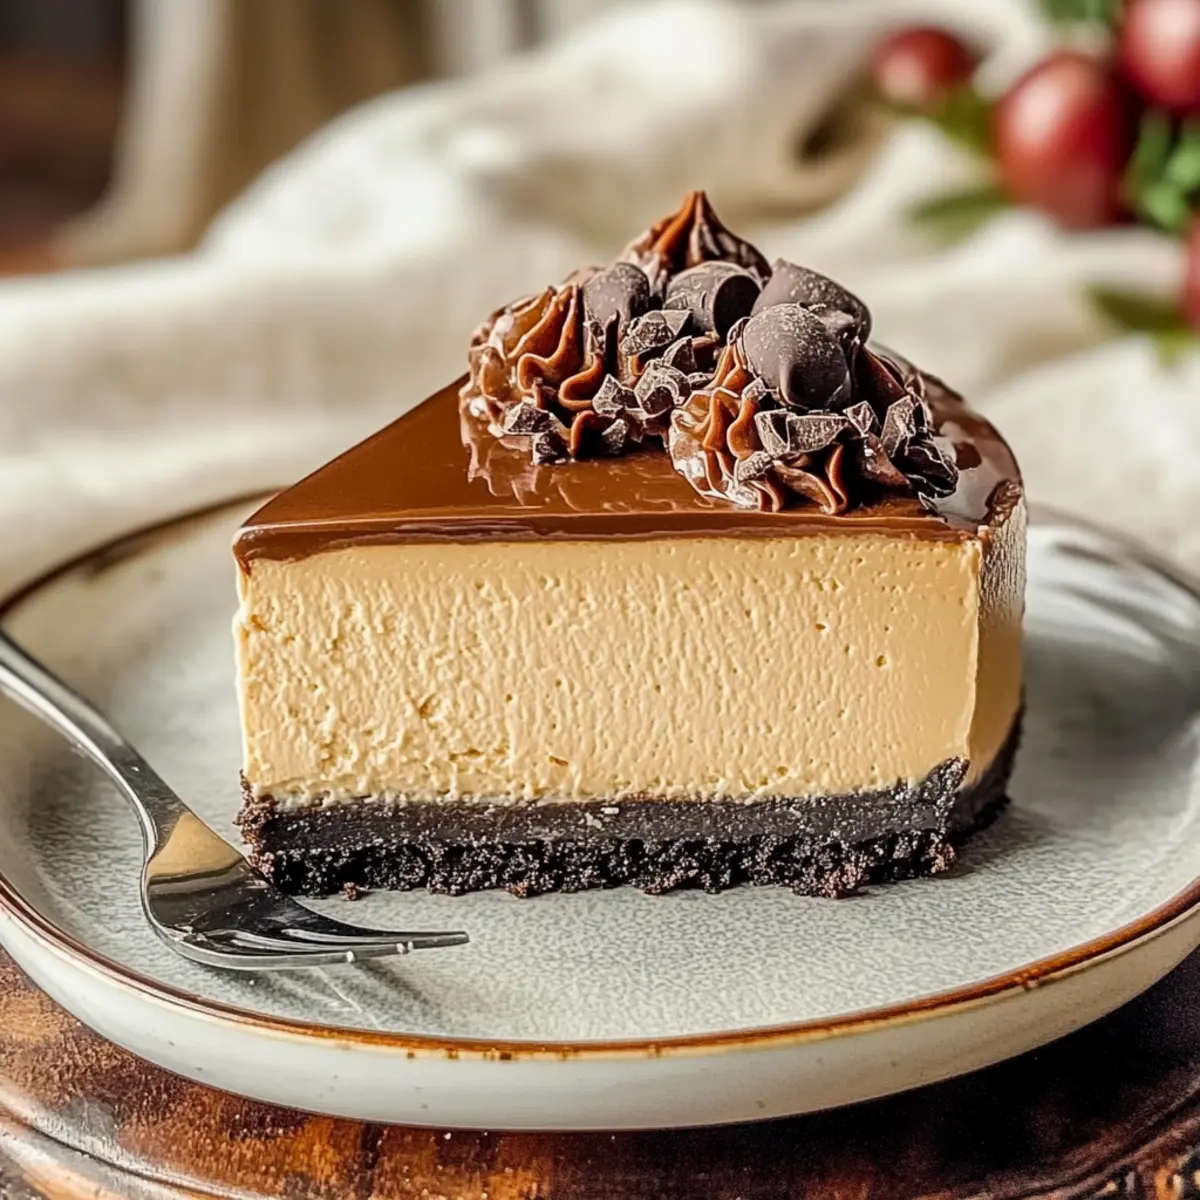
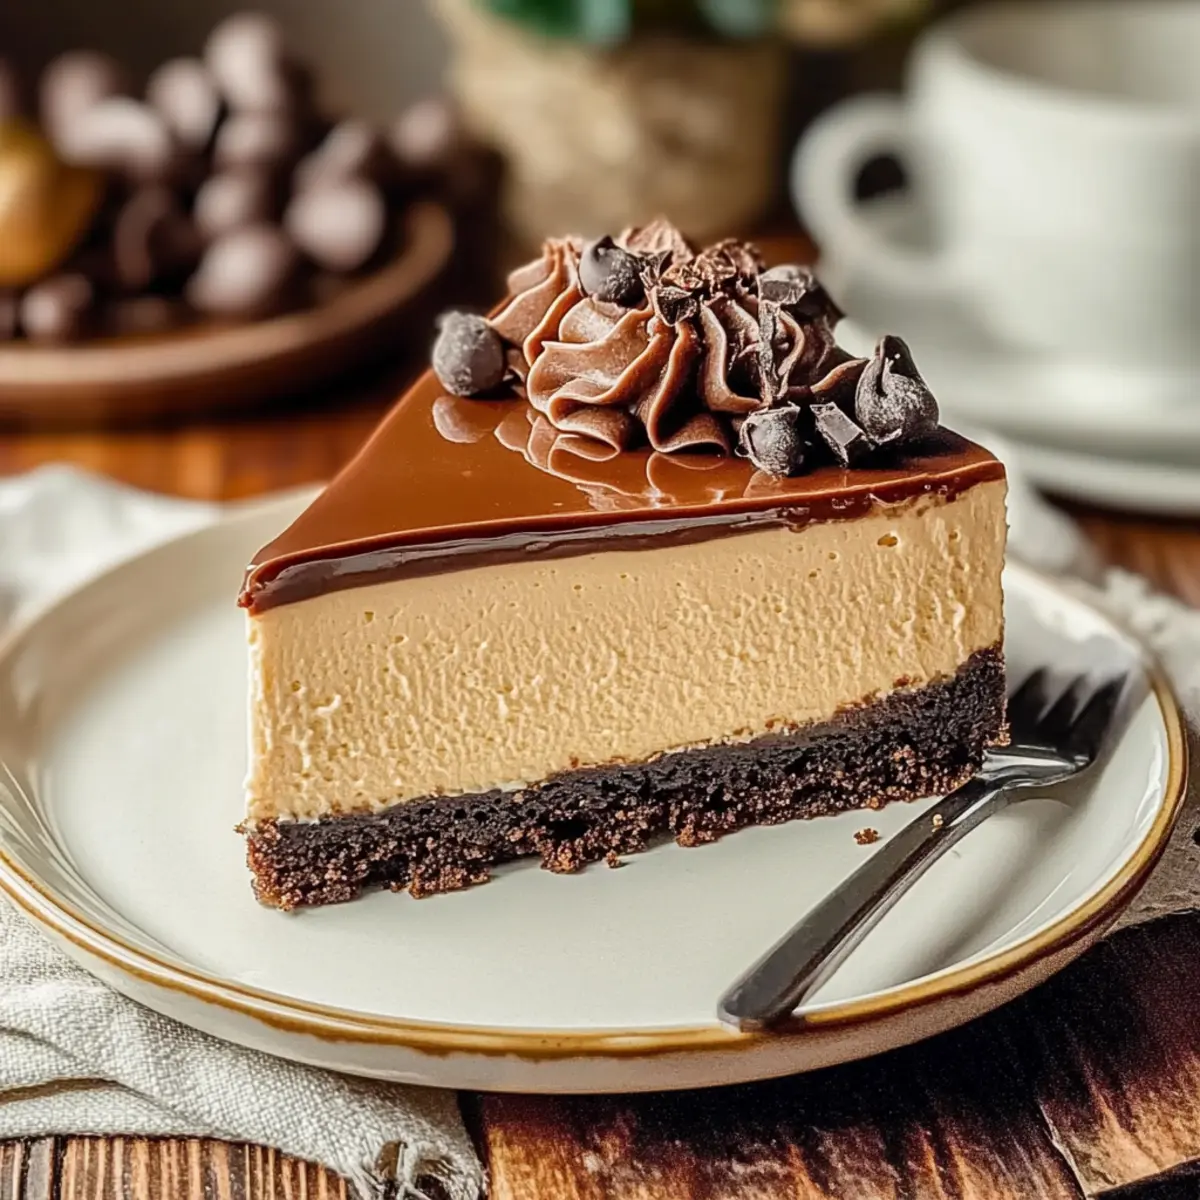
As I sifted through my coffee cupboard, a spark of inspiration hit me: why not create a dessert that marries my love for coffee with the creamy delight of cheesecake? This Decadent Coffee Cheesecake with Chocolate Ganache does just that, boasting an irresistible combination of smooth, velvety texture and rich coffee flavor. Not only is it a showstopper for gatherings, but it’s also incredibly easy to customize, offering gluten-free and dairy-free options for those with dietary preferences. Imagine serving this luxurious slice of heaven at your next celebration and watching your friends’ faces light up with delight! Are you ready to elevate your dessert game? Let’s dive into this mouthwatering recipe and whip up a treat that will linger in your memory long after the last bite!
Why Is This Coffee Cheesecake Special?
Rich, Aromatic Delight: This cheesecake beautifully blends creamy textures with deep coffee notes that will excite your taste buds.
Versatile Variations: Whether you’re gluten-free or prefer a dairy-free option, this recipe adapts seamlessly to your needs.
Impressive Yet Simple: With straightforward steps, even novice bakers can create a stunning dessert that looks like it’s from a bakery!
Gourmet Appeal: The silky chocolate ganache adds a luxurious touch, making it a perfect centerpiece for any gathering.
Make Ahead Magic: Perfect for entertaining, you can prepare it a day in advance, ensuring stress-free hosting!
Imagine presenting this indulgent treat alongside a slice of Wild Blueberry Coffee or a classic Velvet Strawberry Cheesecake for a dessert table that dazzles.
Coffee Cheesecake Ingredients
For the Crust
• Oreos (24 cookies) – Perfect for a sweet, crunchy base; swap with gluten-free cookies if needed.
• Salted Butter (6 tablespoons) – Binds crust ingredients while enhancing flavor; feel free to use unsalted for a less intense taste.
• Espresso Powder (1 tablespoon, optional) – Boosts coffee flavor in the crust; omit if you prefer a milder taste.
For the Filling
• Cream Cheese (16 ounces) – The heart of the cheesecake providing rich creaminess; full-fat offers the best texture.
• Granulated Sugar (3/4 cup) – Sweetens the filling; a sugar alternative can keep it lighter if desired.
• Coffee Extract (1 teaspoon) – Enriches the coffee essence; substitute with strong brewed coffee for an alternative flavor.
• Large Eggs (3, room temperature) – Brings structure and richness; make sure they’re at room temperature for seamless blending.
• Heavy Cream (1 cup) – Adds lusciousness to the filling; use a non-dairy alternative for a dairy-free cheesecake.
• Cold Brew Coffee (1/2 cup) – Infuses delightful coffee flavor; strong brewed coffee works wonderfully as a substitute.
• Lemon Juice (1 tablespoon) – Balances sweetness and enhances texture; vinegar can be swapped in if necessary.
• Salt (1/4 teaspoon) – Elevates the flavors of the filling.
• All-Purpose Flour (1/4 cup, optional) – Helps set the filling; omit for a gluten-free version.
For the Ganache
• Bittersweet Chocolate (8 ounces) – The star of the ganache, providing a rich, chocolatey kick; use milk chocolate for a sweeter version.
• Powdered Sugar (1 cup, optional) – Sweetens and thickens the ganache; feel free to leave it out if you’re watching sugar intake.
• Vanilla Extract (1 teaspoon, optional) – Adds depth to the ganache; can be omitted if you want to keep it simple.
For Garnish (Optional)
• Chocolate curls, sprinkles, or chocolate-covered espresso beans – Dress up your cheesecake with your favorite toppings for extra flair!
Dive into making this Coffee Cheesecake masterpiece, guaranteed to impress at any gathering!
Step‑by‑Step Instructions for Decadent Coffee Cheesecake with Chocolate Ganache
Step 1: Preheat and Prepare Pan
Begin by preheating your oven to 300°F (150°C). Prepare your 9-inch springform pan by wrapping the outside with aluminum foil to create a water-tight seal. This helps prevent any moisture from the water bath affecting the crust during baking. Set the pan aside while you prepare the crust mixture.
Step 2: Make the Crust
In a mixing bowl, combine 24 crushed Oreos with 6 tablespoons of melted salted butter and 1 tablespoon of optional espresso powder. Stir until the mixture resembles wet sand. Press this mixture firmly into the bottom of the prepared springform pan, creating an even layer. Bake the crust in the preheated oven for 10 minutes, then remove and let it cool while you work on the cheesecake filling.
Step 3: Blend the Filling
In a large mixing bowl, use an electric mixer to beat 16 ounces of cream cheese and 3/4 cup of granulated sugar until the mixture is smooth and creamy. Gradually add in 1 teaspoon of coffee extract, mixing well. Next, incorporate 3 large room-temperature eggs one at a time, ensuring each is fully blended before adding the next. This creates a rich base for your decadent coffee cheesecake.
Step 4: Combine Remaining Ingredients
Add 1 cup of heavy cream, 1/2 cup of cold brew coffee, 1 tablespoon of lemon juice, 1/4 teaspoon of salt, and 1/4 cup of optional flour to the cream cheese mixture. Beat until thoroughly combined and smooth, with no lumps remaining. This filling will be rich and creamy, packing a delightful coffee flavor that pairs beautifully with the crust.
Step 5: Bake the Cheesecake
Carefully pour the filling over the cooled crust in the springform pan. Place the springform pan into a larger baking dish and fill the dish with hot water until it reaches halfway up the sides of the springform. Bake in the preheated oven for 75-85 minutes, or until the center is set but still slightly jiggles when shaken.
Step 6: Cool in the Oven
Once baked, turn off the oven, slightly crack the oven door, and let the cheesecake cool in the oven for 20 minutes. This gentle cooling process helps prevent cracking and ensures a smooth texture. After cooling, remove the cheesecake from the oven and allow it to cool at room temperature for an additional hour.
Step 7: Chill the Cheesecake
Cover the cooled cheesecake securely with plastic wrap and refrigerate for at least 8 hours, or preferably overnight. This chilling time helps the cheesecake set completely and allows the flavors to meld beautifully, ensuring a rich and indulgent experience when served.
Step 8: Prepare the Chocolate Ganache
To make the ganache, heat 1 cup of heavy cream in a saucepan until just simmering. Pour it over 8 ounces of chopped bittersweet chocolate in a heatproof bowl. Stir until the chocolate is completely melted and the mixture is smooth. Let it cool slightly before drizzling over the chilled cheesecake for a luscious finish.
Step 9: Garnish and Serve
If desired, whip additional heavy cream with pudding mix and powdered sugar until soft peaks form. Pipe this whipped cream onto the cheesecake for added decoration. Finish off with optional toppings like chocolate curls, sprinkles, or chocolate-covered espresso beans. Your decadent coffee cheesecake is now ready to impress at any gathering!
Tips for the Best Coffee Cheesecake
• Room Temperature Ingredients: Ensure your eggs and cream cheese are at room temperature for a creamy filling and to prevent lumps.
• Water Bath Benefits: Using a water bath while baking will keep the cheesecake moist and prevent cracking during the baking process.
• Chilling Time is Key: Don’t rush the refrigeration; letting the cheesecake chill overnight allows flavors to meld and enhances the overall texture.
• Layering the Ganache: Avoid pouring hot ganache onto the cheesecake; let it cool slightly first to ensure it doesn’t melt the filling.
• Don’t Skip the Lemon Juice: This ingredient balances the sweetness and adds essential flavor; omitting it could make your cheesecake overly rich.
Experiment with these tips for the best coffee cheesecake experience!
What to Serve with Decadent Coffee Cheesecake with Chocolate Ganache
Imagine the perfect finale to your dinner gathering, each bite sparking joy and satisfaction filled with laughter and warmth.
-
Rich Coffee Gelato: This creamy treat echoes the coffee flavors in the cheesecake, offering a smooth and satisfying contrast. A scoop beside your slice enhances the dessert experience effortlessly.
-
Fresh Berries: A medley of raspberries or strawberries adds a burst of freshness, balancing the cheesecake’s richness. Their tartness offers a delightful palate cleanser that keeps flavors vibrant.
-
Crunchy Biscotti: Crunchy, almond-flavored biscotti create a lovely texture contrast, perfect for dipping alongside your slice of cheesecake. Pairing these provides a satisfying crunch, enhancing every bite.
-
Chocolate-Coffee Stout: A glass of this rich, dark beer perfectly pairs with the coffee cheesecake’s robust flavors, creating a decadent duo. The stout’s maltiness will complement the chocolate ganache beautifully.
-
Classic Espresso: Serve a shot of strong espresso on the side for coffee lovers. The bold flavor of espresso enhances the cheesecake’s coffee notes, creating an indulgent experience.
-
Creamy Whipped Topping: A simple dollop of lightly sweetened whipped cream adds a soft, airy texture to each bite. It brings a lightness that contrasts the cheesecake’s dense creaminess.
-
Raspberry Coulis: Drizzle this rich, tart sauce on the plate for a beautiful presentation and an additional layer of flavor. Its brightness amplifies the coffee cheesecake’s depth while making it visually stunning.
-
Caramel Sauce: Drip a little salted caramel on top to introduce a sweet and salty twist. This sauce rounds out the flavors beautifully, adding extra indulgence to each delightful bite.
-
Chocolate-Covered Espresso Beans: These little treats are perfect for a finishing touch, providing an extra crunch and an energizing coffee kick that ties everything together. They add whimsy that your guests will love.
How to Store and Freeze Coffee Cheesecake
Refrigerator: Store your coffee cheesecake tightly wrapped in plastic wrap or in an airtight container for up to 1 week. This helps maintain its creamy texture and flavor.
Freezer: If you want to enjoy it later, freeze the cheesecake for up to 3 months. Be sure to wrap it securely in plastic wrap and then foil to prevent freezer burn.
Thawing: To enjoy your frozen coffee cheesecake, transfer it to the fridge for 24 hours to thaw. Avoid microwaving, as this can alter its texture.
Serving: Once thawed, add the chocolate ganache and any desired toppings just before serving to keep it fresh and inviting!
Variations & Substitutions for Coffee Cheesecake
Feel free to get creative with this delightful cheesecake, tailoring it to suit your tastes and dietary needs!
- Gluten-Free Crust: Swap Oreos with gluten-free cookies like almond flour or gluten-free graham crackers for a delectable base.
- Dairy-Free Delight: Use non-dairy cream cheese and coconut cream in place of regular cream cheese and heavy cream for a dairy-free treat.
- Mocha Boost: Mix in 1 to 2 tablespoons of cocoa powder or chocolate syrup for a rich mocha flavor that complements the coffee perfectly.
- Nutty Crunch: Incorporate crushed nuts like pecans or walnuts into the crust for an added crunch and delightful nutty flavor.
- Fruit Infusion: Top with fresh raspberries or strawberries for a fruity twist that balances the richness of the cheesecake.
- Spicy Kick: Add a pinch of cinnamon or nutmeg to the filling for a warm spice note that pairs beautifully with coffee.
- Decadent Caramel: Drizzle caramel sauce on top of the ganache for a sweet, gooey finish that’s sure to impress!
- Layered Flavors: For a unique presentation, create a marbled effect by swirling some extra chocolate or coffee filling into the batter before baking.
With all these variations, you can create something truly personal! And if you’re looking for more delicious recipes, try serving this cheesecake alongside a slice of Apple Crisp Mini Cheesecakes or indulge in a slice of Velvet Strawberry Cheesecake.
Make Ahead Options
Preparing the Decadent Coffee Cheesecake ahead of time is a game-changer for busy home cooks! You can make the crust and filling up to 24 hours in advance; simply assemble the cheesecake and refrigerate it overnight (this enhances the flavor, too!). For the ganache, it can be prepared and stored in an airtight container for up to 3 days. When ready to serve, just reheat the ganache gently to a pourable consistency, drizzle it over the cheesecake, and add your favorite toppings. To maintain quality, always cover the cheesecake tightly in plastic wrap to prevent drying out. With this make-ahead strategy, you can impress your guests with minimal last-minute effort!
Decadent Coffee Cheesecake Recipe FAQs
How do I select the best coffee for my cheesecake?
For the best flavor, choose a high-quality coffee or espresso powder that’s fresh and aromatic. Look for options that don’t have dark spots or an off smell. If you prefer a milder taste, using brewed coffee instead of espresso powder can be a delightful alternative.
What’s the best way to store leftover cheesecake?
Absolutely! Wrap your leftover coffee cheesecake tightly in plastic wrap or place it in an airtight container. Store it in the refrigerator for up to 1 week. If you need to save it for longer, you can freeze it for up to 3 months. Just remember to thaw it in the fridge overnight before enjoying.
Can I freeze my coffee cheesecake? If so, how?
Certainly! To freeze your decadent coffee cheesecake, follow these steps:
- Allow the cheesecake to chill completely in the fridge.
- Wrap it tightly in plastic wrap, then in aluminum foil to prevent freezer burn.
- Label and date the package, then place it in the freezer. When you’re ready to enjoy, transfer it to the fridge for 24 hours to thaw. It will taste almost as fresh as the day you made it!
What if my cheesecake cracks during baking?
Very! If you notice cracks in your cheesecake, don’t panic! It usually happens due to rapid temperature changes. To prevent this in the future, ensure you’re using a water bath for even baking, and allow the cheesecake to cool gradually in the oven with the door slightly open. If cracks do occur, you can cover them up beautifully with the chocolate ganache!
Are there any dietary considerations for this recipe?
Indeed! This coffee cheesecake can easily cater to dietary preferences. To make it gluten-free, simply substitute the Oreos with gluten-free cookies and omit the flour. For a dairy-free option, use non-dairy cream cheese and heavy cream alternatives. These adjustments will still yield a delicious cheesecake everyone can enjoy!
Can my pet enjoy a small piece of this cheesecake?
Not this one! Due to the ingredients like cream cheese, sugar, and chocolate, it’s best to keep this coffee cheesecake away from pets. Most desserts are not suitable for them, so it’s safer to treat them with pet-friendly snacks instead.
Indulge in Decadent Chocolate Coffee Cheesecake Bliss
Ingredients
Equipment
Method
- Preheat your oven to 300°F (150°C) and prepare your springform pan with aluminum foil.
- Make the crust by combining crushed Oreos, melted butter, and optional espresso powder; press into the pan.
- Blend cream cheese and sugar until smooth, then gradually mix in coffee extract and eggs.
- Combine heavy cream, cold brew coffee, lemon juice, salt, and optional flour into the cream cheese mixture.
- Bake the cheesecake in a water bath for 75-85 minutes, until slightly jiggly.
- Cool in the oven with the door cracked for 20 minutes, then let it cool at room temperature for an hour.
- Refrigerate the cheesecake for at least 8 hours, preferably overnight.
- Prepare the ganache by heating heavy cream and pouring it over chopped chocolate, stirring until smooth.
- Garnish with whipped cream and optional toppings before serving.
Leave a Reply