
As the vibrant colors of spring awaken, I’m reminded of joyful gatherings filled with laughter and creativity. This Easter Cake in a Jar recipe captures that spirit perfectly, transforming the classic dessert into an eye-catching treat that’ll have everyone at your table smiling with delight. Not only is this fun and festive dessert easy to make, but it also serves as a whimsical centerpiece for any Easter celebration. With its layers of colorful cake and fluffy frosting, it’s a treat both kids and adults will adore. Imagine the thrill of each spoonful revealing delightful surprises, making it a hit at your holiday brunch! Ready to whip up something that will bring joy to your festivities? Let’s embark on this colorful culinary adventure together!
Why is This Easter Cake in a Jar Special?
Fun and Festive: This colorful dessert will bring smiles to faces young and old, making it perfect for family gatherings or Easter brunch. Eye-Catching Presentation: Layered in jars, it creates a visual delight that’s sure to impress your guests. Easy to Make: With simple ingredients and straightforward steps, even beginner bakers can create a masterpiece. Creative Customization: Feel free to add your favorite mix-ins or decorations, like fresh fruits or edible flowers! Pair it with a warm drink, such as coffee or tea, for an unforgettable dessert experience. Kid-Friendly Fun: Involve the little ones in the decorating process for a memorable family activity. Enjoy the festive spirit with this delightful take on cake!
Easter Cake In A Jar Ingredients
Get ready to pour some color into your Easter festivities with this delightful dessert!
For the Cake
- White Cake Mix – serves as the base of the cake; just follow the package instructions for a fluffy texture.
- Food Coloring – adds vibrant hues of pink, yellow, teal, and purple; use gel or liquid for best results.
For the Frosting
- White Frosting – provides sweetness and moisture; feel free to choose store-bought or whip up a homemade version.
For Decoration
- Edible Easter Grass – brings a festive touch; you can swap it with shredded coconut or colored sugar if desired.
- Jelly Bean Easter Eggs – fun topping for added whimsy; replace with chocolate eggs for a different sweet surprise.
- Optional: Easter Sprinkles – extra decorative flair for your frosting; a little shimmer makes everything better!
For Serving
- 4 Jars (4-6 oz) – ideal containers for your layered creation; any small glass or plastic jars will do the trick.
Embrace the joy of spring celebrations with this vibrant Easter Cake In A Jar recipe, and indulge in a dessert that’s just as delightful to look at as it is to eat!
Step‑by‑Step Instructions for Easter Cake in a Jar Recipe
Step 1: Prepare the Cake Batter
Begin by preparing the white cake mix according to the package instructions in a large mixing bowl. Once mixed, divide the batter evenly into four smaller bowls. Add a few drops of food coloring to each bowl—think vibrant pinks, yellows, teals, and purples. Stir well until the colors are vivid, creating a fun, rainbow-like batter.
Step 2: Bake the Cakes
Preheat your oven to 350°F (175°C). Line a cupcake tin with papers and pour each colored batter into the cups, filling them about two-thirds full. Bake in the preheated oven for 18–20 minutes or until a toothpick inserted into the center comes out clean. Allow the cupcakes to cool completely on a wire rack before moving to the next step.
Step 3: Crumble the Cupcakes
Once the cupcakes are completely cooled, carefully remove them from their liners. Place each color into separate bowls and crumble them into small pieces using your hands or a fork—maintain the color separation for that beautiful layered effect in the jars. This process is a fun way to bring out the vibrant colors!
Step 4: Prepare the Frosting
If using store-bought frosting, simply give it a good stir to make it creamy. For homemade frosting, follow your favorite recipe until light and fluffy. Transfer the frosting into a piping bag or a zip-top plastic bag with one corner snipped off—this will make layering it in the jars easier and mess-free.
Step 5: Layer the Jars
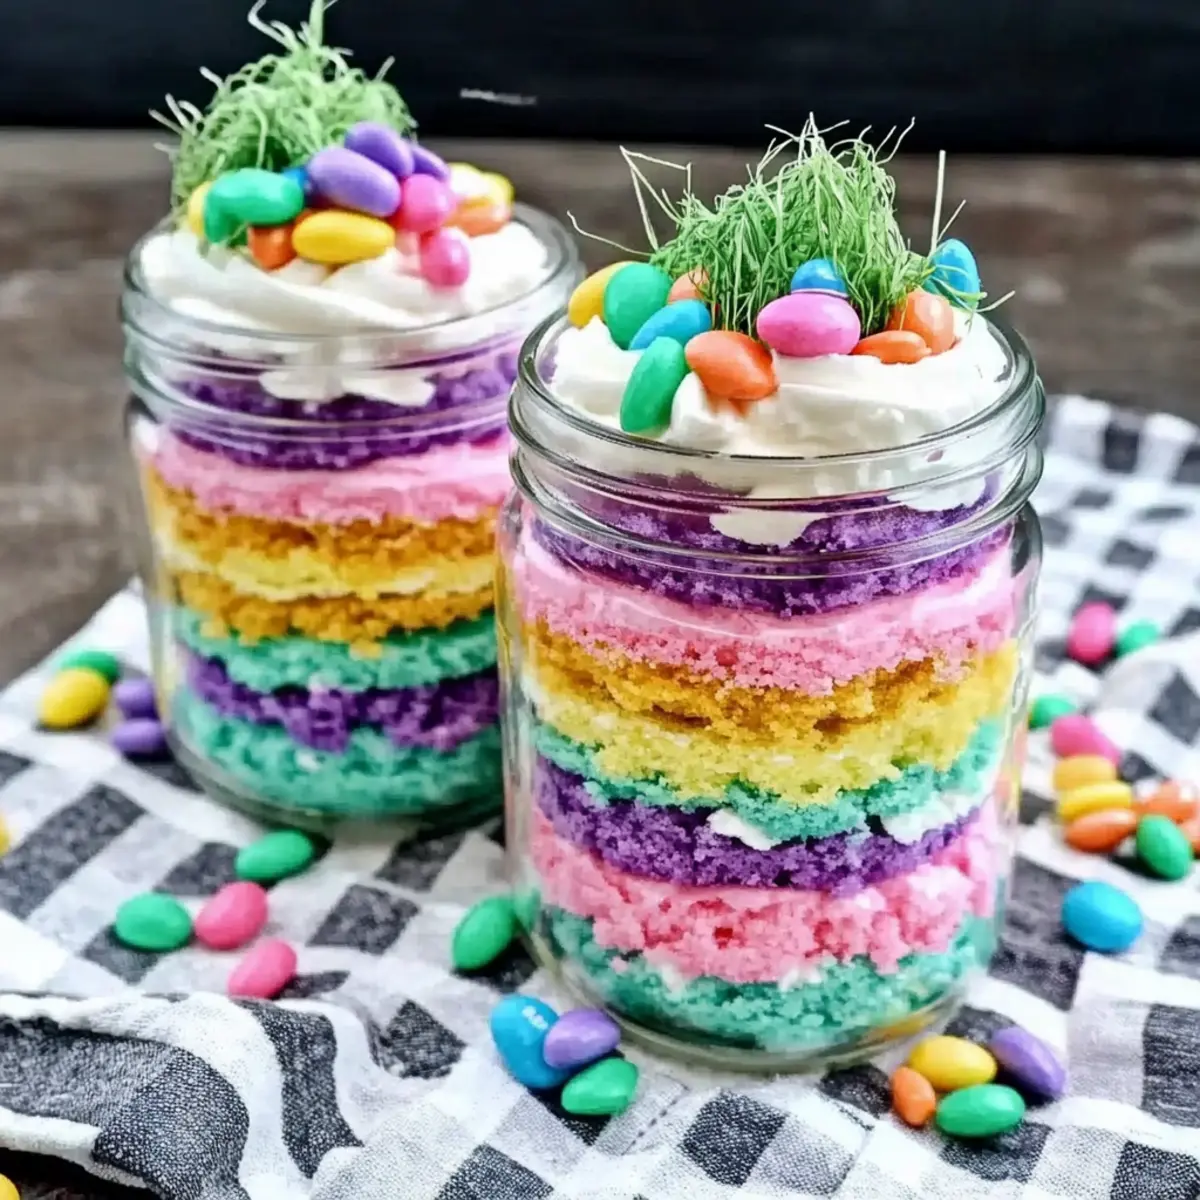
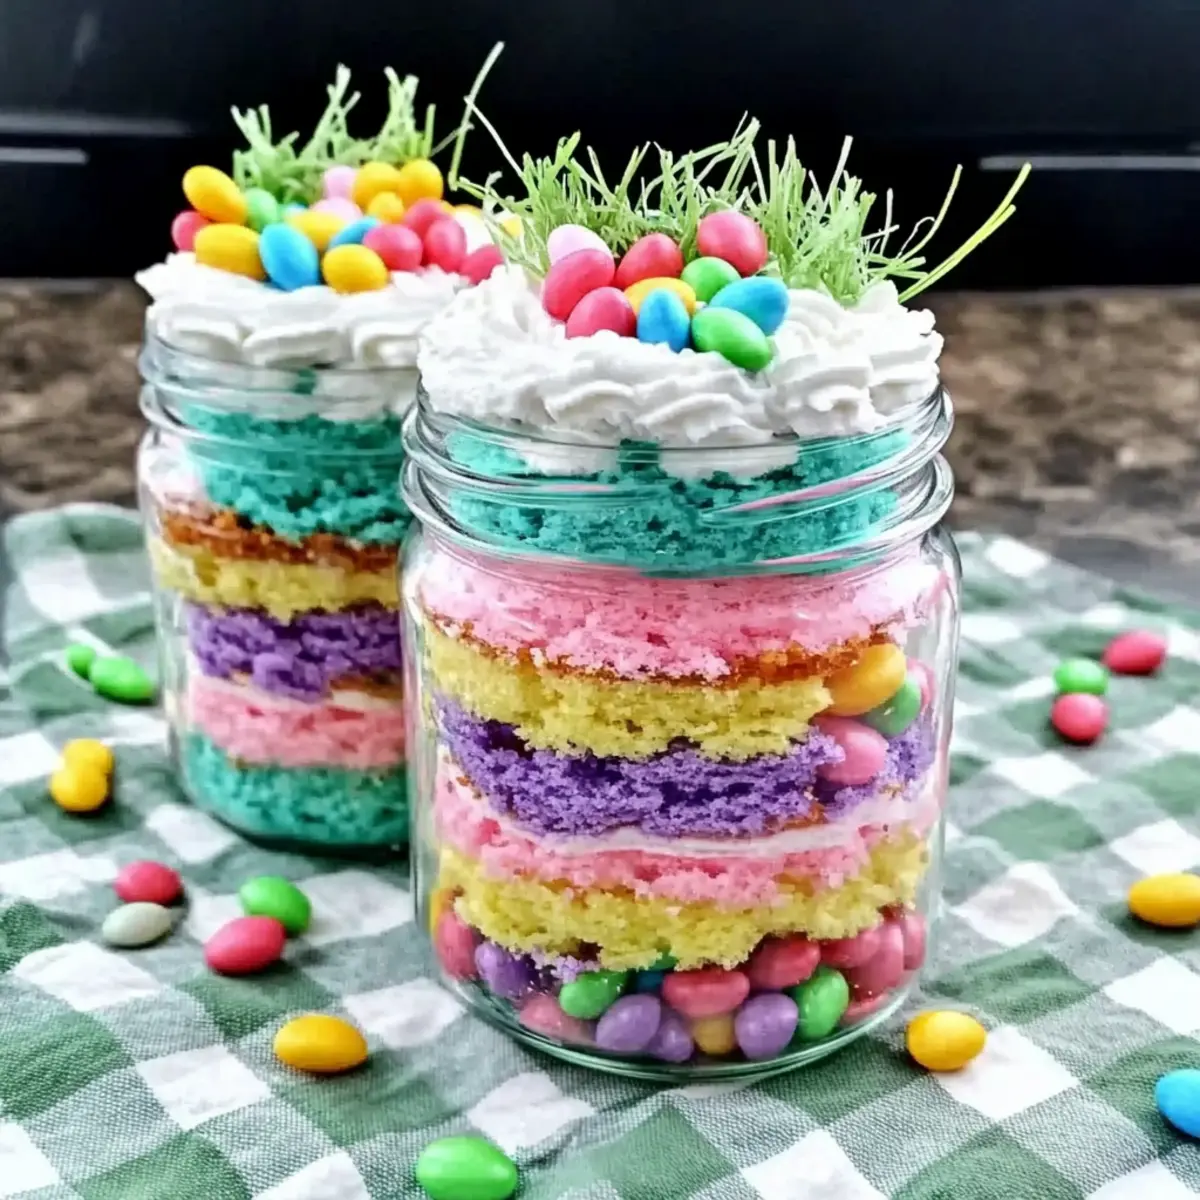
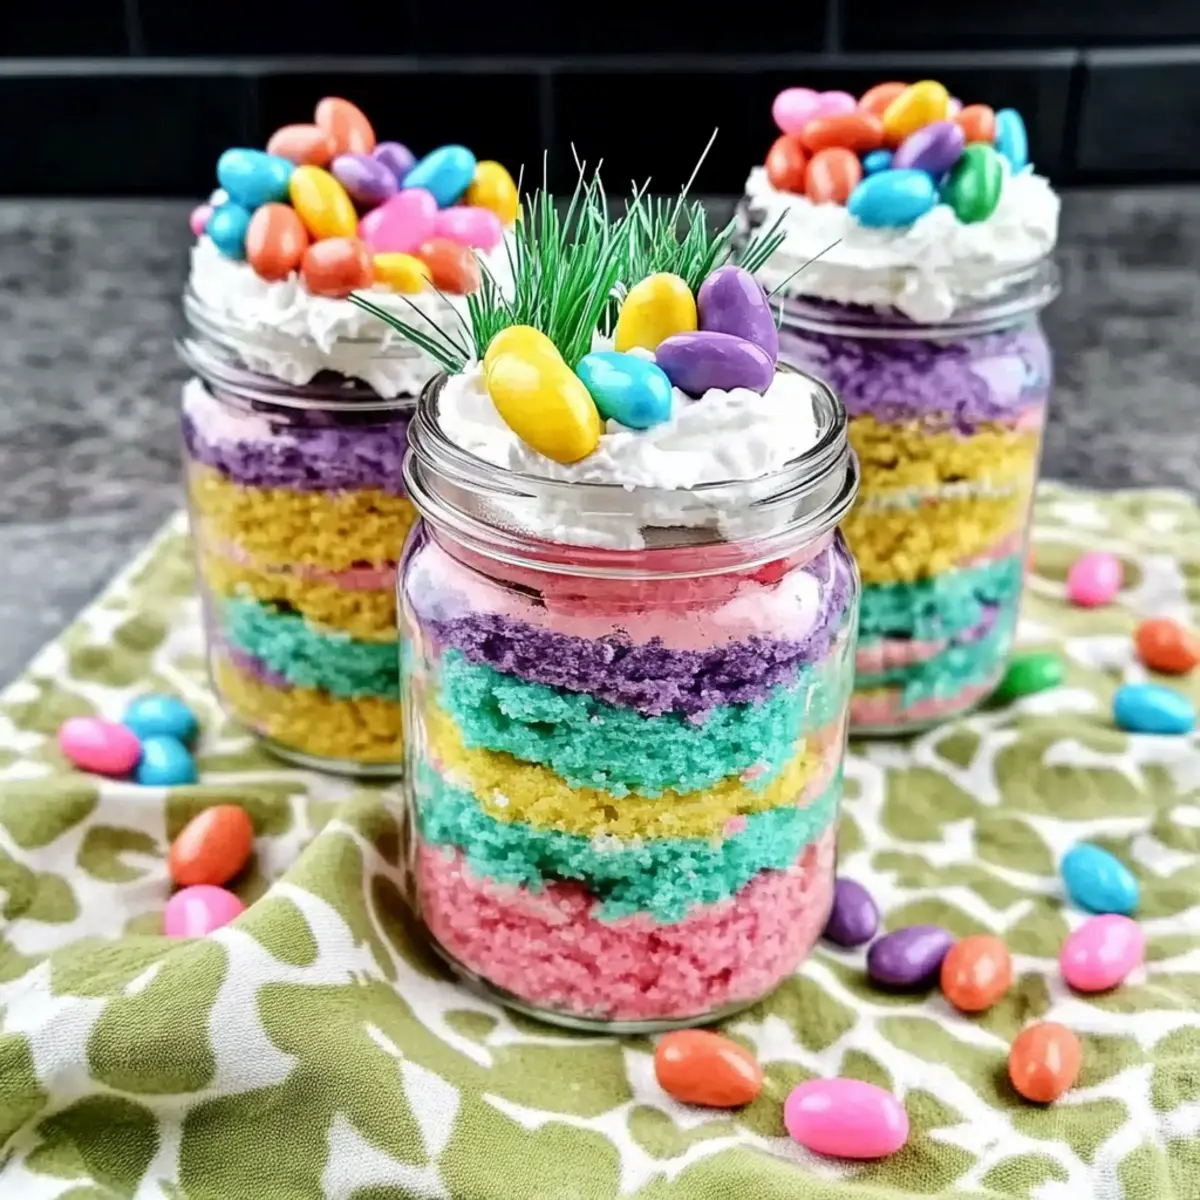
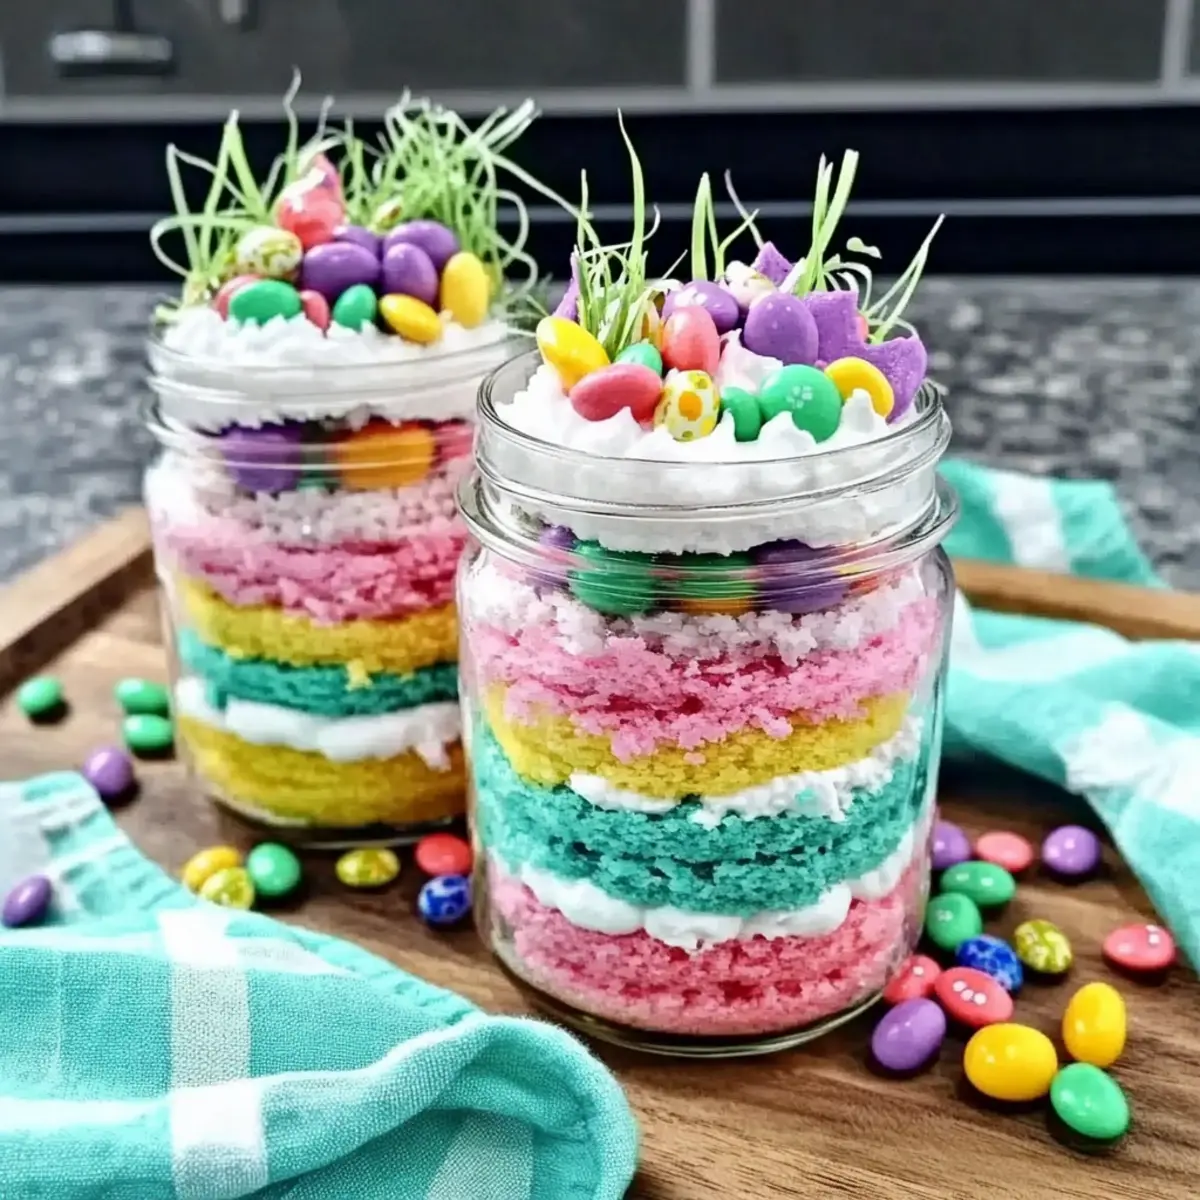
Select your 4–6 oz jars and start layering your Easter Cake in a Jar. Begin with a layer of crumbled cake, followed by a layer of frosting. Continue this process, alternating layers until the jars are filled, finishing with a generous swirl of frosting at the top. Aim for at least three vibrant layers for the best visual impact.
Step 6: Decorate the Tops
Once all jars are filled, it’s time for the festive touch! Sprinkle edible grass or shredded coconut on top to mimic a nest. Then, carefully place colorful jelly bean Easter eggs on the grass, or you can adorn them with fun Easter sprinkles for an extra pop of color. Let your creativity shine!
Step 7: Chill and Serve
For the best texture, place your jars in the refrigerator for at least 30 minutes before serving. This chilling time allows the frosting to set slightly, making it easier to scoop. Serve your delightful Easter Cake in a Jar chilled or at room temperature, and watch the smiles appear as everyone digs in!
What to Serve with Easter Cake in a Jar
Delightful and colorful, this dessert pairs beautifully with a variety of options to create a complete festive feast.
-
Fresh Flowers Salad: A light and refreshing option that brightens the table, complementing the cake’s sweetness and adding a vibrant crunch.
-
Vanilla Ice Cream: The creamy richness of vanilla ice cream pairs wonderfully with the layered cake, creating a delightful contrast in textures.
-
Lemonade Spritzer: A fizzy beverage adds a refreshing brightness, balancing the sweetness of the cake and quenching your thirst on a warm spring day.
-
Carrot Sticks with Hummus: Crunchy veggies paired with creamy hummus offer a healthy contrast and a colorful touch, keeping the focus on festive colors.
-
Chocolate-Covered Strawberries: These sweet, decadent bites introduce a touch of elegance and romance, perfect for adding a special touch to your Easter celebration.
-
Coffee or Tea: Pairing with a warm drink creates a cozy atmosphere. The robust notes of coffee or the soothing flavors of tea tie the meal together beautifully.
-
Cheese Platter: A mix of mild and tangy cheeses adds sophistication, balancing the sweetness and enhancing the overall dining experience.
-
Easter-themed Cookies: Fun and festive, these treats add an extra layer of sweetness while continuing the holiday theme, making them perfect companions for the Easter Cake in a Jar.
Easter Cake in a Jar Recipe Variations
Feel free to explore these delightful twists, adding personal flair to your festive dessert!
- Flavor Twist: Swap white cake mix for chocolate or lemon for a unique flavor experience that surprises every bite.
- Fruit-Filled Delights: Add fresh berries like raspberries or strawberries between layers for a burst of flavor and texture.
- Nutty Crunch: Include a layer of chopped nuts or granola for a delightful crunch that contrasts with the soft cake.
- Gourmet Touch: Top with chocolate shavings or edible flowers for an upscale presentation worthy of any fancy event.
- Dairy-Free Option: Use dairy-free frosting and vegan cake mix to accommodate those with dietary restrictions while still enjoying the festive treat.
- Spicy Kick: Incorporate a hint of cinnamon or nutmeg into the cake batter to spice things up with a warm flavor.
- Alternative Decorations: Use shredded coconut flavored with green food coloring instead of edible grass for a tropical feel.
- Layered Parfaits: Experiment with yogurt and granola layers in the jars for a nutritious yet colorful breakfast option!
As you customize your Easter Cake in a Jar, don’t forget to enjoy it with a warm beverage while pairing it with ideas from our Fruitcake Cookies Festive or Moist Carrot Cake for a hearty brunch. Enjoy the festive spirit of your creations!
Expert Tips for Easter Cake In A Jar Recipe
-
Color Separation: Make sure to keep the crumbled cake colors in separate bowls to maintain the vibrant layers in each jar. Mixing can lead to a muddy appearance!
-
Clear Jars: Use clear jars to beautifully showcase the colorful layers of your Easter Cake in a Jar, creating visual appeal that enhances the dessert experience.
-
Frosting Consistency: If you find your frosting is too thick after refrigeration, simply stir it until creamy again before piping, ensuring it goes on smoothly.
-
Creative Decorations: Feel free to personalize your jars with different toppings or edible decor like fresh fruit or chocolate shavings to make each treat uniquely yours!
-
Pre-Make & Chill: Prepare the jars a day in advance and refrigerate them. This not only saves time but also allows the flavors to meld beautifully—perfect for any Easter celebration!
Storage Tips for Easter Cake in a Jar
Fridge: Store your Easter Cake in a Jar in the refrigerator for up to 3 days. Make sure to seal the jars tightly to prevent drying and keep them fresh.
Freezer: For longer storage, freeze the jars for up to 1 month. Ensure they are airtight to avoid freezer burn, and allow them to thaw in the fridge before serving.
Reheating: If desired, you can enjoy the jars at room temperature or slightly chilled. Simply let them sit out for about 30 minutes before serving for the best texture and flavor.
Serving Tips: When ready to delight your guests, garnish each jar with a sprinkle of fresh decorations just before serving. This will enhance the vibrant appeal of your Easter Cake in a Jar recipe!
Make Ahead Options
These Easter Cake in a Jar creations are perfect for busy home cooks looking to save time! You can prepare the cake crumbles and frosting up to 24 hours in advance for maximum convenience. Simply bake the colorful cupcakes, then crumble them and store each color in separate airtight containers in the refrigerator to keep them fresh. The frosting can also be made ahead of time and stored in a sealed container. When you’re ready to assemble, simply layer the crumbled cakes and frosting in the jars, top with edible grass and jelly beans, and chill for about 30 minutes before serving. This approach ensures your Easter Cake in a Jar remains just as delightful and colorful, making it a stress-free addition to your festive celebration!
Easter Cake in a Jar Recipe FAQs
What type of food coloring should I use for the Easter Cake in a Jar?
For the vibrant colors you want, I recommend using gel food coloring. It provides more intense hues than liquid coloring, allowing your cake layers to really pop. Just a few drops of gel can create vivid shades of pink, yellow, teal, and purple in your cake batter.
How should I store the Easter Cake in a Jar?
To keep your Easter Cake in a Jar fresh, store them tightly sealed in the refrigerator for up to 3 days. This way, they remain moist and the flavors meld beautifully. If you’re making them in advance, you can also freeze them for up to a month. Just ensure they’re airtight to prevent freezer burn!
Can I freeze my Easter Cake in a Jar?
Absolutely! To freeze, make sure each jar is sealed tightly. Place them in the freezer for up to 1 month. When you’re ready to enjoy them, simply transfer them to the refrigerator to thaw overnight, or let them sit at room temperature for about 30 minutes before serving for optimal texture.
What can I substitute for jelly beans in the Easter Cake in a Jar?
If jelly beans aren’t your thing, feel free to get creative! You can use chocolate eggs, mini marshmallows, or even a mix of your favorite candies. Fresh fruits like strawberries or blueberries can also add a fresh twist to your jars, especially in the spring!
How can I avoid the frosting from being too thick?
If you find your frosting is too thick after chilling, don’t worry! Simply let it sit at room temperature for about 10 minutes, then give it a good stir. If it’s still thick, you can add a teaspoon of milk and mix until it’s creamy again. This way, your frosting will pipe beautifully on top of your cake layers.
Is this recipe suitable for kids to help with?
Definitely! This Easter Cake in a Jar recipe is perfect for kids to help with. They can join in on the fun of coloring the cake layers, crumbling them, and layering them into jars. Plus, decorating with edible grass and jelly beans is a delightful way to get creative together!
Easter Cake in a Jar Recipe – A Festive Treat to Delight!
Ingredients
Equipment
Method
- Prepare the white cake mix according to the package instructions in a large mixing bowl. Divide the batter into four smaller bowls and add food coloring to each bowl.
- Preheat your oven to 350°F (175°C) and fill a cupcake tin with the colored batter. Bake for 18-20 minutes until a toothpick comes out clean. Let cool completely.
- Once cooled, crumble the cupcakes into small pieces while keeping the colors separate.
- If using store-bought frosting, stir until creamy. For homemade, prepare until light and fluffy. Transfer to a piping or zip-top bag.
- Layer the jars by starting with crumbled cake, then frosting, alternating until jars are filled. Finish with frosting on top.
- Decorate the tops with edible grass and jelly bean eggs, or sprinkles.
- Chill the jars in the refrigerator for at least 30 minutes before serving.
Leave a Reply