
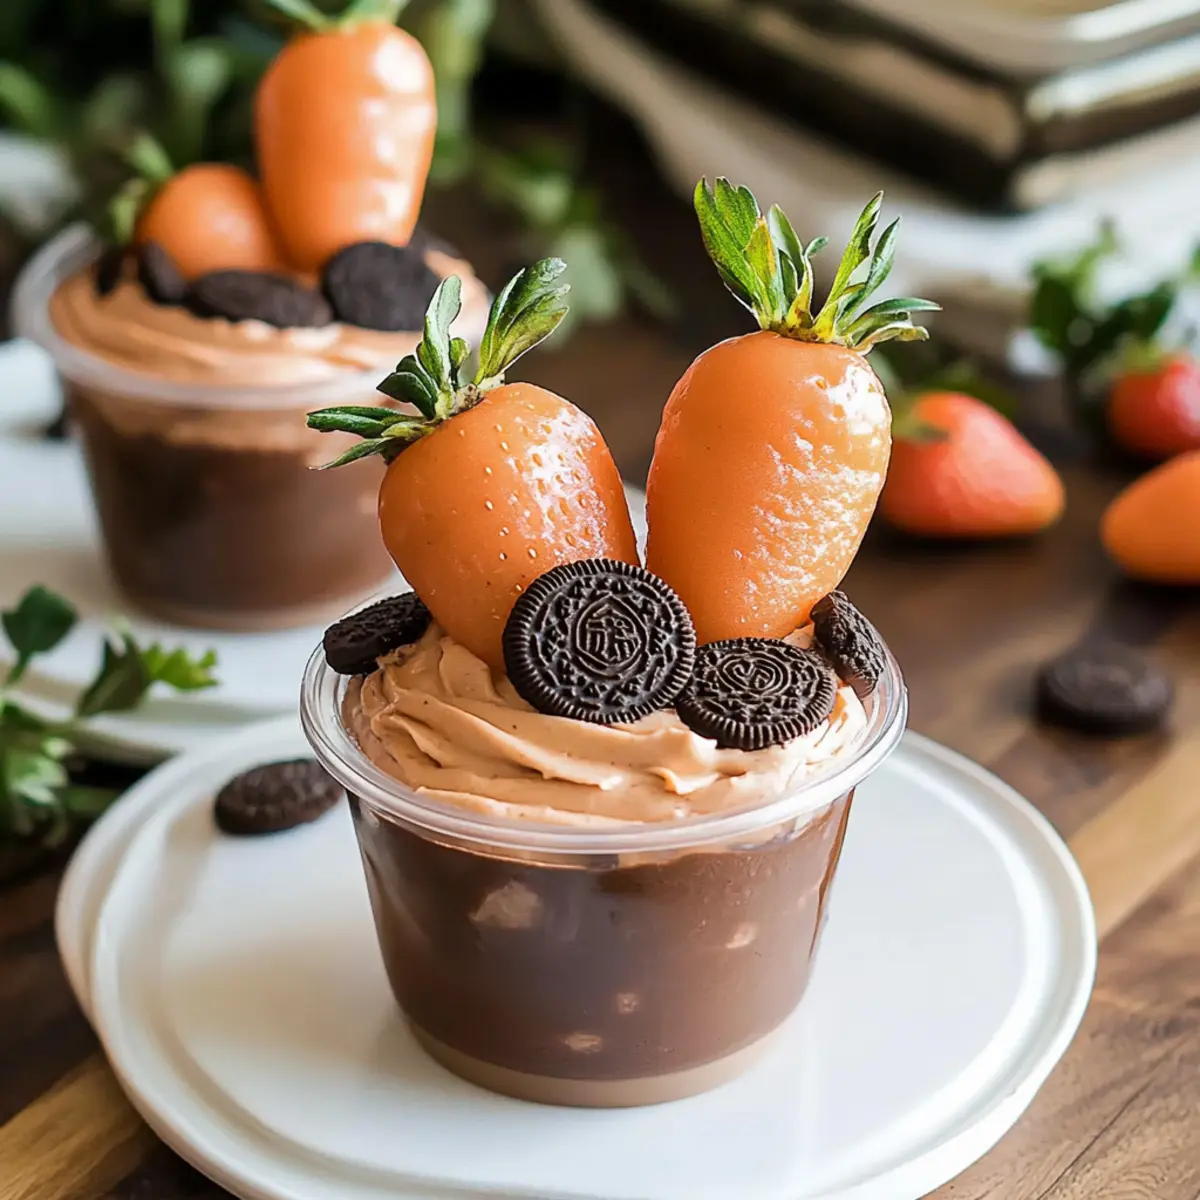
“Mom, can we make those fun dessert cups again?” My heart swells every time I hear this plea, usually during Easter season. These No-Bake Carrot Patch Dirt Cups effortlessly bring out the joy in both kids and adults alike. Not only are they easy to whip up in just 15 minutes, but they also pack a delicious combination of creamy chocolate pudding and a crunchy Oreo “dirt” topping that makes them truly special. Each adorable cup is garnished with white chocolate-covered strawberries that resemble bright little carrots, transforming dessert into a playful celebration of springtime. With such minimal effort required, these delightful treats will have your family eagerly anticipating your next holiday gathering. Curious about how to create this fun, festive dessert? Let’s dive into the details!
Why Are Carrot Patch Dirt Cups So Fun?
Delightful whimsy: These Carrot Patch Dirt Cups bring playful charm to the dessert table, making them a hit for both kids and adults alike during Easter celebrations.
Quick to prepare: Whip them up in just 15 minutes! Ideal for busy schedules, these no-bake treats save time while delighting your guests.
Flavorful layers: Experience the rich, creamy chocolate pudding paired perfectly with crunchy Oreo “dirt.” Each bite promises a delightful contrast of textures.
Visual appeal: With their vibrant chocolate-covered strawberries as adorable carrot toppers, these cups don’t just taste amazing—they look fantastic too!
Versatile options: Want to mix it up? Try using Moist Carrot Cake for added flavor or swap in different fruits for your “carrots.” These customizable treats cater to everyone’s preferences!
Carrot Patch Dirt Cups Ingredients
• Get ready to create this fun dessert!
For the Pudding
- Chocolate Pudding Mix – Provides creaminess and rich chocolate flavor; use any instant chocolate pudding for quick setting.
- Whole Milk – Adds creaminess to the pudding; substitute with almond milk for a dairy-free version.
For the “Dirt” Layer
- Oreos – Crushed to create the “dirt” layer on top of the pudding; any chocolate cookie can serve as a substitute.
For the Carrots
- Fresh Strawberries – Serve as the “carrots” on top, offering freshness and natural sweetness; feel free to use other fruits if desired.
- White Chocolate Melting Wafers – Used for coating strawberries, giving them a beautiful finish; can swap with regular chocolate if preferred.
- Orange Food Coloring – Enhances the visual appeal of the chocolate-covered strawberries; omit if using orange chocolate wafers.
These Carrot Patch Dirt Cups are sure to be a crowd-pleaser!
Step‑by‑Step Instructions for Carrot Patch Dirt Cups
Step 1: Mix the Pudding
In a large mixing bowl, combine a package of chocolate pudding mix with 2 cups of cold whole milk. Whisk vigorously for about two minutes until the mixture is smooth and well-blended. Allow the pudding to set for five minutes, during which it will thicken to a creamy consistency perfect for your Carrot Patch Dirt Cups.
Step 2: Melt the Chocolate
While the pudding sets, place white chocolate melting wafers in a microwave-safe bowl. Heat them in the microwave in 30-second increments, stirring after each interval until completely smooth. If desired, mix in a few drops of orange food coloring to create vibrant carrot-like hues, enhancing the visual appeal of your dessert.
Step 3: Prepare the Strawberries
Take fresh strawberries and dip them into the melted white chocolate, ensuring they are well-coated. Place them stem-side up on a sheet of parchment paper to set. For an extra touch, drizzle additional melted chocolate over the strawberries before the coating hardens to add a decorative flair to your Carrot Patch Dirt Cups.
Step 4: Assemble the Cups
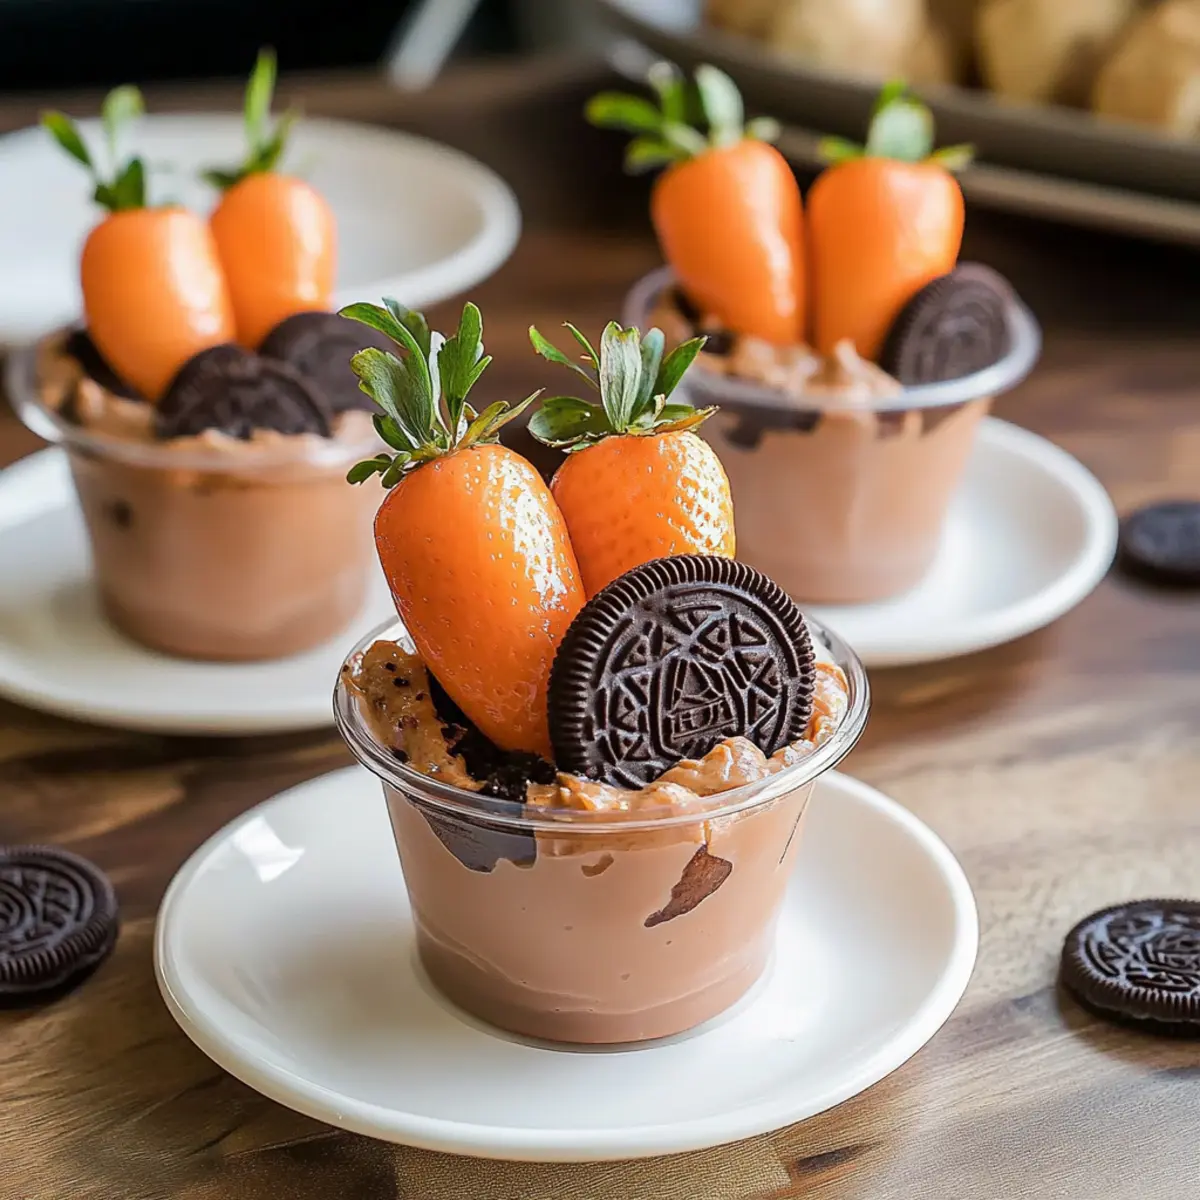
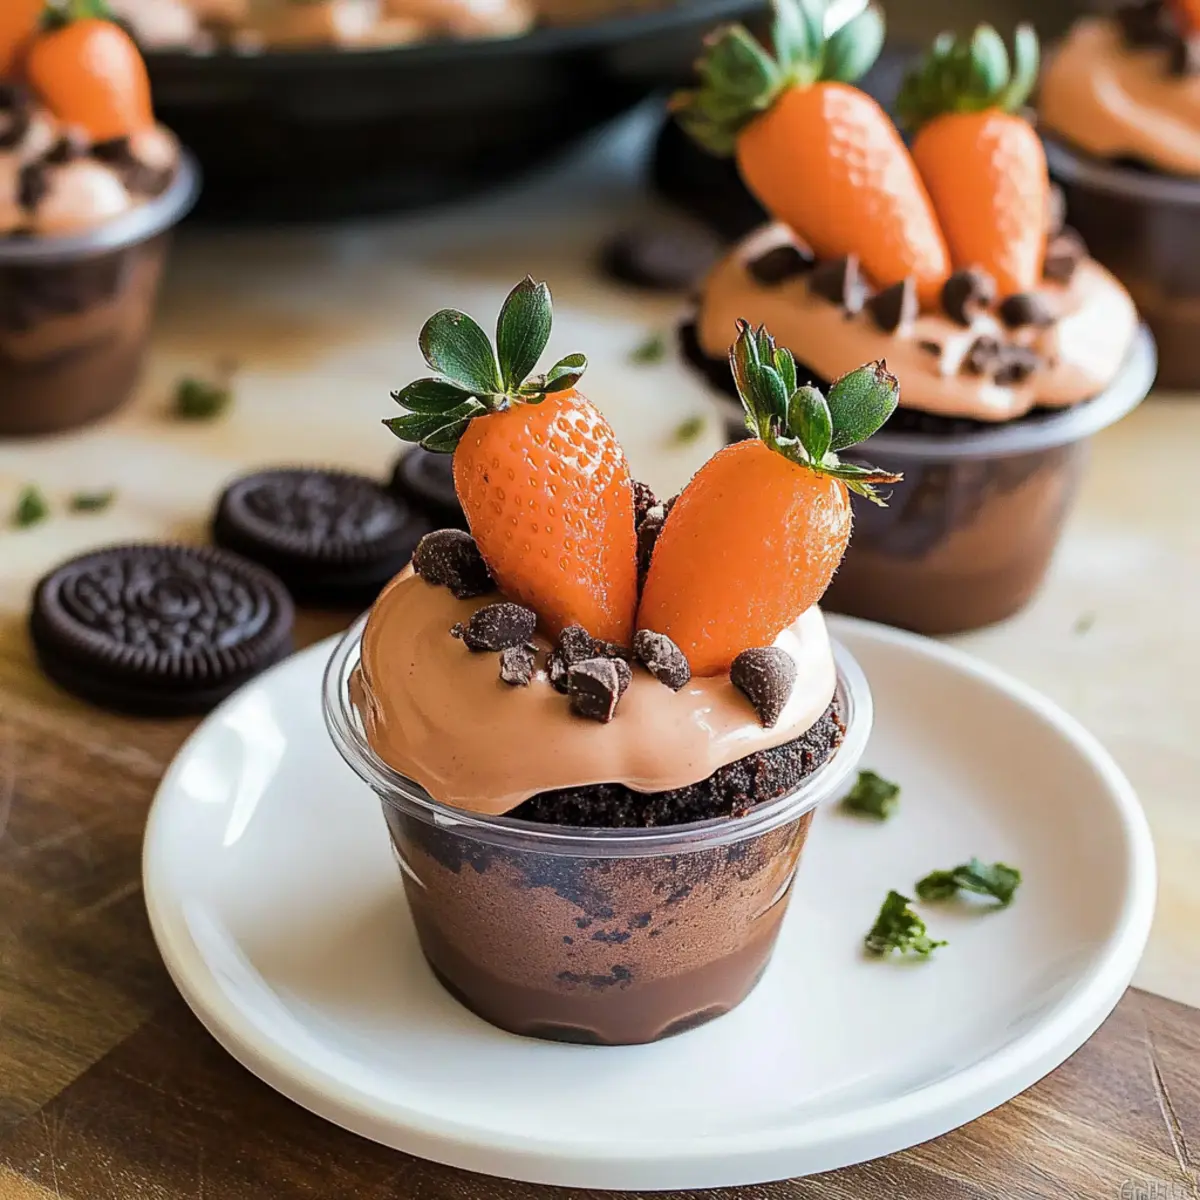
In individual serving cups, start by spooning a generous layer of chocolate pudding, ensuring it fills the cup about halfway. This creamy base will provide a lovely foundation for the crunch to come, so make it even and smooth with a spatula for a polished look.
Step 5: Add the “Dirt” Layer
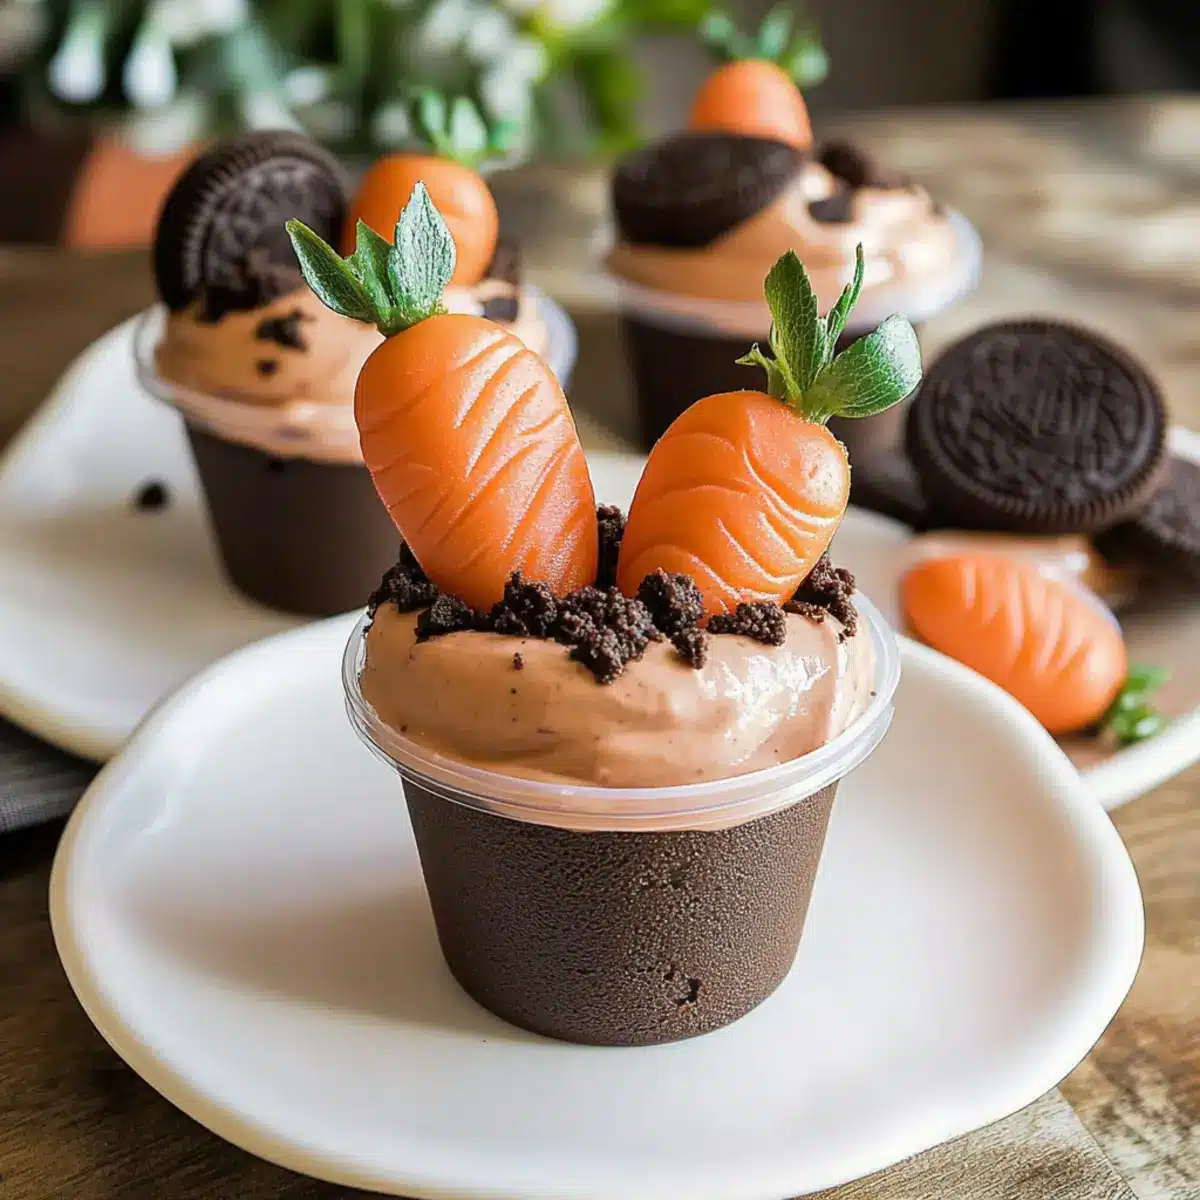
Next, sprinkle a generous layer of crushed Oreos over the top of each pudding-filled cup, mimicking the look of dirt in your Carrot Patch Dirt Cups. Aim for an even coating, creating a contrasting texture with the creamy pudding below. Press lightly on the crumbs to ensure they stay in place.
Step 6: Garnish with Carrots
Finally, to complete your festive Carrot Patch Dirt Cups, gently insert two of the chocolate-covered strawberries into each cup, positioning them to resemble adorable carrots peeking out of the “dirt.” Arrange them thoughtfully for an eye-catching presentation that will delight both kids and adults.
Make Ahead Options
These Carrot Patch Dirt Cups are fantastic for meal prep! You can prepare the chocolate pudding up to 24 hours in advance; simply whisk the pudding mix with cold milk, let it set, and store in an airtight container in the refrigerator. The crushed Oreo layer can also be made ahead and stored at room temperature in a sealed bag to maintain its crunch. On the day you plan to serve, assemble the cups by adding the pudding and “dirt” layer, and top each cup with the chocolate-covered strawberries. This method not only saves time but ensures that your dessert remains just as delightful and delicious when it’s time to enjoy!
How to Store and Freeze Carrot Patch Dirt Cups
Refrigerator: Keep your Carrot Patch Dirt Cups in the fridge for up to 2 days. Store them in an airtight container to maintain freshness and prevent any wilting of the strawberry toppers.
Freezer: While these cups are best enjoyed fresh, you can freeze the pudding mixture separately for up to 1 month. Assemble the cups once you’re ready to serve for optimal texture and flavor.
Thawing: If frozen, transfer the pudding to the fridge to thaw overnight before reassembling with the Oreo “dirt” and strawberries. Avoid thawing at room temperature to maintain quality.
Reheating: Not applicable for these specific dessert cups, as they are best served chilled. Enjoy the delightful combination of textures and flavors fresh!
Carrot Patch Dirt Cups Variations
Feel free to explore these delightful twists on your Carrot Patch Dirt Cups, igniting your creativity in the kitchen!
-
Vanilla Pudding: Swap chocolate pudding for vanilla for a lighter, less intense flavor. This change enhances the overall dessert’s sweetness without overpowering the fun visuals.
-
Graham Cracker Crumbs: Use crushed graham crackers instead of Oreos for a different texture. The subtle sweetness of graham crackers will bring a new dimension to each bite!
-
Fruit Swap: Substitute strawberries with kiwi or orange segments to give your cups a fruity twist. These vibrant alternatives not only add flavor but also create a colorful garden scene.
-
Nutty Crunch: Incorporate crushed nuts, like walnuts or pecans, into the “dirt” layer for added crunch. The nuttiness complements the creamy pudding beautifully.
-
Coconut Whipped Topping: For a tropical vibe, top your cups with coconut whipped cream instead of chocolate. It creates a delightful contrast and a burst of flavor.
-
Spicy Kick: Add a pinch of chili powder to the chocolate coating for a surprising heat. This unexpected twist can tantalize adventurous taste buds!
-
Mini Carrots: Instead of chocolate-covered strawberries, use small, orange carrots for a fun, healthy alternative. They will certainly add an unexpected yet charming touch.
-
Boozy Option: For an adult version, mix a splash of coffee liqueur into the pudding for a rich, decadent flavor that’s still fun but with a little more sophistication.
These variations keep your Carrot Patch Dirt Cups exciting and adaptable for any gathering. Looking for more delicious ideas? Check out these scrumptious Carrot Muffin Moist or learn how to whip up a fabulous Moist Carrot Cake!
Expert Tips for Carrot Patch Dirt Cups
-
Perfect Pudding Consistency: Ensure the pudding is whisked thoroughly to avoid lumps. It should be smooth and thick before layering in the cups.
-
Oreo Crush: For a more authentic “dirt” look, aim for a fine, consistent crush of Oreos, using a food processor if needed. This prevents large chunks from ruining the visual appeal.
-
Chocolate Melting: When melting white chocolate, do it gradually to prevent burning. Stir every 30 seconds and remove it from the microwave while a few small lumps remain for a smooth finish.
-
Creative Toppers: If you want to mix up your Carrot Patch Dirt Cups, try using gummy worms or edible flowers for a different garden-inspired look that the kids will love!
-
Serve Immediately: For best presentation and texture, serve the cups as soon as you assemble them. The longer they sit, the soggier the Oreo layer may become.
What to Serve with No-Bake Carrot Patch Dirt Cups?
These delicious, playful treats are perfect for creating a delightful dessert spread that will charm everyone at your gathering.
-
Spring Salad: A refreshing mix of greens, berries, and a citrus vinaigrette complements the sweetness of the Dirt Cups beautifully. The pop of color and flavor adds to the festive atmosphere.
-
Mini Sandwiches: Bite-sized sandwiches filled with ham and cheese or cucumber and cream cheese provide a savory contrast to the sweet dessert, ideal for balancing flavors.
-
Fruit Skewers: Colorful skewers of fresh fruit bring a vibrant touch and a burst of natural sweetness, enhancing the springtime vibe of your celebration.
-
Lemonade: This classic drink refreshes the palate and offers a zesty twist that pairs perfectly with the sweet and creamy texture of the pudding cups.
-
Carrot Cake Bites: For double the fun, serve these delightful bites alongside your Carrot Patch Dirt Cups, reinforcing the theme and providing a delightful texture contrast.
-
Chocolate Milk: Rich and creamy chocolate milk makes for a nostalgic pairing, enhancing the chocolatey goodness of the pudding cups and making it a hit among both kids and adults.
Mix and match these suggestions to create an inviting spread that will turn your Easter gathering into a memorable feast!
Carrot Patch Dirt Cups Recipe FAQs
What kind of chocolate pudding mix should I use?
You can use any instant chocolate pudding mix for this recipe; the key is to choose an option that allows for quick setting. I often opt for a brand I trust to ensure a rich, creamy flavor.
How should I store the Carrot Patch Dirt Cups?
Keep your Carrot Patch Dirt Cups in the refrigerator in an airtight container for up to 2 days. This helps maintain freshness and keeps the strawberries from wilting. Just be sure to serve them before they lose their charm!
Can I freeze Carrot Patch Dirt Cups?
While these delightful cups are best enjoyed fresh, you can freeze the chocolate pudding mixture alone for up to 1 month. To do this, let the pudding cool completely, then pour it into a freezer-safe container. When you’re ready to enjoy it, transfer the pudding to the fridge to thaw overnight before assembling with the Oreo dirt and strawberries.
Why did my pudding not set properly?
Absolutely! If your pudding is not setting as it should, check that you allowed it enough time to thicken—usually around 5 minutes. Make sure you used the correct milk-to-pudding mix ratio (typically 2 cups of milk per package of pudding mix) and whisked it vigorously for at least two minutes. If not thickening, it could be due to expired pudding mix; double-check those dates!
Can I substitute the strawberries for another fruit?
Very! Feel free to get creative with your toppings. You can use fresh fruits like kiwi or orange segments instead of strawberries to achieve varied flavors. Just ensure any alternative fruits are cut and prepared in a way that maintains a nice presentation in your Carrot Patch Dirt Cups.
Are there any dietary considerations I should keep in mind?
Absolutely! If you have any allergies or dietary restrictions, consider using dairy-free options, such as almond milk for the pudding. Additionally, double-check any additional ingredients for potential allergens, such as nuts in chocolate or cross-contamination states. Always label your desserts clearly if serving a crowd!
Delightful Carrot Patch Dirt Cups for a Fun Easter Treat
Ingredients
Equipment
Method
- In a large mixing bowl, combine a package of chocolate pudding mix with 2 cups of cold whole milk. Whisk vigorously for about two minutes until the mixture is smooth and well-blended. Allow the pudding to set for five minutes.
- While the pudding sets, place white chocolate melting wafers in a microwave-safe bowl. Heat them in the microwave in 30-second increments, stirring after each interval until completely smooth. Mix in a few drops of orange food coloring if desired.
- Take fresh strawberries and dip them into the melted white chocolate, ensuring they are well-coated. Place them stem-side up on parchment paper to set.
- In individual serving cups, start by spooning a generous layer of chocolate pudding, smoothing it out with a spatula.
- Next, sprinkle a generous layer of crushed Oreos over the top of each pudding-filled cup, pressing lightly to ensure they stay in place.
- Gently insert two of the chocolate-covered strawberries into each cup, positioning them to resemble carrots peeking out of the dirt.
Leave a Reply