
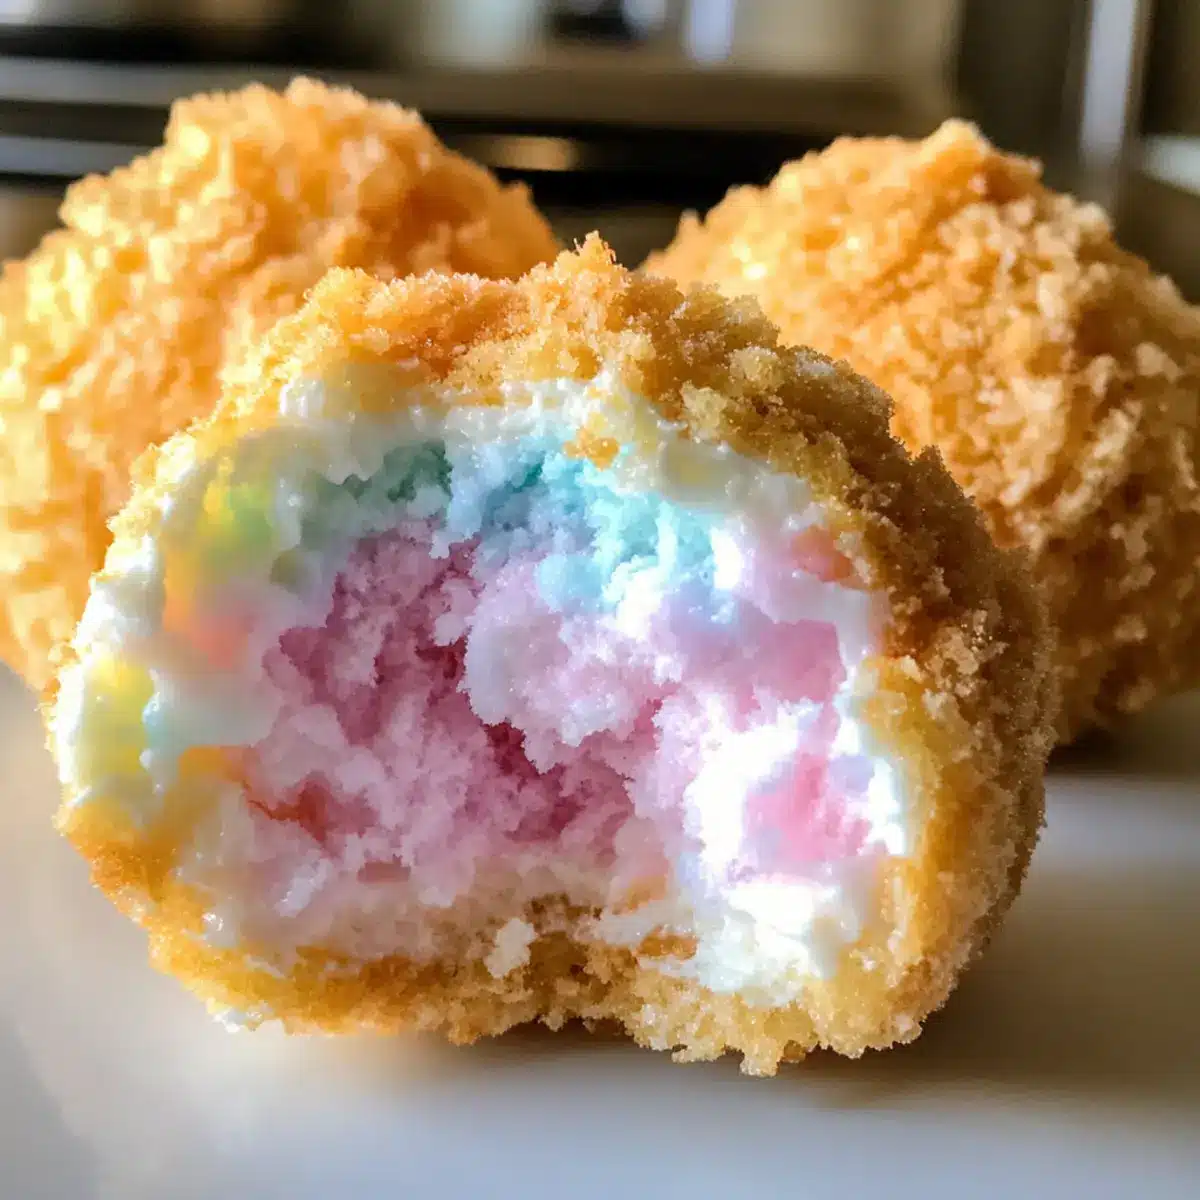
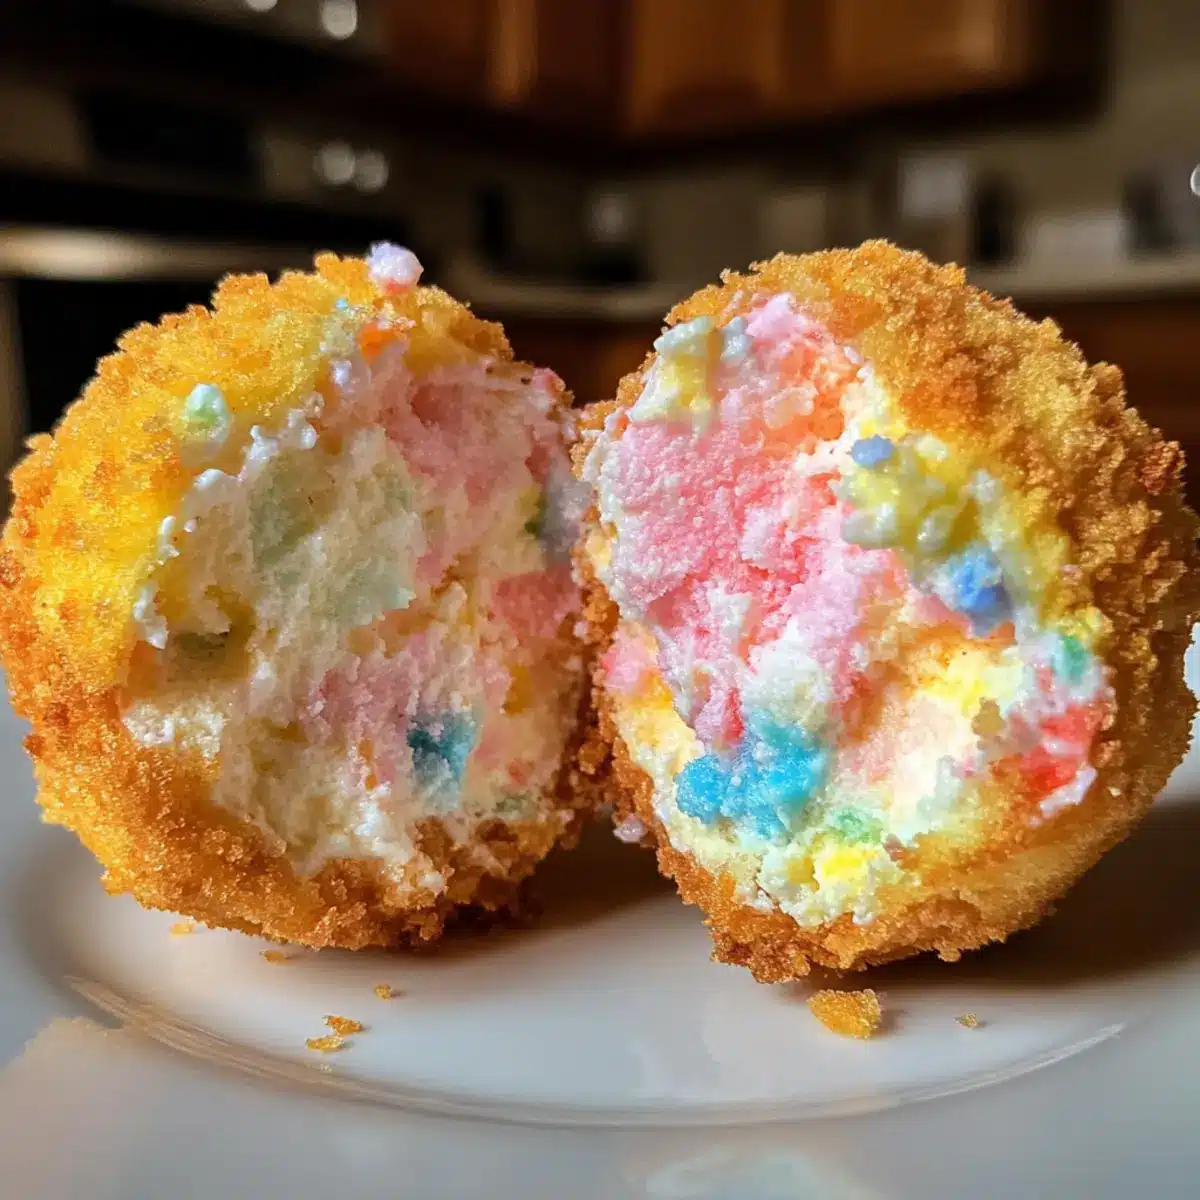
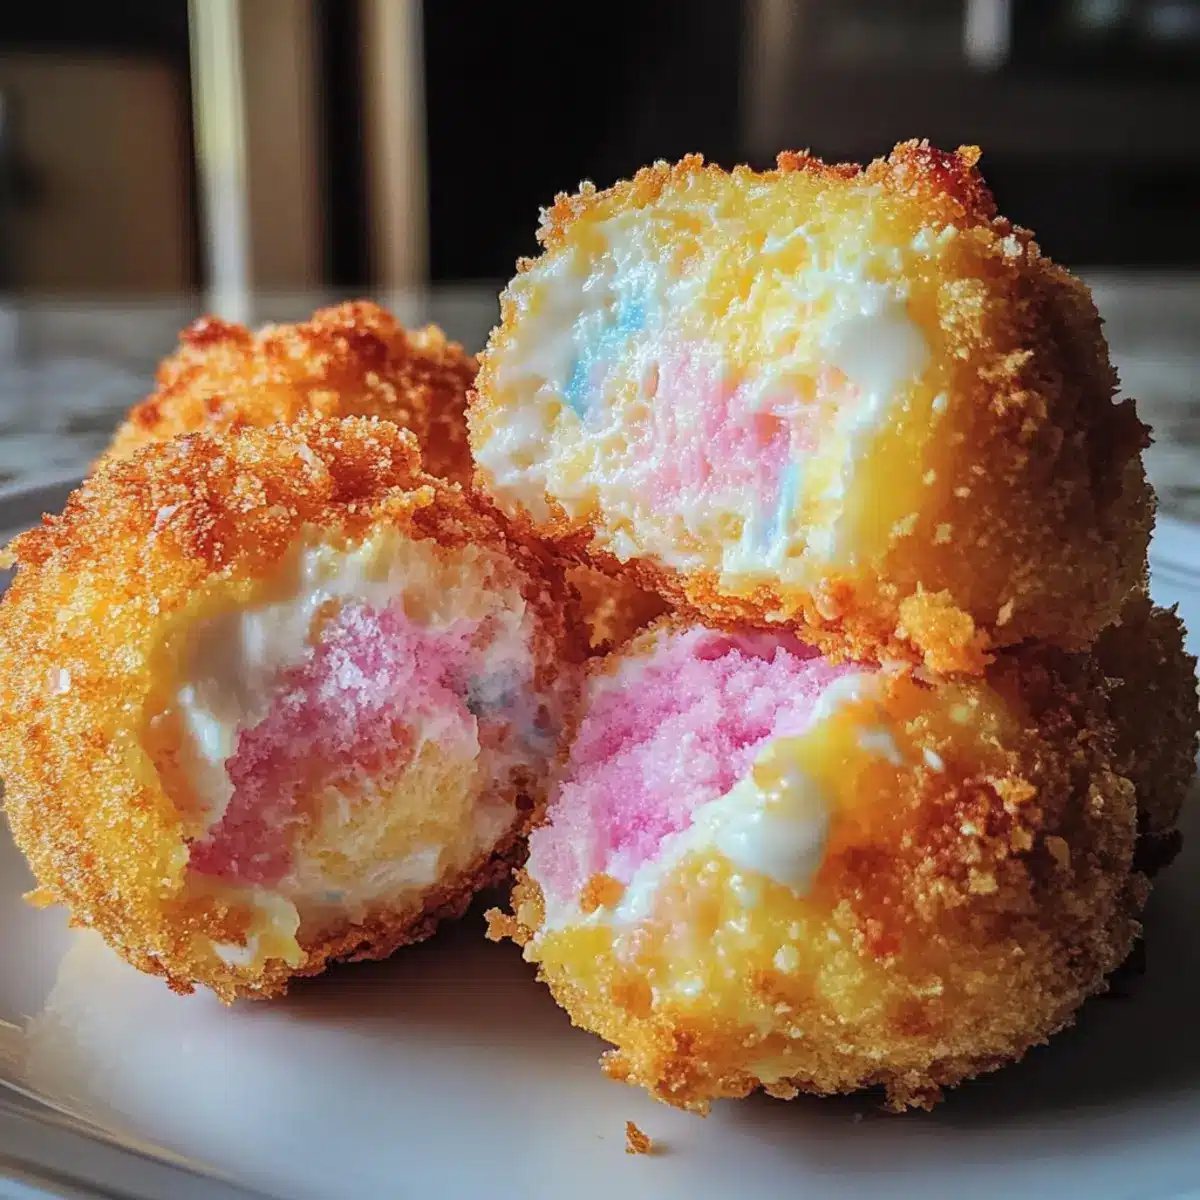
As I stood in my kitchen twirling a fluffy tuft of cotton candy in one hand, I felt a wave of nostalgia wash over me—those carefree carnival days when everything tasted like pure magic. That’s the inspiration behind my Crispy Cotton Candy Cheesecake Bombs, a whimsical twist on traditional cheesecake that combines creamy goodness with a playful crunch. These delightful treats are remarkably quick to whip up, making them a perfect crowd-pleaser for parties or a unique dessert for a cozy night in. Imagine indulging in a crispy exterior that gives way to a heavenly cotton candy-infused filling—you won’t be able to resist! So, are you ready to dive into this dreamy dessert adventure?
Why Are These Cheesecake Bombs Irresistible?
Whimsical Flavor: The playful essence of cotton candy adds a nostalgic and delightful sweetness that elevates your dessert game.
Crispy Exterior: Enjoy the enticing crunch of fried dough, making each bite a delightful experience that contrasts beautifully with the creamy filling.
Quick to Prepare: These treats come together in no time at all, allowing you to impress your guests without hours in the kitchen.
Versatile Treat: Feel free to experiment with flavors! Swap cotton candy for chocolate or peanut butter to create unique variations that cater to every palate.
Perfect for Occasions: Whether at a birthday party or a cozy night in, these cheesecake bombs make a statement and bring smiles to everyone.
Looking for more delicious ideas? Check out these Crisp Mini Cheesecakes for another fun twist on dessert!
Crispy Cotton Candy Cheesecake Bombs
Gather Your Ingredients
• Here’s what you need for these irresistible treats:
For the Cheesecake Filling
- Cream Cheese – a rich base for a creamy filling that melts in your mouth.
- Granulated Sugar – brings just the right sweetness to balance the richness.
- Vanilla Extract – elevates the flavor profile with a warm, inviting aroma.
- Cotton Candy – the star ingredient, providing a whimsical sweetness that kids and adults adore!
For the Dough
- Graham Cracker Crumbs – creates a texture reminiscent of a traditional cheesecake crust.
- All-Purpose Flour – gives structure to your bombs, making them easy to handle.
- Baking Powder – helps the dough rise slightly during frying, keeping it light.
- Salt – balances the sweetness, enhancing the overall flavor.
- Large Eggs – bind the dough together, adding moisture for a lovely texture.
For Frying and Coating
- Cotton Candy-Flavored Candy Melts – for a sweet, colorful coating; swap with chocolate for a different twist.
- Oil for Frying – choose a neutral oil to achieve that perfect crispy exterior.
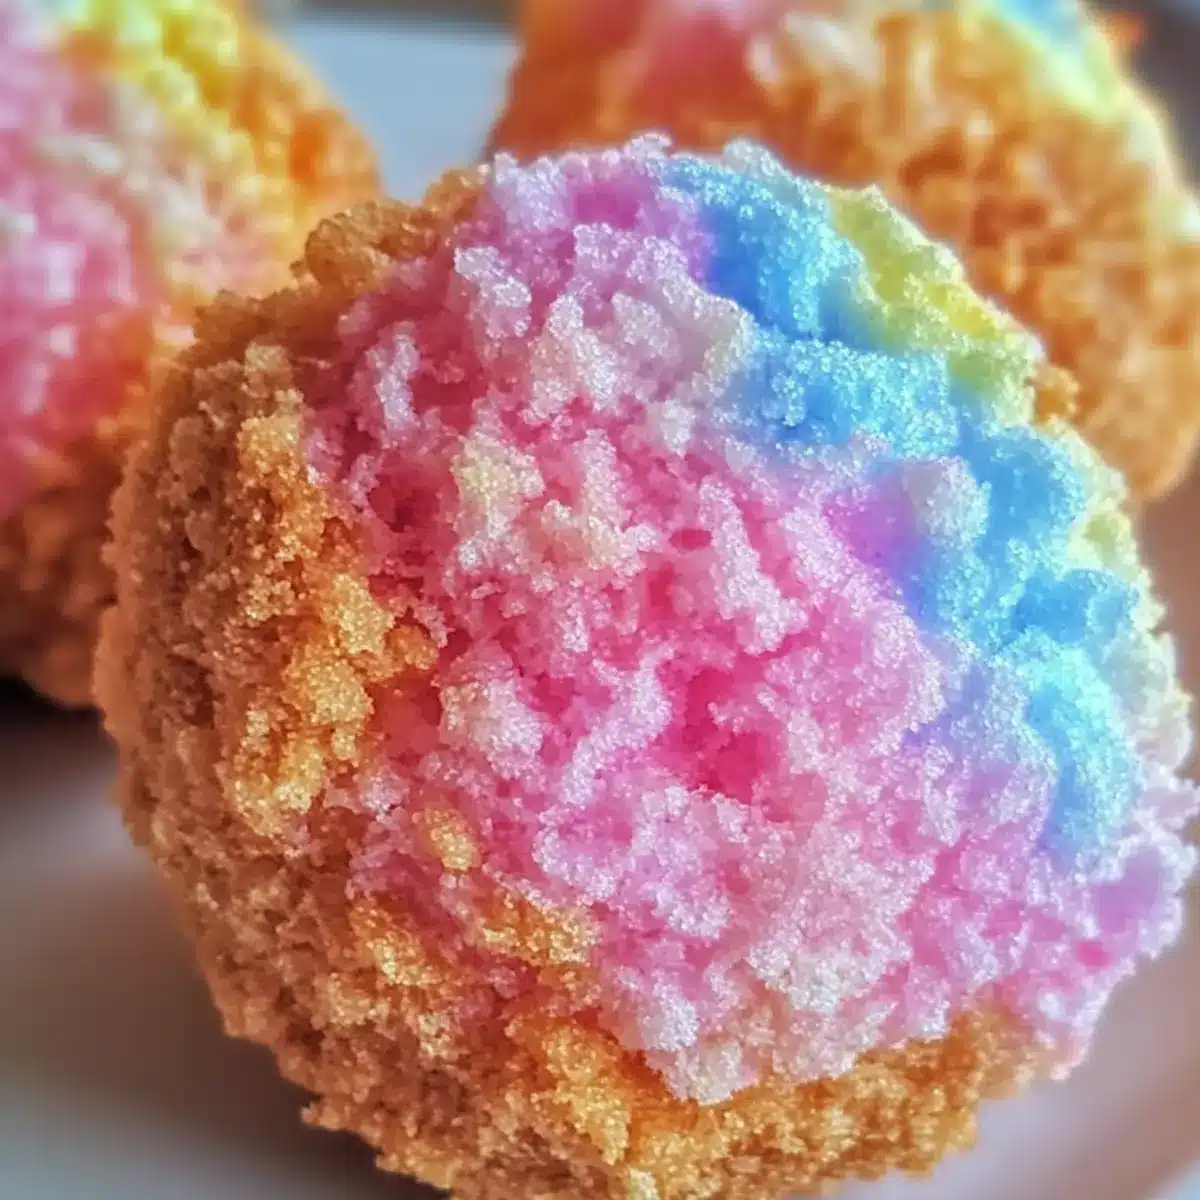
- Additional Crushed Cotton Candy (optional) – for a fun finish that heightens visual appeal.
Dive into the world of Crispy Cotton Candy Cheesecake Bombs, and enjoy a delightful adventure with every bite!
Step‑by‑Step Instructions for Crispy Cotton Candy Cheesecake Bombs
Step 1: Prepare the Cheesecake Filling
Begin by mixing the cream cheese, granulated sugar, vanilla extract, and crushed cotton candy in a medium bowl until the mixture is smooth and creamy. Use an electric mixer for about 2-3 minutes until fully combined. This delightful filling will be the heart of your Crispy Cotton Candy Cheesecake Bombs, so make sure there are no lumps.
Step 2: Chill the Filling
Transfer the cheesecake filling into an airtight container and chill it in the refrigerator for at least 30 minutes. Chilling allows the filling to firm up, making it easier to work with when assembling the bombs. If you’re short on time, you can freeze it for about 15 minutes until it thickens but be careful not to freeze it solid.
Step 3: Prepare the Dough
In a large mixing bowl, combine the graham cracker crumbs, all-purpose flour, baking powder, and salt. Mix these dry ingredients well with a whisk for about a minute, ensuring each element is evenly distributed. This mixture will create a lovely base for your Crispy Cotton Candy Cheesecake Bombs, enhancing flavor and texture.
Step 4: Form the Dough
Gradually add the large eggs to your dry mixture, stirring gently until a cohesive dough begins to form. This should take about 2-3 minutes; the dough will be slightly sticky but should hold together when pressed. Ensure you mix well to create a uniform texture that can encase your cheesecake filling perfectly.
Step 5: Shape the Cheesecake Bombs
Divide the dough into equal pieces, about the size of a golf ball. Flatten each piece in the palm of your hand and place a spoonful of the chilled cheesecake filling in the center. Carefully fold the edges of the dough over the filling, sealing it completely and shaping it into a ball. Repeat this process until all dough and filling are used.
Step 6: Firm Up the Bombs
Lay the shaped cheesecake bombs on a parchment-lined baking sheet and place them in the freezer for 15 minutes. This step helps them firm up, ensuring they maintain their shape while frying. You want them to be chilled but not frozen solid to achieve the right balance for frying.
Step 7: Heat the Oil
In a heavy-bottomed pot or deep fryer, heat oil to 350°F (175°C). Use a thermometer to monitor the temperature, ensuring it doesn’t get too hot, which can burn the bombs. Once hot, prepare for frying your Crispy Cotton Candy Cheesecake Bombs. Be cautious as the oil can splatter when adding the bombs.
Step 8: Fry the Bombs
Carefully drop the chilled cheesecake bombs into the hot oil in small batches, making sure not to overcrowd the pot. Fry for 2-3 minutes or until they turn golden brown, gently turning them halfway through to ensure even cooking. Watch for a crispy, golden exterior that contrasts beautifully with the creamy filling.
Step 9: Drain Excess Oil
Using a slotted spoon, remove the fried cheesecake bombs from the oil and place them on a plate lined with paper towels. Let them drain for a minute to remove excess oil. This step is essential for keeping your Crispy Cotton Candy Cheesecake Bombs perfectly crispy on the outside.
Step 10: Coat with Candy Melts
Meanwhile, melt the cotton candy-flavored candy melts according to package instructions until smooth and glossy. Dip each warm cheesecake bomb into the melted candy, allowing the excess to drip off, and place them back on parchment paper. This vibrant coating will add a sweet and colorful twist.
Step 11: Garnish the Bombs
Before the candy coating sets, optionally sprinkle additional crushed cotton candy on top of each bomb for a fun finish. This visual appeal not only enhances the whimsy but also adds an extra touch of sweetness to your Crispy Cotton Candy Cheesecake Bombs.
Step 12: Allow to Harden
Let the coated cheesecake bombs rest at room temperature until the candy melt has completely hardened, which usually takes about 10-15 minutes. Once set, they are ready to be served! Enjoy these delightful treats with family and friends, and relish the joy they bring to any occasion.
Expert Tips for Crispy Cotton Candy Cheesecake Bombs
- Chill the Filling: Ensure the cheesecake filling is well-chilled before assembling, making it easier to handle and preventing spills during shaping.
- Maintain Oil Temperature: Use a thermometer to keep oil at 350°F for optimal frying; too high can burn the dough, while too low yields soggy bombs.
- Don’t Overcrowd the Pot: Fry the bombs in small batches to avoid reducing the oil temperature, which can affect the crispiness of your Crispy Cotton Candy Cheesecake Bombs.
- Cool Before Coating: Allow the bombs to cool briefly before dipping them in melted candy melts; this helps the coating adhere better.
- Experiment with Flavors: Feel free to swap out cotton candy for other fun flavors like chocolate or peanut butter for a unique twist on these cheesecake bombs.
- Use Quality Ingredients: For the best flavor, choose high-quality cream cheese and fresh cotton candy; this will elevate your dessert to the next level!
Make Ahead Options
These Crispy Cotton Candy Cheesecake Bombs are perfect for meal prep, allowing you to enjoy sweet delights with ease! You can prepare the cheesecake filling up to 24 hours in advance by mixing cream cheese, sugar, vanilla, and crushed cotton candy, then refrigerate it in an airtight container. Additionally, the shaped cheesecake bombs can be frozen for up to 3 days before frying. Make sure to chill and freeze them for about 15 minutes to keep their shape when frying later. When you’re ready to serve, simply heat the oil and fry the bombs until they’re golden brown, then coat them with melted candy melts and enjoy a delightful dessert that feels just as fresh!
What to Serve with Crispy Cotton Candy Cheesecake Bombs
These delightful cheesecake bombs are the perfect treat to pair with a variety of side dishes and desserts that enhance their whimsical flavor and texture.
-
Creamy Vanilla Ice Cream: A scoop of vanilla ice cream adds a smooth, rich contrast to the crispy bombs, creating a delightful balance of hot and cold.
-
Fresh Berries: A mix of strawberries and blueberries brings a burst of freshness and natural sweetness that cuts through the richness of the cheesecake.
-
Whipped Cream: Light and airy whipped cream enhances the overall creaminess, making each bite even more indulgent and dreamy.
-
Chocolate Sauce: A drizzle of warm chocolate sauce offers a luscious finish, adding an extra layer of flavor that harmonizes beautifully with cotton candy.
-
Sparkling Lemonade: This refreshing drink complements the sweetness of the cheesecake bombs while offering a zesty twist that keeps the palate energized.
-
Cotton Candy Fluff: For those looking to double down on the theme, serving a small bowl of cotton candy fluff can create a fun, interactive element that kids will love.
-
Caramel Drizzle: A sweet drizzle of caramel sauce can provide a delightful contrast to the creamy and crispy elements, adding a touch of gourmet flair.
-
Mimosa: For a festive occasion, a bubbly mimosa adds a sophisticated touch, perfect for toasting with friends while enjoying the irresistible dessert.
Crispy Cotton Candy Cheesecake Bombs Variations
Feel free to get creative with your Crispy Cotton Candy Cheesecake Bombs and explore exciting twists that will delight your taste buds!
-
Chocolate Delight: Swap out cotton candy for chocolate chunks in the filling for a rich, decadent experience that chocolate lovers will adore.
-
Peanut Butter Bliss: Replace the cotton candy with peanut butter for a creamy, nutty filling, perfect for those who crave a more savory sweetness.
-
Flavorful Extracts: Incorporate flavored extracts like almond or lemon to give the cream cheese layer a unique twist, enhancing the taste while keeping that creamy texture intact.
-
Oreo Crust: Substitute graham cracker crumbs with crushed Oreos for an irresistible chocolatey crust that adds depth and deliciousness to each bite.
-
Fun Fruit Filling: Add small pieces of fresh fruit, like strawberries or bananas, to the cheesecake filling for a fruity surprise that contrasts with the sweet flavors.
-
Spicy Kick: Incorporate a hint of cinnamon or cayenne pepper in the dough for those who enjoy a little heat in their dessert, creating an exciting flavor profile.
-
Lavender Infusion: Use lavender extract in the filling for a floral aroma that brings a sophisticated touch to your cheesecake bombs, making them perfect for special occasions.
-
Rainbow Coating: Use a mix of colored candy melts to coat the bombs, creating a vibrant display that is perfect for parties or festive events.
After trying out these variations, don’t forget to check out my delightful recipes like Crisp Mini Cheesecakes or the indulgent Chocolate Oat Cookies for even more sweet inspiration!
Storage Tips for Crispy Cotton Candy Cheesecake Bombs
- Fridge: Store any uneaten Crispy Cotton Candy Cheesecake Bombs in an airtight container for up to 3 days to keep them fresh and tasty.
- Freezer: If you want to preserve them longer, freeze the bombs in a single layer on a baking sheet for up to 2 months. Once frozen, transfer them to a zip-top bag to save space.
- Reheating: To enjoy the bombs later, reheat them in a preheated oven at 350°F (175°C) for about 5-7 minutes to regain their crispiness. Avoid microwaving as it can make them soggy.
- Coating Care: If you notice any candy coating getting sticky in storage, you can lightly dust them with powdered sugar before storing to help maintain their delightful appearance.
Crispy Cotton Candy Cheesecake Bombs Recipe FAQs
What kind of cotton candy should I use?
Absolutely! I recommend using fresh cotton candy for the best flavor, but you can use store-bought as well. Look for vibrant colors without any dark spots or signs of being stale. If you’re feeling adventurous, you could even make your own using a cotton candy machine!
How should I store leftover Crispy Cotton Candy Cheesecake Bombs?
Store any uneaten cheesecake bombs in an airtight container in the refrigerator for up to 3 days. If you’re looking to keep them longer, freezing is a fantastic option! Place them in a single layer on a baking sheet to freeze for about 2 hours. Once firm, transfer them to a zip-top bag for easy storage; they can last for up to 2 months in the freezer.
Can I freeze these cheesecake bombs? If so, how?
Definitely! To freeze, follow these steps: after shaping the bombs, lay them on a baking sheet lined with parchment paper and pop them in the freezer until frozen solid (about 2 hours). Once they’re firm, you can transfer them to a zip-top bag or airtight container. This way, you’ll have fun treats ready to fry whenever the craving strikes!
What if my cheesecake bombs are soggy after frying?
If your bombs turn out soggy, it could mean the oil temperature was too low during frying. Make sure to keep your oil at around 350°F (175°C) for the perfect crispiness. Also, ensure that you drain them fully on paper towels after frying. The next time, try frying in smaller batches to maintain the oil temperature.
Are these cheesecake bombs suitable for kids?
Yes, indeed! These delightful treats are perfect for kids and adults alike, thanks to their fun flavors and whimsical nature. However, check for any allergies to the ingredients, especially the cotton candy, as it may contain allergens like gluten or artificial coloring. Feel free to make them even more kid-friendly by swapping cotton candy for other flavors they love!
Delightful Crispy Cotton Candy Cheesecake Bombs for Fun Treats
Ingredients
Equipment
Method
- In a medium bowl, mix cream cheese, granulated sugar, vanilla extract, and crushed cotton candy until smooth.
- Transfer the mixture to an airtight container and chill for at least 30 minutes.
- In a large bowl, combine graham cracker crumbs, all-purpose flour, baking powder, and salt. Mix well.
- Gradually add eggs to the dry mixture, stirring until a cohesive dough forms.
- Divide the dough, flatten each piece, and add a spoonful of chilled filling. Seal and shape into balls.
- Place the shaped bombs on a parchment-lined baking sheet and chill in the freezer for 15 minutes.
- Heat oil to 350°F (175°C).
- Fry the cheesecake bombs in small batches for 2-3 minutes until golden brown.
- Remove from oil and drain on paper towels.
- Melt candy melts until smooth and dip each warm cheesecake bomb into the coating.
- Sprinkle with crushed cotton candy if desired before the coating sets.
- Let them rest at room temperature until the coating hardens.
Leave a Reply