
The scent of warm graham crackers and zesty key lime fills the air, transporting me straight to sun-drenched Florida beaches with every bite of this heavenly Key Lime Cheesecake. This delightful treat is a harmonious blend of vibrant citrus and creamy goodness, all sitting on a crunchy crust that offers the perfect balance. What I love most about this recipe is its make-ahead friendly nature; you can whip it up days in advance, allowing you to focus on your guests instead of the kitchen chaos. Plus, it’s designed for a foolproof finish—no cracks here, my friend! Perfect for warm weather gatherings or simply to satisfy a sweet tooth, this cheesecake will become your go-to for impressing family and friends. Are you ready to dive into this deliciously easy dessert? Let’s get baking!

Why Is This Cheesecake So Amazing?
Simplicity at its finest: This recipe is incredibly straightforward, allowing anyone to master the art of cheesecake regardless of skill level.
Make-Ahead Friendly: Prepare this delightful dessert days in advance, ensuring you spend more time enjoying your gathering instead of being stuck in the kitchen.
Rich, Creamy Flavor: The combination of key lime and cream cheese creates a luxurious experience that tastes divine with every mouthful.
Crowd-Pleasing Delight: Whether you’re serving friends at a summer barbecue or family during a holiday feast, this cheesecake will be a hit!
No-Crack Assurance: With my foolproof technique, you can confidently present a flawless cheesecake every time—no unsightly cracks in sight!
For an extra twist on flavors, why not try serving it with fresh kiwi slices or a drizzle of homemade raspberry coulis? You can also explore other delicious desserts like a Pecan Pie Bread or a light, refreshing Cranberry Lime Fizz.
Key Lime Pie Cheesecake Ingredients
For the Crust
• Graham Crackers – Create a buttery base for the crust; feel free to substitute with gluten-free graham crackers for a gluten-free option.
• Unsalted Butter – Binds the crust together without adding extra salt; make sure it’s unsalted for better flavor control.
• Granulated Sugar – Sweetens the crust and cheesecake filling to balance the tartness of the limes; no direct substitutions are recommended.
For the Cheesecake Filling
• Cream Cheese – The main component providing richness and creaminess; opt for full-fat for the best flavor, avoiding nonfat options.
• Sour Cream – Adds moisture and a smooth texture; ensure it’s at room temperature for even blending.
• Cornstarch – Helps the cheesecake set properly; you can substitute it with all-purpose flour (3 tablespoons) if needed.
• Eggs – Provide structure and richness; use large eggs at room temperature for optimal mixing.
• Key Lime Juice – The main source of tartness; you can use bottled or fresh juice, or substitute with a mix of regular lime juice and lemon juice (6 tablespoons lime + 2 tablespoons lemon).
• Key Lime Zest – Enhances the lime flavor; if unavailable, regular lime zest works as a substitute.
• Vanilla Extract – Adds depth of flavor; opt for a high-quality extract to elevate your cheesecake.
For the Whipped Cream Topping
• Heavy Cream – Essential for whipping into stabilized whipped cream; it’s best when cold for better volume and texture.
• Powdered Sugar – Ensures sweetness and stability in the whipped cream; don’t substitute it with granulated sugar.
• Unflavored Gelatin & Water – Used to stabilize the whipped cream; essential for maintaining form when prepared ahead of time.
This Key Lime Pie Cheesecake is sure to become a star at your gatherings, offering a deliciously creamy escape into citrus bliss!
Step‑by‑Step Instructions for Key Lime Pie Cheesecake
Step 1: Preheat and Prepare
Begin by preheating your oven to 325°F (160°C). While the oven heats, prepare a boiling water bath by bringing water to a simmer. This water bath will help bake your Key Lime Pie Cheesecake evenly and prevent cracking. A roasting pan works best for this method, so have that ready near your oven.
Step 2: Make the Crust
In a food processor, pulse the graham crackers with granulated sugar and melted unsalted butter until fine crumbs form. Transfer this mixture into a greased 9-inch springform pan and press it firmly into the bottom and up the sides. Bake for 10 minutes until set, then allow the crust to cool completely before filling.
Step 3: Waterproof the Pan
To prevent any leaks from your springform pan, tightly wrap the bottom with aluminum foil. Ensure the foil goes up the sides of the pan. This waterproofing step is crucial when placing the pan in the boiling water bath later and guarantees a smooth baking process for your Key Lime Pie Cheesecake.
Step 4: Prepare the Filling
In a large mixing bowl, beat the room temperature cream cheese using an electric mixer until it’s light and fluffy, about 2-3 minutes. Gradually add in granulated sugar and cornstarch, mixing just until combined. The goal here is to create a smooth and creamy batter without overmixing, which could introduce air bubbles.
Step 5: Mix in Ingredients
Add sour cream, key lime juice, zest, and vanilla extract to the cream cheese mixture. Blend these until completely smooth, scraping down the sides of the bowl as needed. This mixture should be creamy with a lovely zing from the lime, creating the perfect filling for your Key Lime Pie Cheesecake.
Step 6: Incorporate the Eggs
Add the eggs to your cheesecake filling one at a time, mixing gently after each addition just until blended. Avoid overmixing, as this can lead to cracks while baking. Once combined, pour the luscious filling into your cooled crust, ensuring an even surface for a beautifully smooth finish.
Step 7: Set Up the Water Bath
Place the prepared springform pan into a larger roasting pan. Carefully pour the boiling water into the roasting pan, ensuring it reaches halfway up the sides of the springform pan. This water bath will help regulate the temperature during baking, resulting in your perfect Key Lime Pie Cheesecake.
Step 8: Bake the Cheesecake
Bake your cheesecakes in the preheated oven for approximately 65-85 minutes. You’ll know it’s done when the edges are firm and the center jiggles slightly—like a gentle wave in calm waters! Keep the door closed during the first 65 minutes to prevent temperature fluctuations.
Step 9: Cool Gradually
After baking, turn off the oven and crack the door open, letting the cheesecake slowly cool inside for 60 minutes. This gradual cooling helps prevent shocking the cheesecake and minimizes cracks. Once cooled, transfer it to a wire rack to cool completely before refrigerating.
Step 10: Chill Overnight
Cover your cooled Key Lime Pie Cheesecake with plastic wrap and refrigerate it for at least 8 hours, though overnight is ideal. This chilling period allows the flavors to meld beautifully, making it taste even better the next day—trust me, it’s worth the wait!
Step 11: Whip the Cream
For the whipped cream topping, dissolve unflavored gelatin in water according to package instructions. In a chilled mixing bowl, beat heavy cream until soft peaks form, then gradually add in powdered sugar and the gelatin mixture. Continue whipping until you achieve stiff peaks, creating a stable topping for your cheesecake.
Step 12: Serve with Whipped Cream
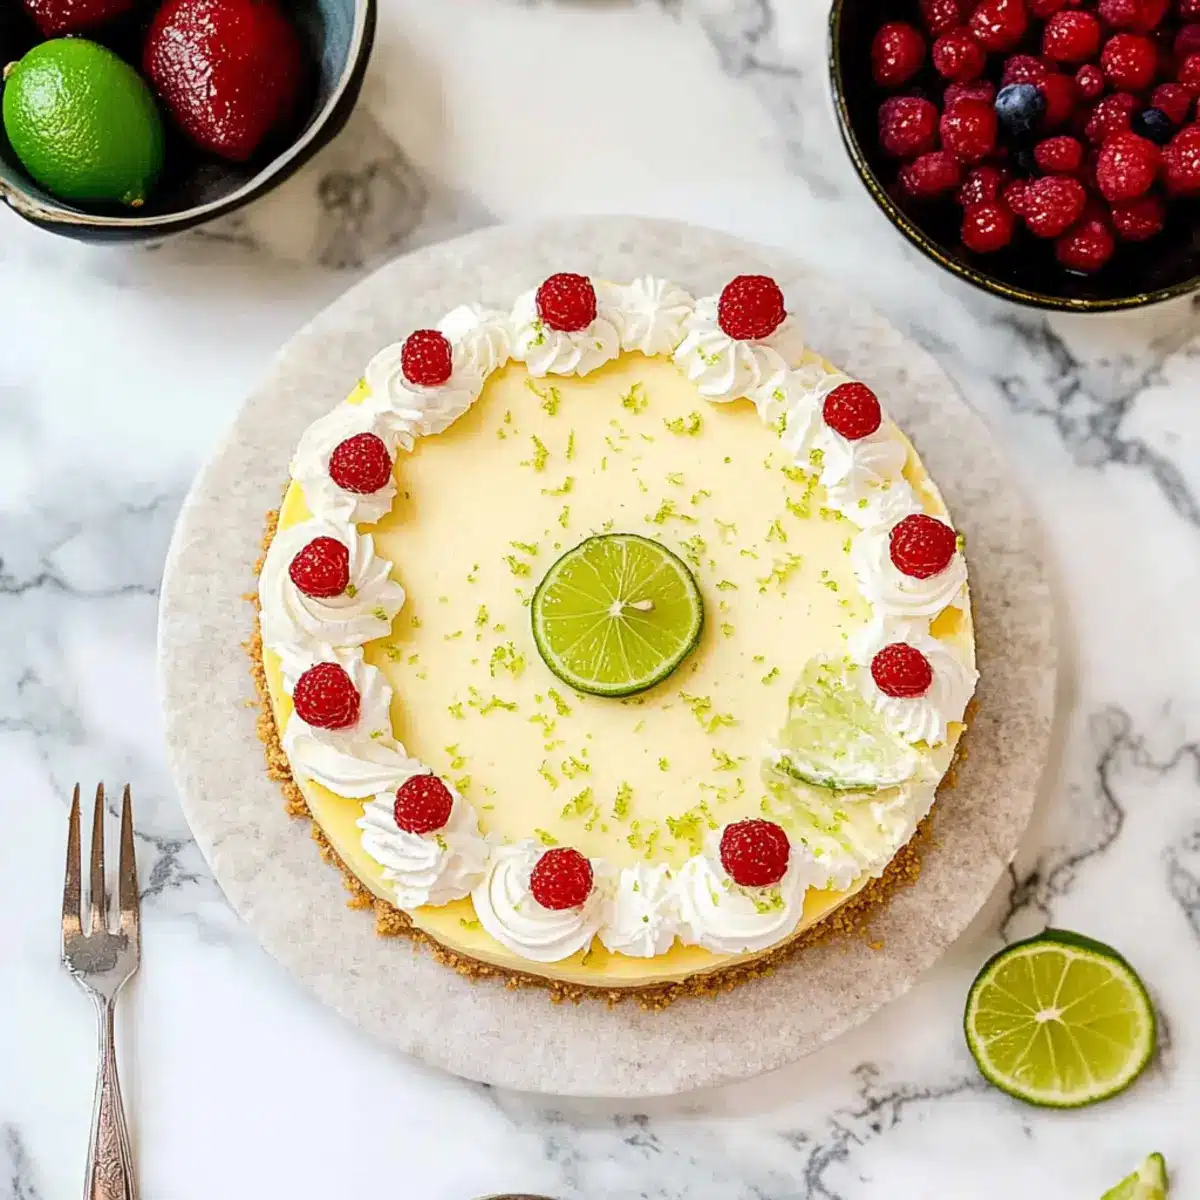
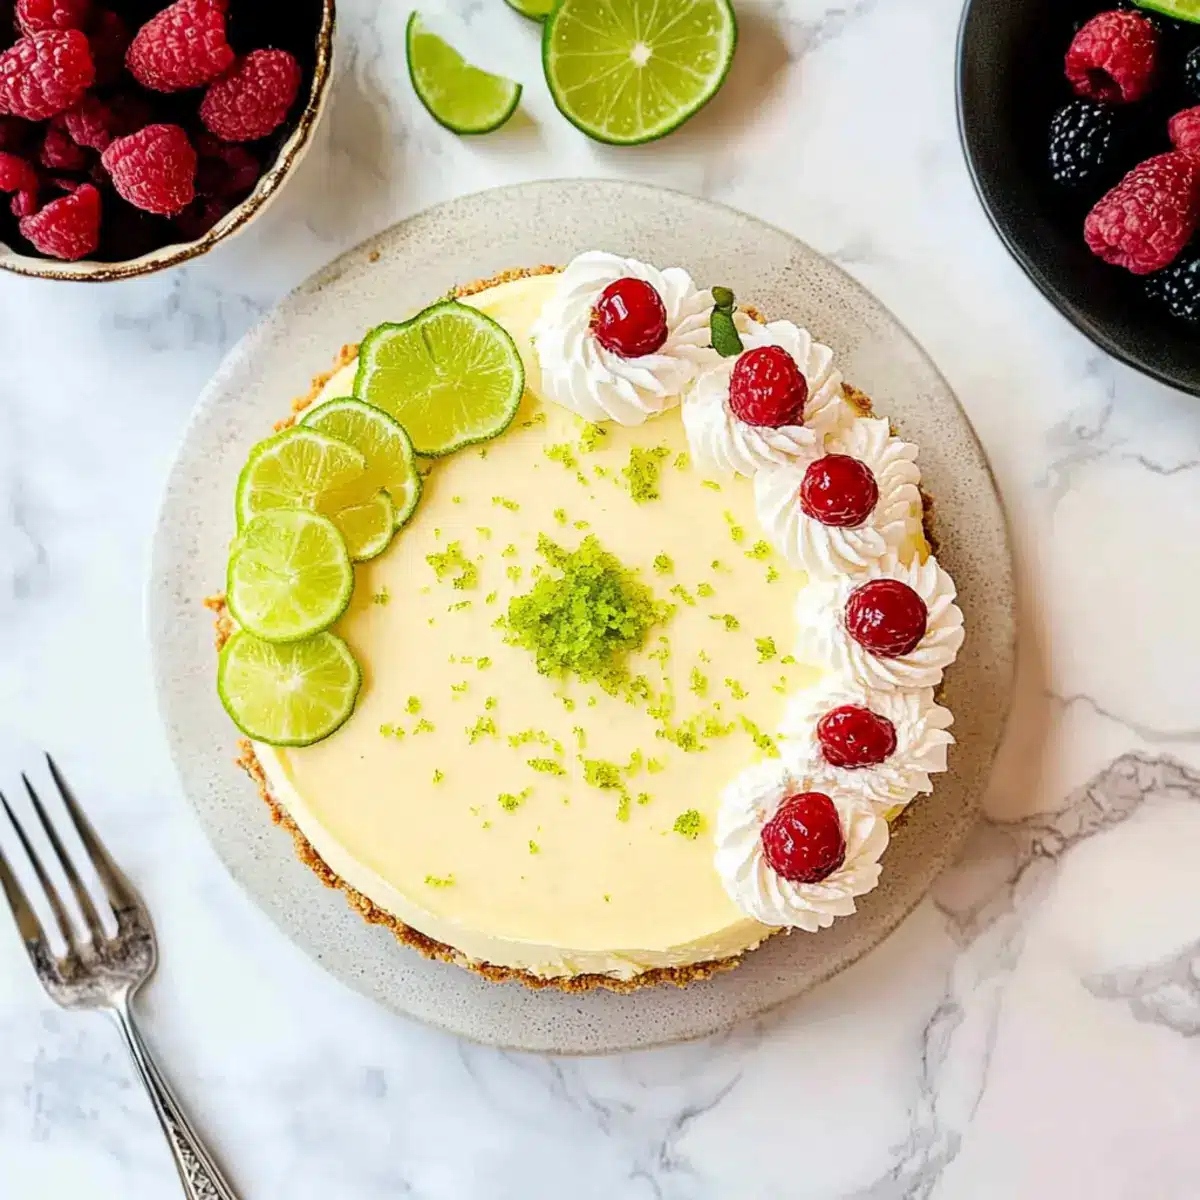
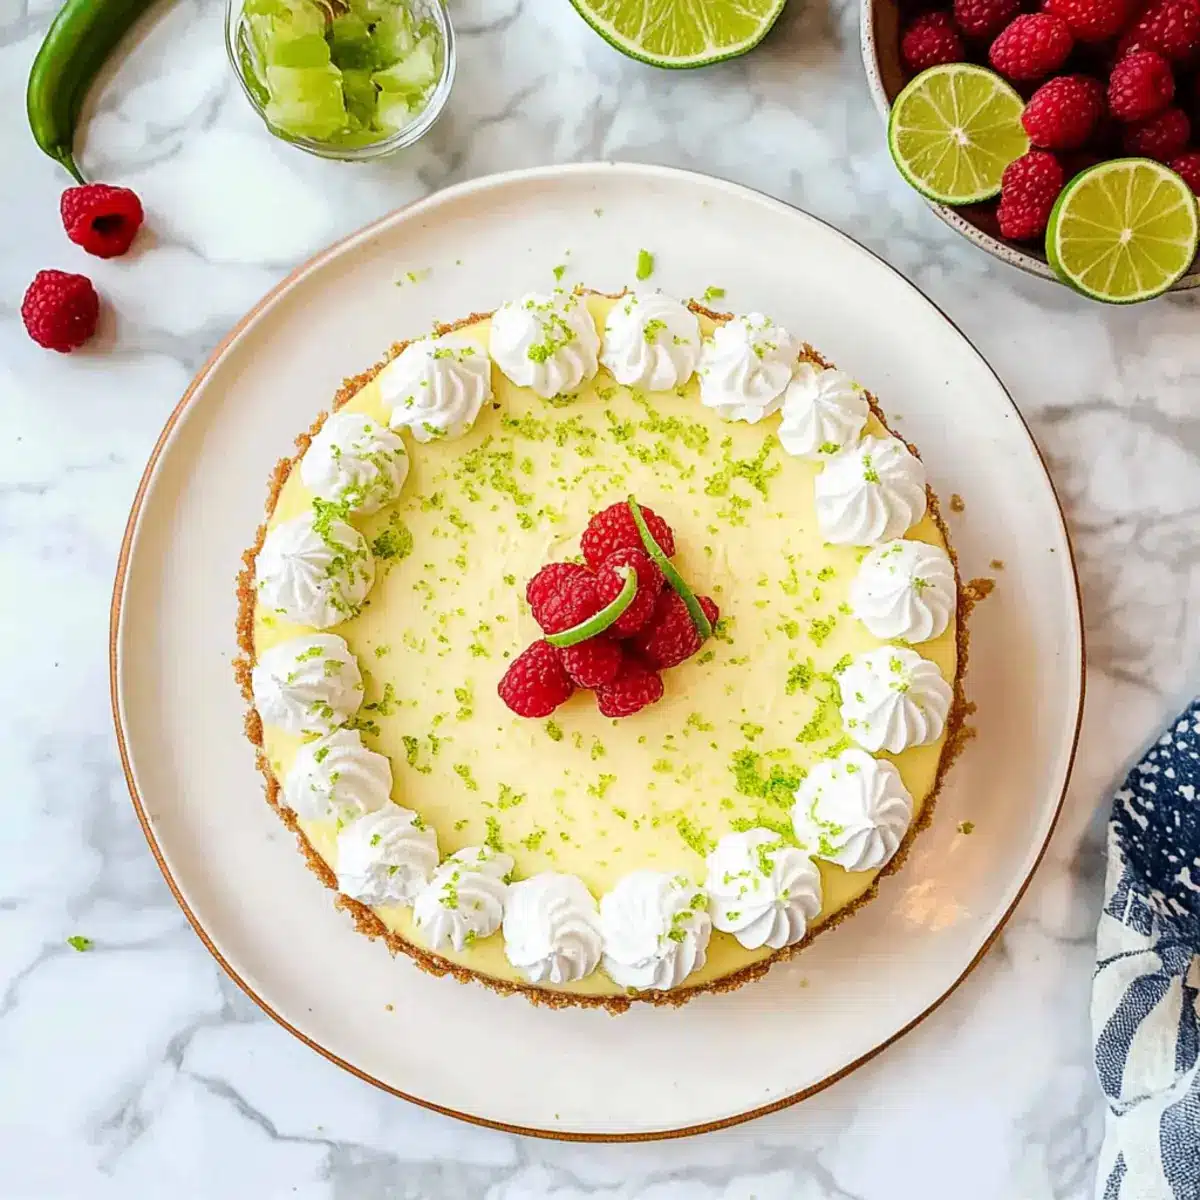
Right before serving, pipe the stabilized whipped cream on top of your chilled Key Lime Pie Cheesecake, creating beautiful swirls for presentation. Optionally, garnish with lime zest or fresh berries to add an extra touch of color and flavor. Now, it’s ready to delight your guests!
Storage Tips for Key Lime Pie Cheesecake
-
Fridge: Store your Key Lime Pie Cheesecake in the refrigerator, tightly covered, for up to 7 days. This keeps it fresh and delicious for every slice.
-
Freezer: If you want to enjoy it later, freeze the cheesecake for up to 2 months. Wrap it tightly in plastic wrap and then in aluminum foil for best preservation.
-
Thawing: When ready to enjoy, transfer the frozen cheesecake to the fridge and let it thaw overnight for optimal texture.
-
Reheating: There’s no need to reheat cheesecake; simply serve it chilled and top with whipped cream or fresh fruits right before serving!
What to Serve with Key Lime Cheesecake
The perfect accompaniments can elevate your Key Lime Cheesecake from delightful to unforgettable, creating a memorable dining experience.
-
Fresh Berries: Plump raspberries or luscious strawberries add a burst of color and sweetness that balances the tartness of the cheesecake. Their juicy texture juxtaposes the creamy cheesecake, making each bite a celebration.
-
Mint Leaves: A sprinkle of fresh mint not only adds a refreshing aroma but also brings a hint of herbal brightness that enhances the citrus flavors. Simply place a few sprigs on top for a vibrant touch.
-
Coconut Macaroons: The chewy, sweet goodness of coconut macaroons complements the creamy cheesecake beautifully. Their texture contrast creates an exciting experience, perfect for Coco lovers!
-
Zesty Key Lime Drink: Serve a cool key limeade or a zesty mocktail alongside the cheesecake to highlight its flavors and offer a refreshing sip. The tart and tangy notes will dance well with each slice of your cheesecake.
-
Chocolate Drizzle: A drizzle of rich chocolate ganache can add an indulgent contrasting note to the tart key lime flavors. This harmonious blend of flavors and textures will leave your guests wanting more!
-
Chilled White Wine: Pairing your Key Lime Cheesecake with a glass of chilled white wine, like Sauvignon Blanc, enhances the bright citrus notes. The crispness of the wine perfectly balances the richness of the dessert.
Each of these pairings will not only highlight the delightful characteristics of your Key Lime Cheesecake but also create a full, satisfying meal experience!
Key Lime Pie Cheesecake Variations
Feel free to explore these delightful twists on your Key Lime Pie Cheesecake—your taste buds might thank you!
-
Gluten-Free Crust: Substitute traditional graham crackers with gluten-free alternatives to accommodate dietary needs without sacrificing flavor. Special guests will appreciate this thoughtful variation!
-
Biscoff Crust: Swap out graham crackers for Biscoff cookies for a unique, caramelized flavor that adds warmth and depth to your crust. This twist invites an exciting contrast to the tangy filling.
-
Meyer Lemon Zest: For a subtle, fragrant alternative, use Meyer lemon zest instead of key lime zest. This will add a gentle sweetness and citrus aroma—perfect for those who adore lemony desserts.
-
Mixed Citrus Filling: Experiment by mixing key lime juice with orange juice for a refreshing taste! The sweet and tart combination can make for a delightful surprise in each slice.
-
Berry Swirl: Blend fresh raspberries or strawberries into the filling before baking for a beautiful marbled effect and a fruity surprise in every bite. This adds a vibrant pop of color!
-
Chocolate Drizzle: Elevate your cheesecake by drizzling melted chocolate on top of the whipped cream just before serving. The indulgent touch balances the tanginess beautifully and adds a touch of decadence.
-
Spicy Twist: Add a pinch of cayenne pepper or chili powder to the filling for a lively kick. This adds an unexpected heat that complements the cheesecake’s sweetness and refreshing lime flavor.
For additional delicious ideas, consider pairing your cheesecake with a refreshing Cranberry Lime Fizz or a sumptuous Velvet Strawberry Cheesecake. These creative serving ideas will certainly enrich your dessert experience!
Make Ahead Options
These Key Lime Pie Cheesecakes are a fantastic choice for meal prep, allowing you to enjoy more time with your guests instead of bustling around the kitchen! You can prepare the cheesecake filling up to 3 days in advance; simply tart it in the refrigerator after it’s cooled completely. For the crust, you can make it up to 24 hours before serving, storing it in an airtight container at room temperature to keep it crisp. Just remember to add the whipped cream topping before serving to maintain its freshness and stability. When you’re ready to impress, simply pipe the delicious stabilized whipped cream over the cheesecake, and enjoy the time-saving benefits of your make-ahead masterpiece!
Expert Tips for Key Lime Pie Cheesecake
-
Room Temperature Ingredients: Ensure your cream cheese, eggs, and sour cream are at room temperature for a smooth filling and to prevent lumps in your Key Lime Pie Cheesecake.
-
Mix Gently: Avoid overmixing your eggs when adding them to the filling. This will help prevent cracks during baking by limiting excess air incorporation.
-
Water Bath Technique: Always use a water bath while baking your cheesecake to maintain moisture. This method helps create a perfect, creamy texture without cracks.
-
Cooling Gradually: After baking, leave your cheesecake in a turned-off oven with the door ajar for 60 minutes. Gradual cooling prevents drastic temperature changes that can lead to cracks.
-
Chill for Flavor: For the best taste and texture, chill your Key Lime Pie Cheesecake for at least 8 hours (preferably overnight) before serving. Flavors deepen and improve after chilling.
Key Lime Pie Cheesecake Recipe FAQs
What type of graham crackers should I use for the crust?
You can use regular graham crackers for a classic taste, but if you need a gluten-free option, feel free to substitute with gluten-free graham crackers. Just ensure they are finely crushed for the best texture!
How long can I store Key Lime Pie Cheesecake in the fridge?
Your Key Lime Pie Cheesecake can be stored in the refrigerator for up to 7 days. Be sure to cover it tightly with plastic wrap or aluminum foil to maintain its freshness and flavor.
Can I freeze Key Lime Pie Cheesecake?
Absolutely! To freeze, wrap the cheesecake tightly in plastic wrap then cover it with aluminum foil to prevent freezer burn. It can be stored in the freezer for up to 2 months. When ready to enjoy, simply transfer it to the fridge overnight to thaw.
My cheesecake cracked on top; what went wrong?
Cracks can occur for a few reasons. To avoid this, ensure that you’re mixing the eggs in gently without overbeating, as too much air can cause cracks during baking. Additionally, using a water bath helps maintain temperature and moisture, which is key to a smooth finish!
Is there a way to accommodate dairy allergies when making Key Lime Pie Cheesecake?
For those with dairy allergies, you can experiment with dairy-free cream cheese alternatives, and use coconut cream in place of the whipped cream topping. Just keep in mind that the flavor and texture may vary slightly from the traditional version, but it can still be delicious!
How do I properly whip the cream to stabilize it?
To stabilize whipped cream, start by dissolving unflavored gelatin in cool water; let it sit for a few minutes. Then, whip your heavy cream until soft peaks form, gradually adding powdered sugar. Finally, mix in the dissolved gelatin and continue whipping until you get stiff peaks. This ensures your cream retains its shape when piped onto your cheesecake!
Delightful Key Lime Pie Cheesecake You Can Make Ahead
Ingredients
Equipment
Method
- Preheat your oven to 325°F (160°C) and prepare a boiling water bath.
- In a food processor, mix graham crackers, sugar, and butter until crumbly. Press into a greased springform pan and bake for 10 minutes.
- Wrap the bottom of the springform pan in aluminum foil to prevent leaks.
- Beat cream cheese until light and fluffy, add sugar and cornstarch until combined.
- Mix in sour cream, key lime juice, zest, and vanilla extract until smooth.
- Incorporate eggs one at a time, mixing gently; pour into cooled crust.
- Place the pan in a larger roasting pan and fill with boiling water halfway up the sides.
- Bake cheesecakes for 65-85 minutes until edges are firm.
- Turn off oven, crack the door and let cool for 60 minutes.
- Transfer to a wire rack, then refrigerate, covered, for at least 8 hours.
- Dissolve gelatin in water, whip cream until soft peaks, add powdered sugar and gelatin until stiff peaks form.
- Pipe whipped cream on the cheesecake before serving, optionally garnish with lime zest or berries.
Leave a Reply