
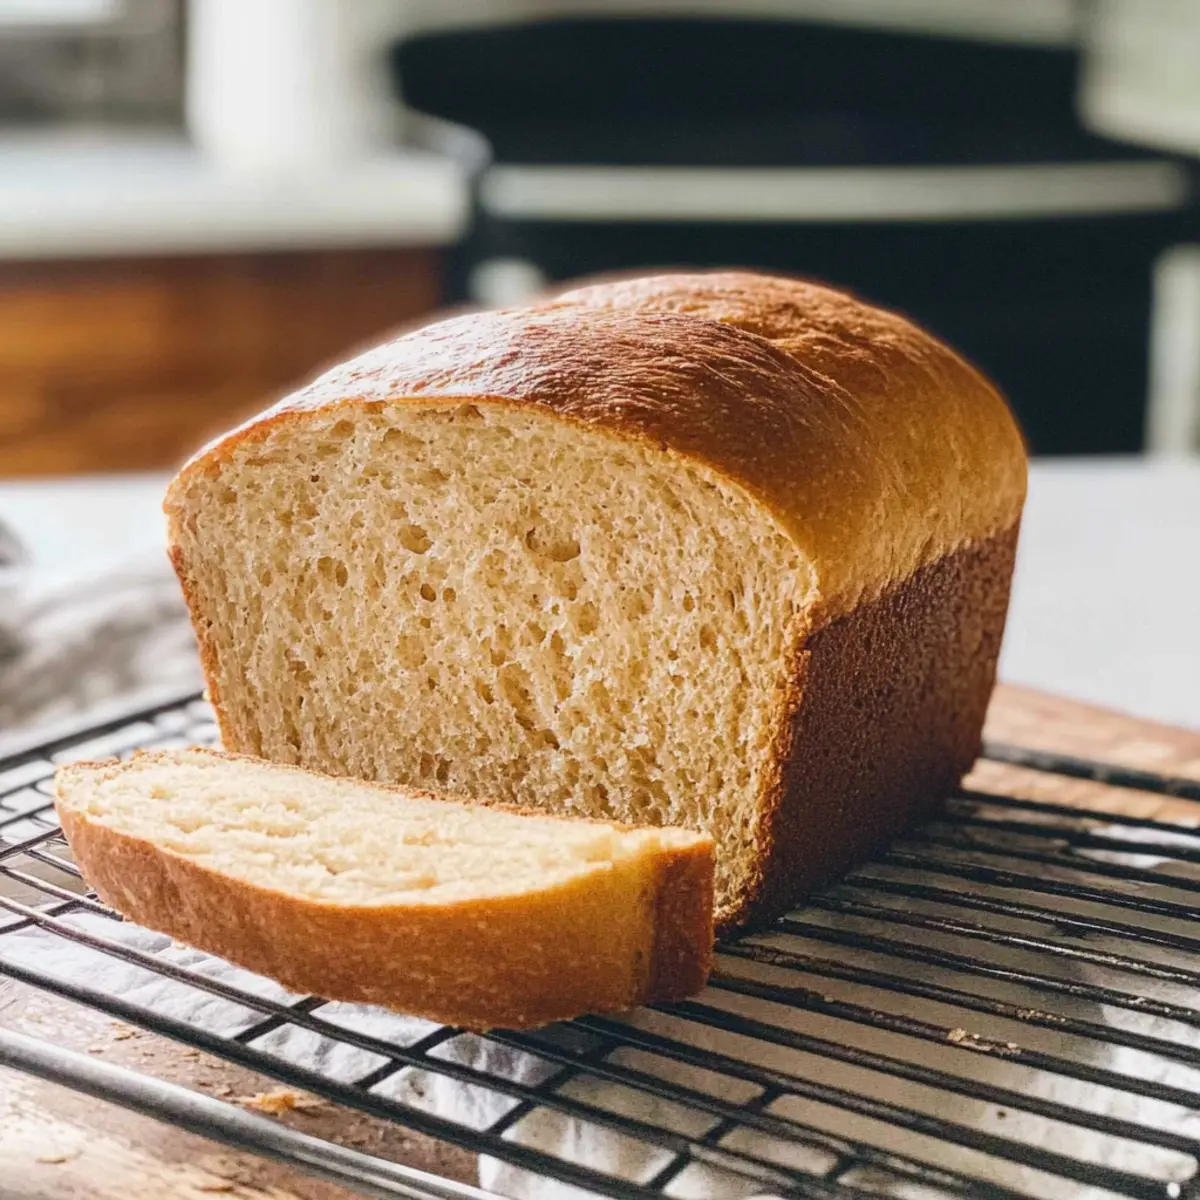
As I pulled the warm, golden Honey Wheat Bread from the oven, a wave of nostalgia washed over me—the comforting embrace of home-cooked meals filled with love. This simple honey wheat bread blends the earthy goodness of whole wheat flour with the sweet touch of honey, making it a delightful addition to any meal, whether it’s slathered in butter or turned into a comforting sandwich. Not only is this recipe approachable for beginners, but it also offers a nourishing alternative to store-bought bread, ideal for busy families seeking that homemade touch. With just a handful of ingredients and straightforward techniques, you’ll be well on your way to mastering this wholesome loaf. Curious about how to create this aromatic delight in your own kitchen? Let’s dive in!

Why Choose Honey Wheat Bread?
Comforting Aroma: Imagine the warm, inviting scent filling your home as this bread bakes. It’s perfect for cozy family dinners or casual gatherings with friends.
Healthy Option: Packed with whole grains, this recipe not only tastes great but also fuels your body with nutrition, making it a fantastic choice for health-conscious families.
Beginner-Friendly: With simple steps and minimal ingredients, even novice bakers can feel confident tackling this delightful bread.
Versatile Uses: Enjoy it fresh out of the oven, as the base for your favorite sandwiches, or toasted with a spread of homemade jam—endless possibilities await!
A Sweet Touch: The blend of honey and whole wheat flour creates a unique sweetness that elevates it above store-bought alternatives. For more comfort food inspirations, check out our Pecan Pie Bread and Eggnog Bread Pudding.
Simple Honey Wheat Bread Ingredients
• Discover the delightful components of this homemade bread!
For the Bread Dough
- Warm Milk (about 110-115 degrees) – Activates yeast and contributes to a softer crumb. Substitution: Use warm water if milk is unavailable; the bread will still be delicious.
- Instant Yeast – Causes the bread to rise and creates a fluffy texture. Note: Active dry yeast can be used but requires a longer activation period.
- Sugar – Feeds the yeast during fermentation for better rise. Can be omitted if desired, but will affect the yeast activation slightly.
- Warm Water – Helps to hydrate the dough. Does not need to be replaced; works in tandem with warm milk if used.
- Whole Wheat Flour – Provides nutrition and a hearty texture. Substitution: Can use all-purpose flour, but results in a denser loaf if entirely substituted.
- Bread Flour or All-Purpose Flour – Adds structure and chewiness; start with 3 cups and adjust for dough consistency. Can substitute with more whole wheat for a denser texture.
- Shortening (butter flavored preferred) – Adds moisture and creates a tender crumb. Can substitute for softened butter or margarine.
- Honey – Adds natural sweetness and enhances flavor. Manuka or agave syrup can be used for a vegan alternative.
- Salt – Balances flavors and strengthens gluten structure. Omit if reducing sodium intake but enhances flavor significantly.
For the Glaze
- Egg wash (1 egg whisked with 1 Tbsp water) – Gives the bread a shiny crust. Can omit for egg-free version.
Step‑by‑Step Instructions for Simple Honey Wheat Bread
Step 1: Activate the Yeast
In a large mixing bowl, combine the warm milk, instant yeast, and sugar. Allow this mixture to sit for about 5 minutes, or until it becomes foamy and bubbly—this indicates that your yeast is ready to help your Simple Honey Wheat Bread rise beautifully.
Step 2: Mix the Dough Ingredients
Add the warm water, whole wheat flour, 3 cups of bread flour, shortening, honey, and salt to the activated yeast mixture. Stir everything together until well combined, ensuring the dough incorporates all the elements. It should start to form a shaggy mixture that will soon become your dough.
Step 3: Knead the Dough
Using a stand mixer fitted with a dough hook, knead the dough on low speed for about 4 minutes. If the dough feels too sticky, gradually add a bit more bread flour, but aim for a soft, slightly tacky texture. Once done, the dough should be elastic and smooth, perfect for shaping.
Step 4: First Rise
Shape the kneaded dough into a ball, then cover it with plastic wrap or a clean kitchen towel. Place the bowl in a warm, draft-free area for about 1 hour, or until the dough has doubled in size. This rise is crucial for creating that light, fluffy result in your Honey Wheat Bread.
Step 5: Shape the Loaves
Once risen, turn the dough out onto a floured surface and gently knead it a few times to remove excess air. Divide the dough in half to shape into two loaves. Form each piece by folding and tucking in the ends, creating a smooth surface, which will be placed seam-side down in greased loaf pans.
Step 6: Second Rise
Cover the shaped loaves with a clean kitchen towel and allow them to rise for another 30 minutes. During this time, they will puff up just enough to create a deliciously soft texture in your Simple Honey Wheat Bread.
Step 7: Preheat the Oven
While the loaves are rising, preheat your oven to 350°F (175°C). This ensures that the bread starts baking at the right temperature and develops that lovely golden crust.
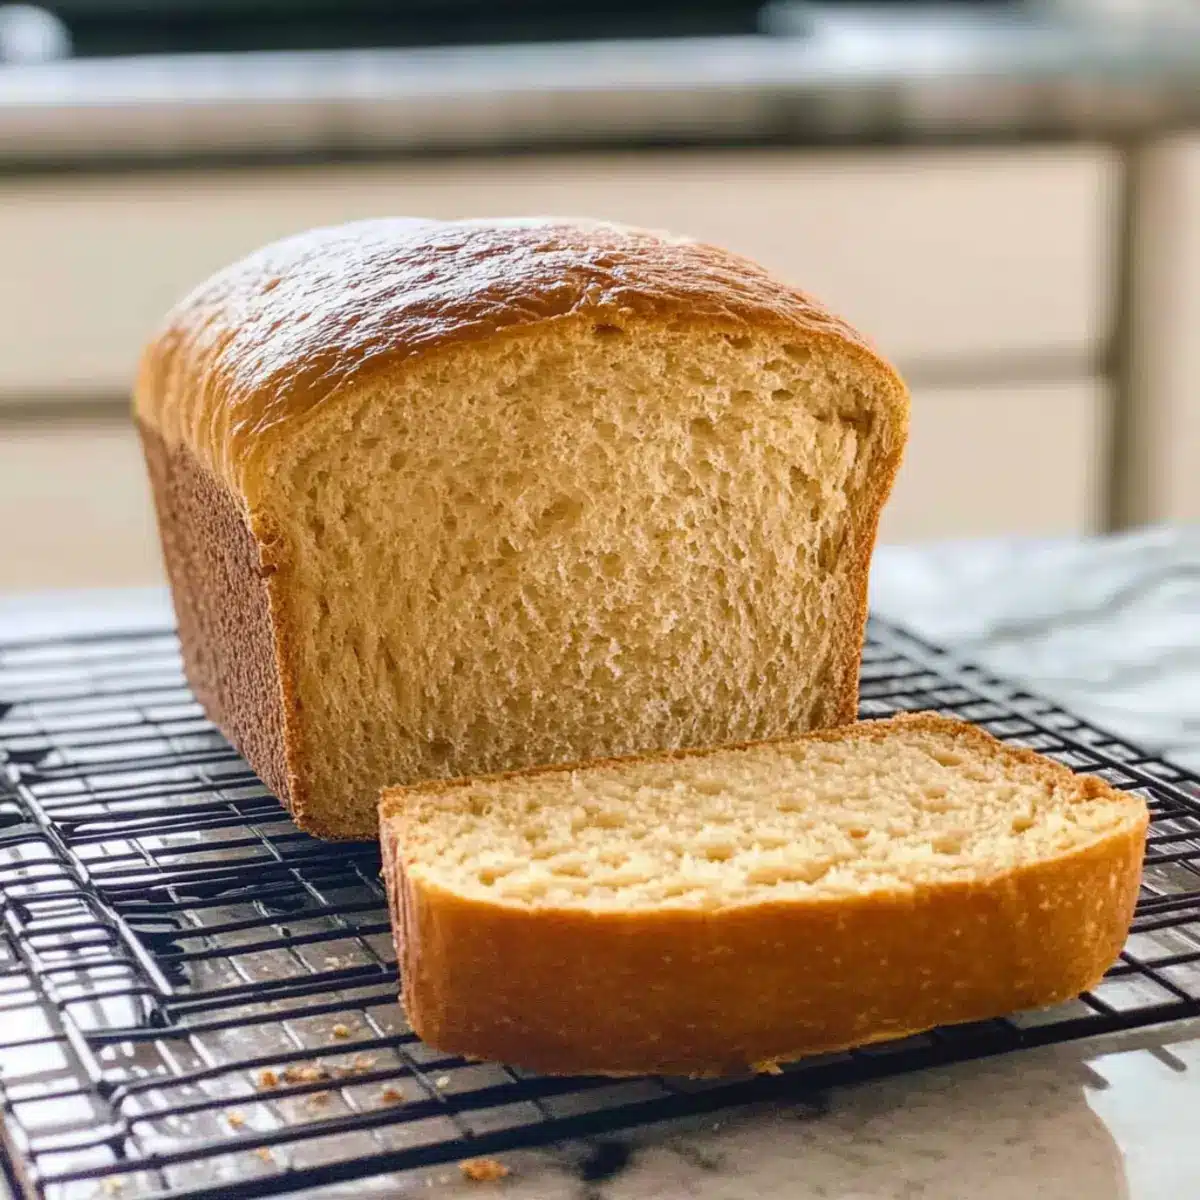
Step 8: Bake the Bread
Once the loaves have finished their second rise, brush the tops with an egg wash for a shiny crust if desired. Place them in the preheated oven and bake for about 30 minutes or until they reach an internal temperature of 190°F (88°C) and the tops are golden brown.
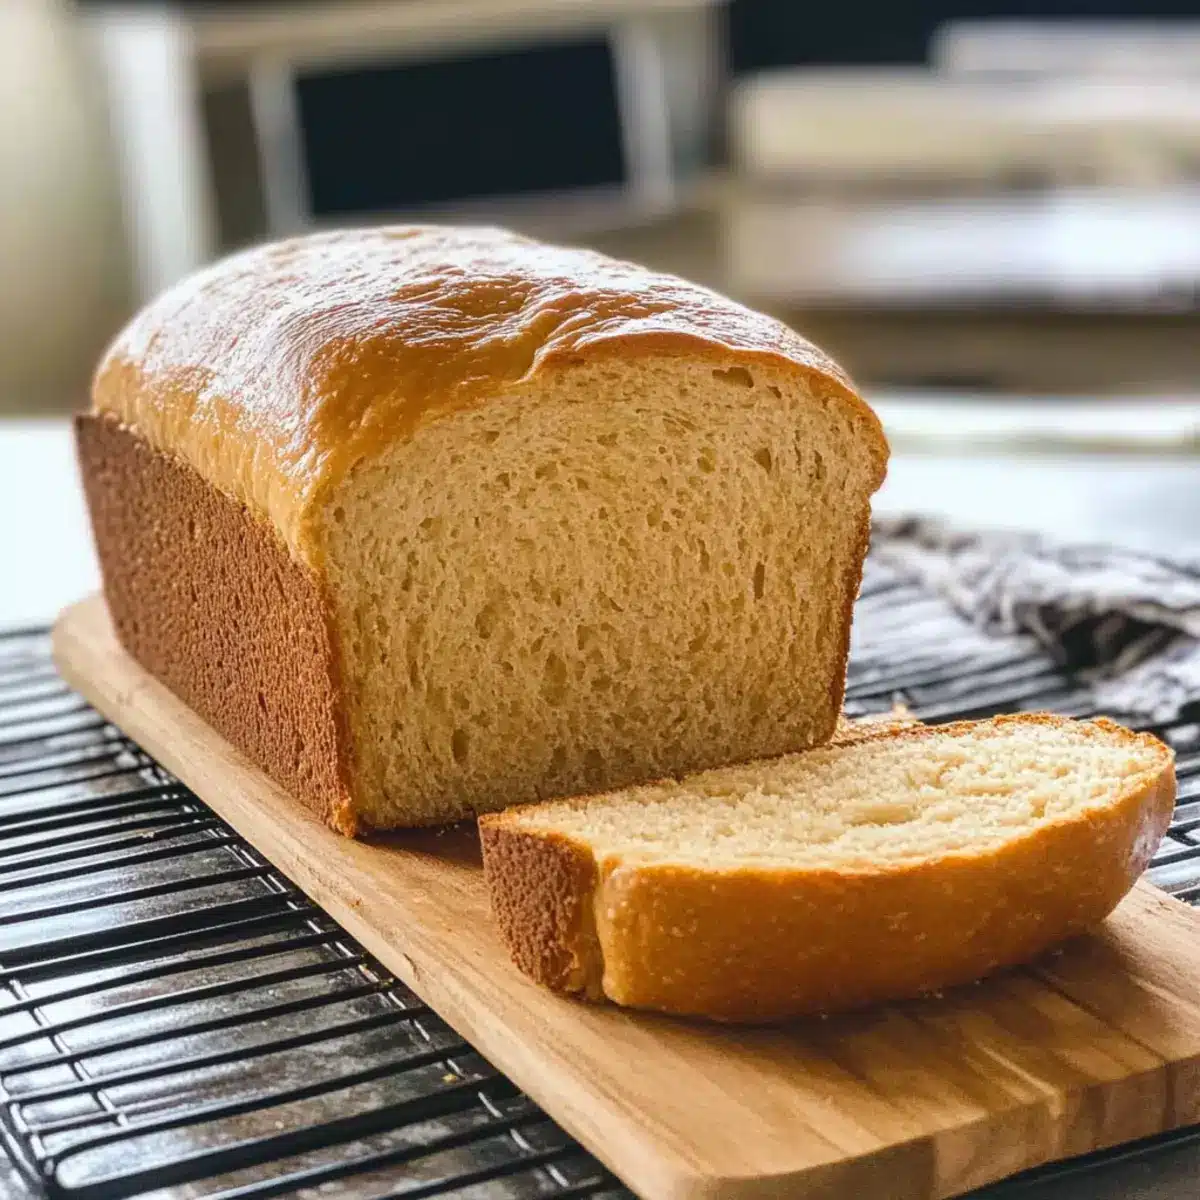
Step 9: Cool and Slice
After baking, remove the loaves from the oven and let them cool in the pans for about 10 minutes. Transfer them to a cooling rack and allow to cool at least 30 minutes before slicing. This cooling period helps to set the texture, ensuring each slice of your Honey Wheat Bread is perfect.
Expert Tips for Honey Wheat Bread
-
Watch the Yeast: Ensure your warm milk is not too hot; temperatures above 120°F can kill the yeast, leading to a dense loaf.
-
Flour Adjustments: The amount of flour needed can vary based on humidity. Add bread flour gradually until the dough is soft but not sticky for perfect Honey Wheat Bread.
-
Longer Rise in Cool Areas: If your kitchen is chilly, the dough might need extra time to rise. Be patient; a slow rise can enhance flavor.
-
Brushing the Crust: For a soft crust, brush the bread with melted butter immediately after baking. This gives it a beautiful sheen and keeps it tender.
-
Proper Cooling: Allow your loaf to cool fully before slicing. This helps the texture set and prevents a gummy interior.
Simple Honey Wheat Bread Variations
Feel free to personalize this recipe for a unique twist that delights your taste buds!
-
Maple Infusion: Replace half the honey with maple syrup for an earthy, rich sweetness that elevates the flavor profile.
Swapping honey for maple syrup introduces a delightful twist that pairs beautifully with breakfast spreads or when toasted. -
Seed Medley: Add seeds like flaxseed or sunflower seeds to the dough for texture and health benefits.
A sprinkle of seeds not only gives a nutty crunch but also enriches the bread with beneficial fatty acids, making it a wholesome choice. -
Spelt Flour Switch: Use spelt flour instead of whole wheat for a lighter, slightly sweeter loaf.
This swap can create a more delicate texture while maintaining the goodness of whole grains, perfect for lighter sandwiches or toast. -
Fruit Surprise: Stir in dried fruits like cranberries or raisins for a hint of sweetness and chewiness.
Imagine a slice that bursts with fruity goodness, making it a deliciously unexpected choice for breakfast or snacking. -
Herb Infusion: Incorporate fresh herbs like rosemary or thyme into the dough for a savory twist.
These aromatic additions transform your Honey Wheat Bread into a gourmet loaf, perfect for pairing with soups or salads. -
Add Some Heat: Mix in a dash of cayenne or red pepper flakes for a subtle kick.
This spiciness complements the sweetness of the honey, making it a fantastic choice for sandwiches featuring spicy ingredients, like our Sweet Spicy Honey Chicken. -
Nutty Goodness: Fold in chopped nuts like walnuts or pecans for added crunch and flavor.
Crunchy nuts create a satisfying contrast to the soft bread, perfect for pairing with creamy cheeses or simply butter. -
Chocolate Chip Delight: For a sweet treat, sprinkle in some mini chocolate chips for an indulgent touch.
These melted morsels transform each slice into a dessert-like delight, best enjoyed warm or toasted with a pat of butter—a wonderful breakfast or afternoon pick-me-up!
Make Ahead Options
These Simple Honey Wheat Bread loaves are perfect for meal prep enthusiasts looking to save time during busy weeknights! You can prepare the dough up to 24 hours in advance by following the first rise step, then covering the bowl with plastic wrap and refrigerating it. The dough may become denser, so allow it to come to room temperature before proceeding with shaping the loaves. Alternatively, you can bake the bread and store it in a sealed plastic bag at room temperature for up to 3 days or freeze for longer storage (up to 3 months). To enjoy fresh-baked taste, simply reheat slices in the toaster! With these make-ahead tips, you’ll have delicious homemade bread ready with minimal effort whenever you need it.
What to Serve with Honey Wheat Bread
Warm, comforting, and freshly baked, this homemade loaf pairs perfectly with a variety of delicious sides and spreads that will elevate your meal.
-
Creamy Soups: A bowl of rich, creamy tomato or hearty potato leek soup is perfect for soaking up the tender bread, creating a satisfying comfort food experience.
-
Savory Sandwiches: Use slices of this honey wheat bread to create delightful sandwiches filled with turkey, cranberry, and lettuce for a perfect lunch or picnic treat.
-
Fresh Salad: A crisp, tangy green salad with vinaigrette adds a refreshing contrast to the sweet notes of the bread, making for a balanced meal.
-
Jam and Butter: Slather on some Irish butter and your favorite homemade jam to enjoy as a sweet breakfast option; the slight sweetness of the honey in the bread pairs beautifully.
-
Cheese Platter: Serve with a selection of cheeses, from sharp cheddar to creamy brie. The complex flavors create a wonderful grazing experience.
-
Herb-Infused Oil: Dip the bread into a bowl of herb-infused olive oil or balsamic vinegar, allowing the savory flavors to complement the bread’s natural sweetness for an appetizer or snack.
-
Sweet Dessert: Try a slice topped with vanilla ice cream and a drizzle of honey for a surprisingly delightful twist on dessert, showcasing the bread’s natural sweetness.
How to Store and Freeze Honey Wheat Bread
Room Temperature: Keep bread in a sealed plastic bag or airtight container for up to 3 days to maintain its freshness and softness.
Fridge: If you live in a humid climate, store in the refrigerator to prevent mold; it will last about a week, but may dry out faster.
Freezer: For longer storage, wrap the cooled loaves tightly in foil and place them in a freezer-safe bag. They can be stored for up to 3 months without losing flavor.
Reheating: To enjoy your Honey Wheat Bread warm, simply thaw at room temperature or heat slices in a toaster or oven for a few minutes before serving.
Simple Honey Wheat Bread Recipe FAQs
What type of milk can I use in this honey wheat bread recipe?
You can use warm milk (about 110-115 degrees) to activate the yeast and create a softer crumb. However, if you’re out of milk or prefer not to use it, warm water works just as well! Your honey wheat bread will still turn out deliciously.
How should I store my honey wheat bread for maximum freshness?
To keep your honey wheat bread fresh, store it in a sealed plastic bag or airtight container at room temperature for up to 3 days. If you live in a humid area, it’s best to refrigerate it to prevent mold, which will keep it fresh for about a week, although it might dry out a bit faster.
Can I freeze leftover honey wheat bread?
Absolutely! To freeze your honey wheat bread, wrap the cooled loaves tightly in foil and place them in a freezer-safe bag. This way, you can store them for up to 3 months. When you’re ready to enjoy it, simply thaw at room temperature or heat individual slices in the toaster or oven.
What if my dough isn’t rising properly?
If you find that your dough isn’t rising, it could be due to the yeast being inactive or the environment being too cool. Make sure your milk wasn’t too hot when mixing, as temperatures above 120°F can kill yeast. If you’re in a chilly room, try placing the dough in a warmer spot, such as an oven with just the light on, to help it rise.
Can I make this honey wheat bread recipe gluten-free?
While this recipe is designed with wheat flour, you might try substituting a gluten-free flour blend specifically formulated for bread. Keep in mind that gluten-free bread may behave differently, and you may need to tweak the liquid amounts and rising times for the best results.
Is this honey wheat bread recipe safe for pets?
It’s generally best to avoid sharing honey wheat bread with pets, particularly dogs, as many ingredients like honey and certain flours are not ideal for their diets. Always check with your veterinarian if you’re unsure about what human food is safe for your pet!
Simple Honey Wheat Bread That Will Warm Your Heart
Ingredients
Equipment
Method
- Activate the Yeast: In a large mixing bowl, combine the warm milk, instant yeast, and sugar. Let it sit for 5 minutes until foamy.
- Mix the Dough Ingredients: Add warm water, whole wheat flour, 3 cups of bread flour, shortening, honey, and salt to the activated yeast mixture. Mix until a shaggy dough forms.
- Knead the Dough: Knead the dough on low speed for about 4 minutes. Add more flour if too sticky to achieve a soft texture.
- First Rise: Shape dough into a ball, cover, and let rise in a warm place for about 1 hour until doubled in size.
- Shape the Loaves: Turn dough onto a floured surface, knead gently, and divide into halves for two loaves.
- Second Rise: Cover shaped loaves and let them rise for another 30 minutes.
- Preheat the Oven: While loaves are rising, preheat your oven to 350°F (175°C).
- Bake the Bread: Brush loaves with egg wash, bake for about 30 minutes until internal temperature is 190°F (88°C).
- Cool and Slice: Allow loaves to cool in pans for 10 minutes, then transfer to a rack to cool completely before slicing.
Leave a Reply