
Every time I take a bite of Yaki Onigiri, I’m transported to the bustling streets of Japan, where these delightful grilled rice balls are a beloved street food. With their crispy exterior and warm, fluffy centers, they make the perfect portable snack for any occasion. This recipe is a two-in-one treasure, offering both a savory miso butter variation and the classic soy sauce flavor, ensuring everyone at your table will find their favorite. Plus, they’re vegetarian-friendly and gluten-free when you choose the right soy sauce, making them an easy choice for a lovely gathering or a quick weeknight meal. Intrigued by how these simple ingredients can create such a unique experience? Let’s dive into the delicious world of Grilled Rice Balls!
Why Are Grilled Rice Balls So Irresistible?
Unique Texture: The combination of a crispy crust and fluffy interior creates an unforgettable bite that will keep you coming back for more.
Flavor Variations: Choose between rich miso butter or classic soy sauce for a taste that caters to every palate.
Quick Preparation: With just a few simple steps, you can whip up these flavorful snacks in no time, making them perfect for quick meals or gatherings.
Crowd Pleaser: Whether for a picnic or snack time, Yaki Onigiri are sure to impress family and friends, just like our Pecan Pie Balls or Street Corn Chicken Rice Bowl.
Portable Delight: Perfectly shaped and easy to carry, these grilled rice balls make an excellent choice for lunch boxes or picnics, providing a delightful treat on-the-go!
Grilled Rice Balls Ingredients
Discover the essential components for making delicious grilled rice balls that everyone will love!
For the Rice
- Short Grain Rice – The key to achieving the perfect sticky texture; opt for Japonica ‘Koshihikari’ for the best results.
- Water – Necessary for cooking your rice to the ideal consistency, ensuring each bite is fluffy and delightful.
For Miso Butter Variation
- Miso – Infuses a deep umami flavor into your grilled rice balls, elevating the taste experience.
- Mirin – This sweet rice wine enhances the flavor; if unavailable, a pinch of sugar can be a good substitute.
- Sake – A traditional addition; you can omit it or use more mirin if you’d like to keep it simple.
- Sugar – Helps to balance the savory taste; adjust according to your sweetness preference.
- Butter – Adds richness and a beautiful flavor to the miso mixture, making each bite irresistible.
For Soy Sauce Variation
- Vegetable Oil – Used for frying to achieve a lovely golden crust and crunchy texture on your rice balls.
- Soy Sauce – A classic ingredient that adds a savory kick; ensure you use gluten-free soy sauce if needed for dietary preferences.
Garnishes
- Chives – Fresh and vibrant, they enhance flavor and presentation.
- Sesame Seeds – Adds a delightful crunch and nutty flavor as a finishing touch.
- Everything Bagel Seasoning (Optional) – A tasty alternative topping for an extra layer of flavor that can be swapped with any favorite rice seasoning.
With these fresh ingredients in hand, you’re just a step away from creating scrumptious grilled rice balls that are satisfyingly crunchy on the outside and fluffy on the inside! Happy cooking!
Step-by-Step Instructions for Grilled Rice Balls
Step 1: Cook the Rice
Begin by rinsing 2 cups of short-grain rice under cold water until the water runs clear. Add the rice to a rice cooker with 2 cups of water and cook according to your device’s instructions. Once the rice is fluffy and cooked, let it sit for 10 minutes to firm up, making it easier to shape your delicious Grilled Rice Balls.
Step 2: Prepare the Miso Mixture
While the rice is cooking, mix together the miso, mirin, sake, sugar, and butter in a medium bowl. Use a fork to blend until smooth, creating a creamy mixture that’s not only flavorful but will also help to enhance the overall taste of your Grilled Rice Balls. Set this aside until the rice is ready to be shaped.
Step 3: Shape the Rice Balls
Once the rice has rested, place a sheet of cling wrap on your work surface. Scoop 1/6 of the cooked rice onto the wrap and use your hands to mold it into a ball or triangle shape. Make sure to pack the rice firmly to avoid breaking during grilling. Repeat this process with the remaining rice portions until you have an array of perfectly shaped rice balls.
Step 4: Grill the Onigiri
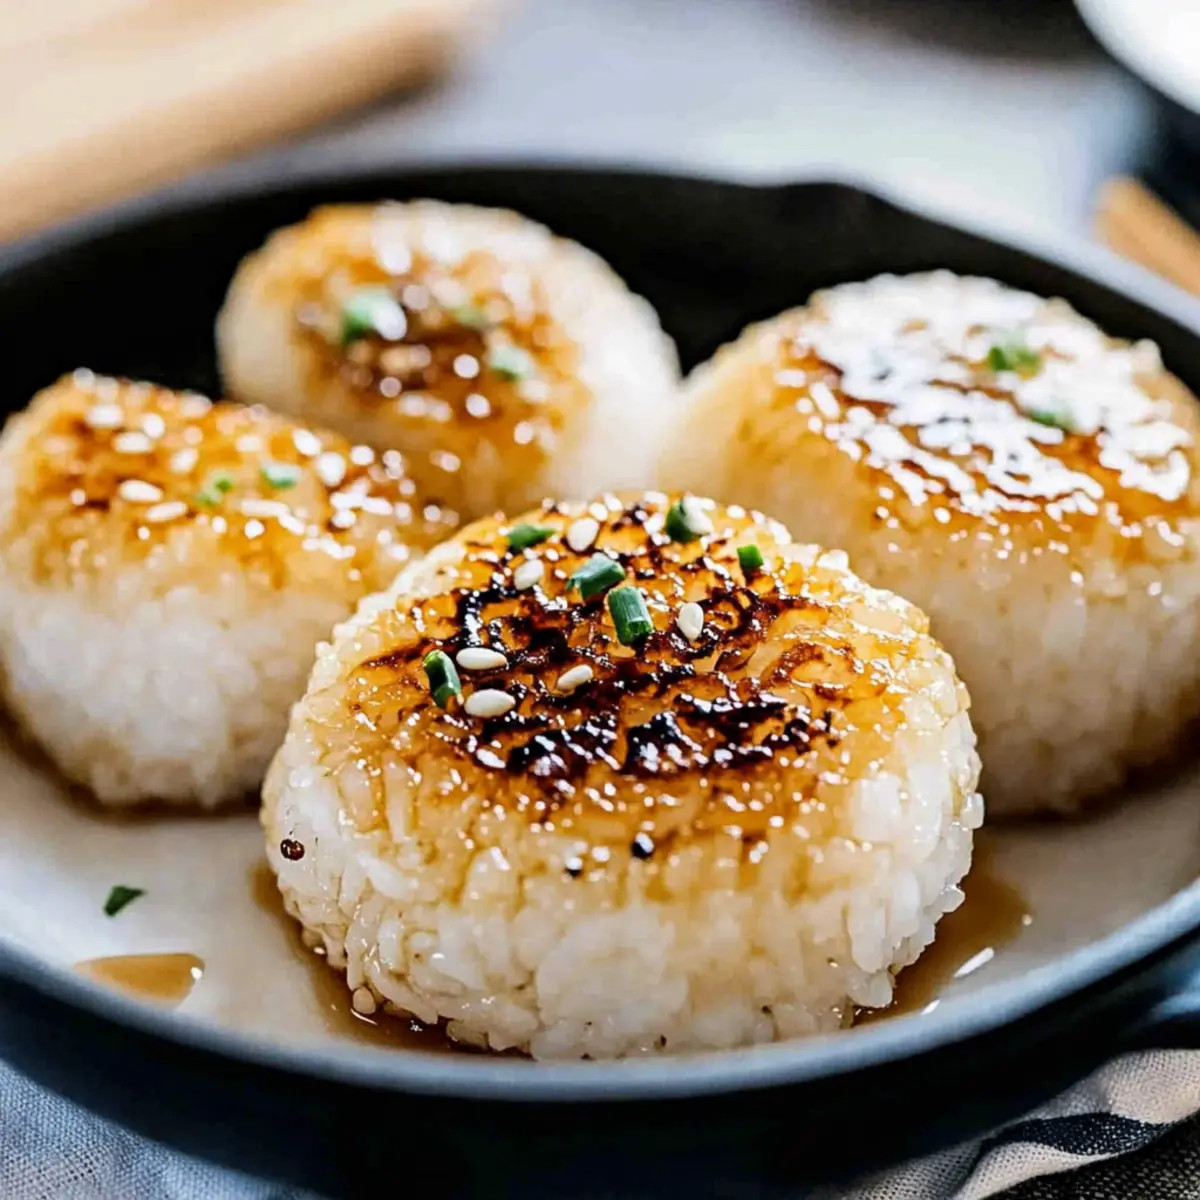
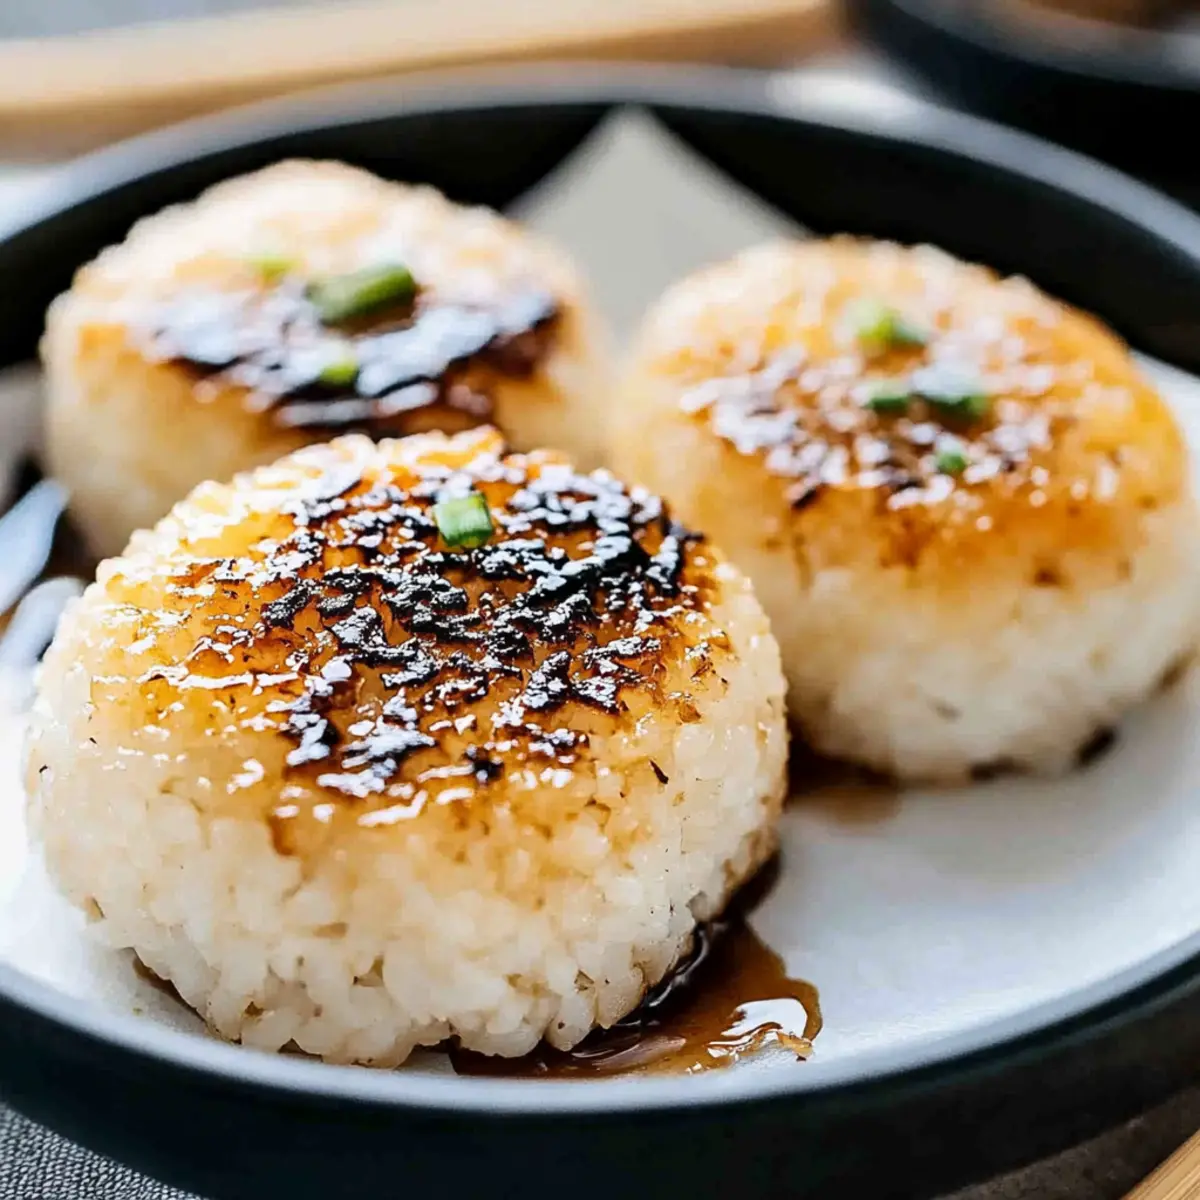
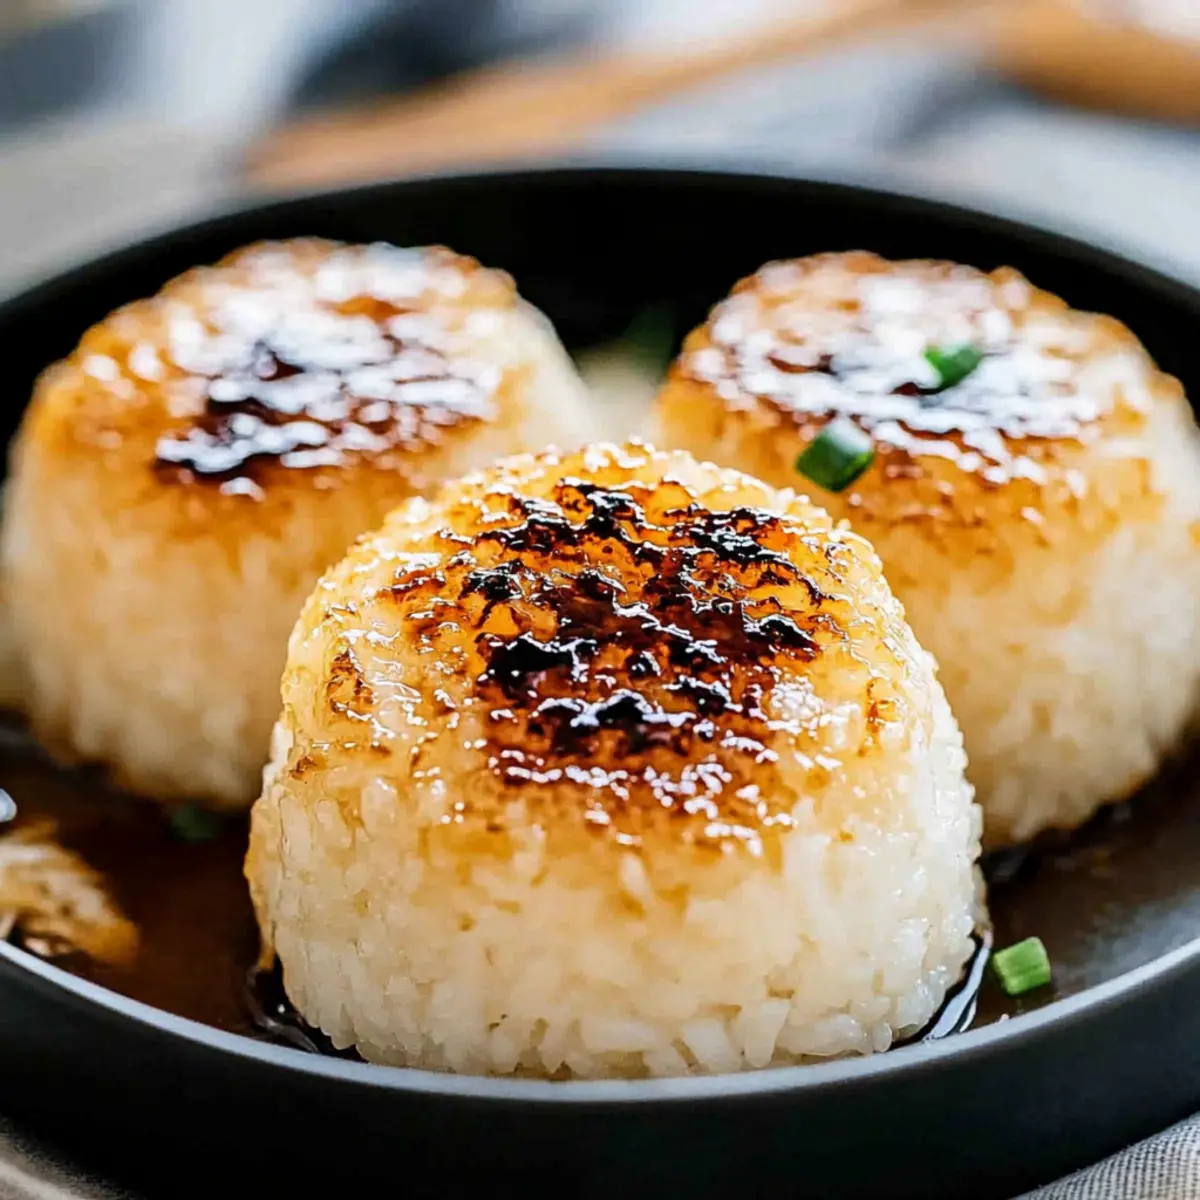
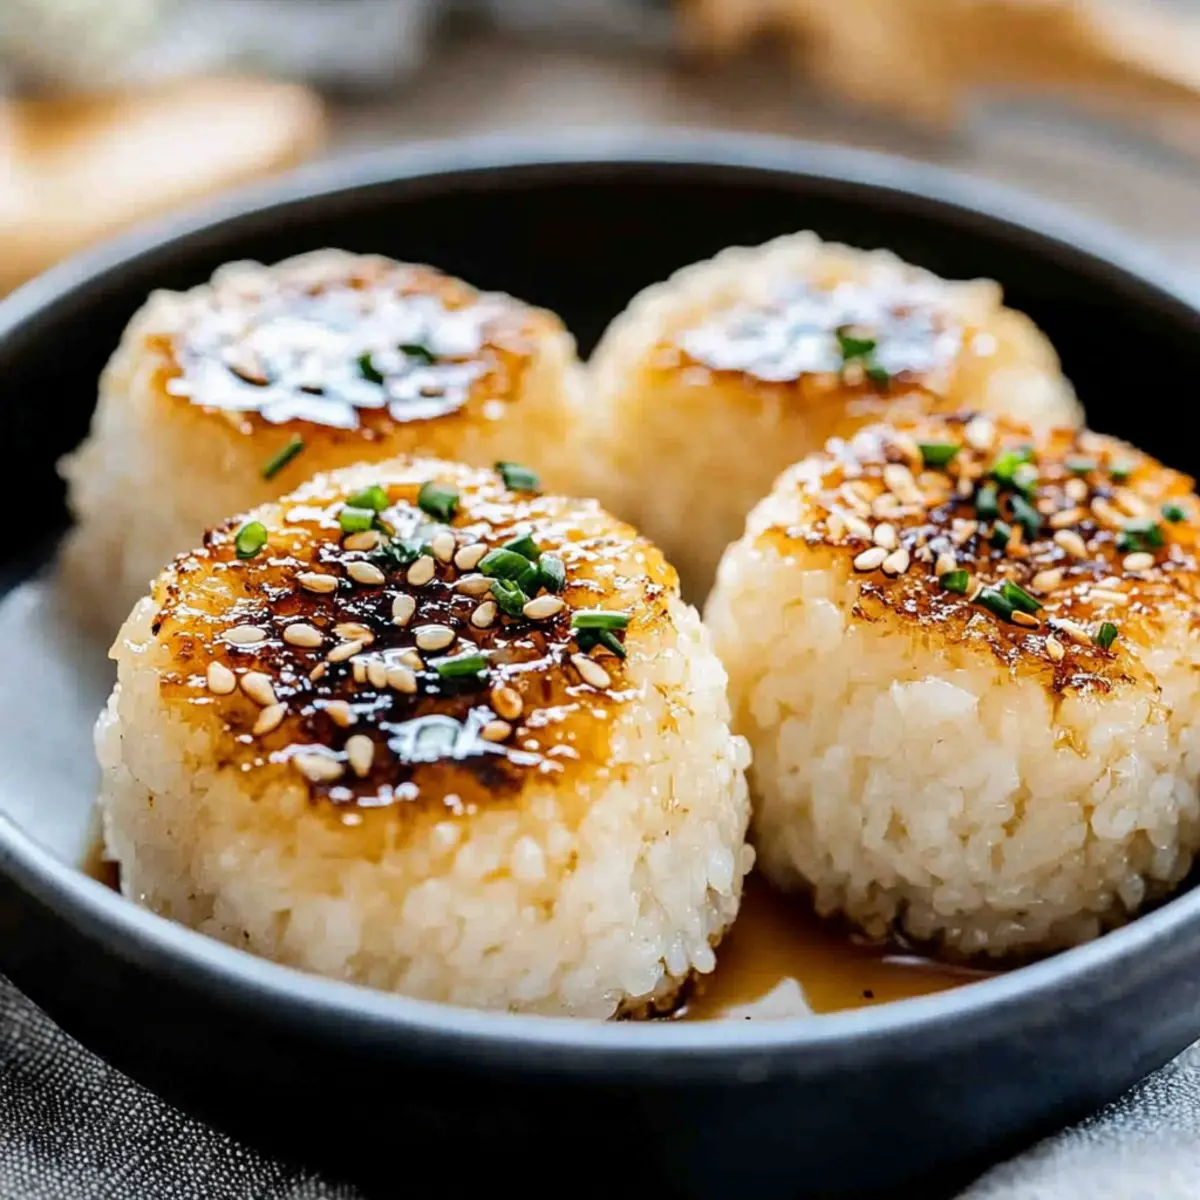
For the Miso Butter variation, heat a cast iron skillet over medium heat and melt 1 tablespoon of butter. Carefully place the rice balls in the skillet and grill for about 1 minute on each side until they develop a golden-brown crust. Brush the tops with the prepared miso mixture as they grill, infusing them with rich flavor and a beautiful glaze.
Step 5: Grill the Soy Sauce Onigiri
To make the Soy Sauce variation, add vegetable oil to a clean cast iron skillet and heat over medium heat. Grill the rice balls for 1 minute per side, then brush each side generously with soy sauce. Continue grilling until they’re crispy and have a delightful brown color on all edges, creating that irresistible texture characteristic of perfect Grilled Rice Balls.
Step 6: Serve the Rice Balls
Once the onigiri have achieved a delightful crunch, remove them from the skillet. Garnish with freshly chopped chives and a sprinkle of sesame seeds for added flavor and crunch. Serve warm, allowing everyone to savor these delicious Grilled Rice Balls together, whether as a snack, appetizer, or delightful side!
What to Serve with Irresistible Yaki Onigiri?
Imagine a delightful spread that complements your savory grilled rice balls, creating a feast that tantalizes all your senses!
-
Miso Soup: A warm and comforting bowl of miso soup perfectly pairs with Yaki Onigiri, enhancing the meal’s Japanese essence while adding depth.
-
Pickled Vegetables: Crunchy, tangy pickles add brightness and contrast, making each bite of the rice balls even more enjoyable.
-
Edamame: These protein-packed, lightly salted soybeans offer a fresh, vibrant side that matches the flavors of your grilled rice balls beautifully.
-
Seaweed Salad: An appetizing seaweed salad provides a chewy texture and umami flavor that balances the crispy exterior of your Yaki Onigiri.
-
Cucumber Salad: The refreshing crunch of thinly sliced cucumbers, dressed in rice vinegar and sesame oil, adds a light touch that complements the richness of the rice balls.
-
Sake or Green Tea: Enjoy a glass of chilled sake or a warm cup of green tea to accentuate the savory flavors in your meal, making every bite more memorable.
-
Dessert Option – Mochi Ice Cream: For a sweet treat to finish, creamy mochi ice cream brings delightful texture and sweetness that follows the elegant dining experience.
Each of these choices brings something unique to your table, making your Yaki Onigiri a star amidst a beautifully balanced meal!
Tips for the Best Grilled Rice Balls
-
Rice Consistency: Use short grain rice for the perfect sticky texture. Avoid long grain rice, which won’t hold together as well for grilled rice balls.
-
Proper Shaping: Pack the rice firmly when shaping to ensure they don’t fall apart while grilling. Take your time to mold them well!
-
Watch the Heat: Keep your skillet at medium heat to prevent burning. Monitor closely, especially when using miso, as it can caramelize quickly.
-
Warm Rice: Work with warm rice for easier shaping. Cold rice can be tough and may not hold the desired shape.
-
Flavor Enhancement: Experiment with additional toppings, like everything bagel seasoning, for a unique twist on your grilled rice balls without compromising the classic flavor.
Make Ahead Options
Yaki Onigiri are perfect for busy home cooks looking to save time! You can prepare the rice and shape the rice balls up to 24 hours in advance. Just cook the rice and let it cool before shaping it into balls or triangles; then wrap each one tightly in cling wrap to maintain moisture and prevent them from drying out. For the best flavor, store them in the refrigerator until you’re ready to grill. When it’s time to enjoy your delicious grilled rice balls, simply heat your skillet and grill for about 1 minute per side until crispy. These prep-ahead tips ensure your Yaki Onigiri will be just as irresistible as if they were made fresh!
How to Store and Freeze Grilled Rice Balls
Fridge: Store your grilled rice balls in an airtight container for up to 3 days. This keeps them fresh while minimizing moisture loss.
Freezer: Wrap shaped but ungrilled rice balls tightly in cling wrap and freeze for up to 1 month. For best quality, grill them directly from frozen, adding a couple of extra minutes to the grilling time.
Reheating: To reheat cooked grilled rice balls, place them in a skillet over medium heat until warmed through and crispy again, about 2–3 minutes per side.
Thawing: If frozen, thaw your grilled rice balls overnight in the fridge before reheating for the best results.
Grilled Rice Balls: Delicious Variations Await!
Feel free to explore exciting twists and substitutions for your grilled rice balls that will elevate your snacking experience!
- Dairy-Free: Replace butter with coconut oil for a plant-based alternative that still brings a lovely richness.
- Teriyaki Sauce Swap: Instead of miso butter, brush your rice balls with teriyaki sauce for a sweet and savory flavor twist.
- Furikake Seasoning: Sprinkle furikake on your rice before grilling for an extra umami punch that compliments the rice beautifully.
- Spicy Kick: Add a touch of sriracha or chili paste to your miso mixture for a spicy version that will tantalize your taste buds.
- Form Variations: Shape your rice into vibrant sushi rolls for a fun presentation that still captures the essence of onigiri.
- Quinoa Touch: Substitute half the rice with cooked quinoa for a nutritious boost while maintaining a delightful texture.
- Sesame Oil Infusion: Drizzle a little toasted sesame oil over the finished rice balls for a nutty flavor that enhances each bite.
- Gluten-Free Options: Ensure your soy sauce or tamari is gluten-free to cater to dietary needs without sacrificing flavor.
With these creative variations, your grilled rice balls will always be an exciting dish. If you enjoy experimenting with complementary flavors, try pairing them with Taco Rice Flavor or a warm bowl of Saucy Chicken with Vegetable Fried Rice for a full culinary experience!
Yaki Onigiri (Grilled Rice Balls) Recipe FAQs
How do I choose the right rice for onigiri?
Absolutely! For Yaki Onigiri, short grain rice is essential for achieving that sticky and fluffy texture. I recommend using Japonica ‘Koshihikari’ rice, as it holds together beautifully when shaped, ensuring your grilled rice balls stay intact during cooking.
What’s the best way to store leftover grilled rice balls?
To keep your grilled rice balls fresh, store them in an airtight container in the refrigerator for up to 3 days. This method minimizes moisture loss and preserves the delightful texture of your rice balls.
Can I freeze ungrilled rice balls? How do I do it?
Yes, you can freeze shaped but ungrilled rice balls! Just wrap each rice ball tightly in cling wrap and place them in a freezer-safe container. They can be frozen for up to 1 month. When you’re ready to eat them, grill them straight from frozen, adding a couple of extra minutes to ensure they’re heated through and crispy on the outside.
Why are my grilled rice balls falling apart? How can I fix this?
The key to preventing your grilled rice balls from falling apart lies in the packing process. Ensure you’re shaping the rice balls firmly without overworking the rice, as the heat also plays a role. If they’re crumbling, pack them more tightly, or try using slightly more water when cooking the rice to achieve the right stickiness.
Are these grilled rice balls safe for vegetarians and those with gluten allergies?
Very! Yaki Onigiri are vegetarian-friendly, especially when made with the right soy sauce for gluten allergies. Look for gluten-free soy sauce options if you need them to be gluten-free. The simple, wholesome ingredients make it easy to cater to various dietary preferences without sacrificing flavor.
What are some creative toppings or seasonings I can use?
The more the merrier! You can experiment with different seasonings, like furikake or everything bagel seasoning for extra flavor. Adding fresh herbs such as chives or cilantro can also elevate the taste, giving your grilled rice balls a personal touch that suits your palate.
Savory Grilled Rice Balls: Your New Favorite Snack Delight
Ingredients
Equipment
Method
- Rinse 2 cups of short-grain rice under cold water until clear. Add rice and 2 cups of water to the rice cooker and cook. Let sit for 10 minutes after cooking.
- In a bowl, mix miso, mirin, sake, sugar, and butter until smooth to prepare the miso mixture.
- Use cling wrap to shape the cooked rice into balls or triangles, packing them firmly.
- Heat a skillet, melt 1 tablespoon of butter, grill rice balls 1 minute per side, brushing tops with miso mixture.
- For soy sauce, heat vegetable oil, grill rice balls for 1 minute per side, brushing with soy sauce until crispy.
- Remove from skillet, garnish with chives and sesame seeds, and serve warm.
Leave a Reply