
The aroma of sizzling steak wafting through the kitchen can instantly whisk me back to my favorite Japanese grill spots. In just a few simple steps, you can recreate that magic with Beef Yakiniku, a dish that marries the savory richness of thinly sliced beef with an unforgettable soy-based marinade. This quick meal stands out because it’s not only packed with flavor but also accommodates a gluten-free option, making it ideal for anyone craving a wholesome, home-cooked dinner without the fuss. Pair it with rice and fresh vegetables for a delightful balance that will please even the pickiest eaters. Are you ready to elevate your weeknight dinners? Let’s dive into this mouthwatering journey!
Why is Beef Yakiniku a must-try?
Flavor Explosion: The marinated beef bursts with umami, sweet, and spicy notes that will tantalize your taste buds.
Quick Prep: With minimal ingredients and easy steps, dinner is ready in no time, perfect for busy weeknights.
Gluten-Free Option: Easily substitute soy sauce with tamari to enjoy a delicious, gluten-free version without sacrificing flavor.
Crowd-Pleasing: This dish is sure to impress friends and family alike, delivering restaurant-worthy quality right at home. For a complete meal, serve it alongside train the taste buds with Ground Beef Potato for added variety.
Customizable: Mix in your favorite veggies or swap out proteins, making it a versatile go-to meal. You’ll love how it brings a taste of Japan into your kitchen!
Beef Yakiniku Ingredients
For the Marinade
• Soy Sauce – Adds umami and saltiness; substitute with tamari for a gluten-free option.
• Gochujang – Introduces heat and depth of flavor; can be swapped with sriracha if unavailable.
• Mirin – Adds sweetness and a hint of acidity; no direct substitute noted.
• Minced Ginger – Provides aromatic warmth; fresh is preferred but powdered can work in a pinch.
• Garlic Powder/Garlic Paste – Enhances overall flavor; fresh garlic can be used instead of dried.
• Sesame Oil – Contributes an essential nutty flavor for authenticity.
• Light Brown Sugar – Balances the marinade with sweetness; granulated sugar can be a substitute.
For the Beef
• Flank or Skirt Steak – The main protein; opt for very thin slices against the grain for tenderness.
For Cooking
• Neutral Oil (e.g., avocado, rapeseed) – Used for cooking; can be replaced with canola oil.
Dive into this wonderful Beef Yakiniku recipe and bring the flavors of Japan right into your home!
Step‑by‑Step Instructions for Beef Yakiniku
Step 1: Prepare Marinade
In a large mixing bowl, whisk together the soy sauce, gochujang, mirin, minced ginger, garlic powder or paste, sesame oil, neutral oil, and light brown sugar. Mix thoroughly until the ingredients are well combined and the sugar has dissolved. This savory-sweet mixture serves as the foundation for your Beef Yakiniku, providing layers of flavor that will transform the thinly sliced beef into a dish full of umami.
Step 2: Marinate Steak
Add the thinly sliced flank or skirt steak to the marinade, ensuring each piece is evenly coated. Cover the bowl with plastic wrap or a lid and refrigerate for at least 2 hours, allowing the meat to absorb the rich flavors. If time permits, marinating overnight deepens the taste even more, setting the stage for this delicious Beef Yakiniku.
Step 3: Preheat Pan
Heat a wok or large skillet over high heat until it begins to smoke, which should take about 3 to 5 minutes. This high temperature is crucial for getting a beautiful caramelization on the beef. As the pan heats, pre-warm a serving bowl in the oven to ensure your Beef Yakiniku stays hot while serving.
Step 4: Cook Steak
Once the pan is sizzling hot, add half of the marinated beef in a single layer, avoiding overcrowding. Sear the meat undisturbed for about 3 minutes to achieve a nice sear, then stir and cook for an additional 2 to 3 minutes, or until the beef is browned and crispy at the edges. Remove the first batch and repeat with the remaining beef, maintaining the same cooking time for optimal texture.
Step 5: Garnish and Serve
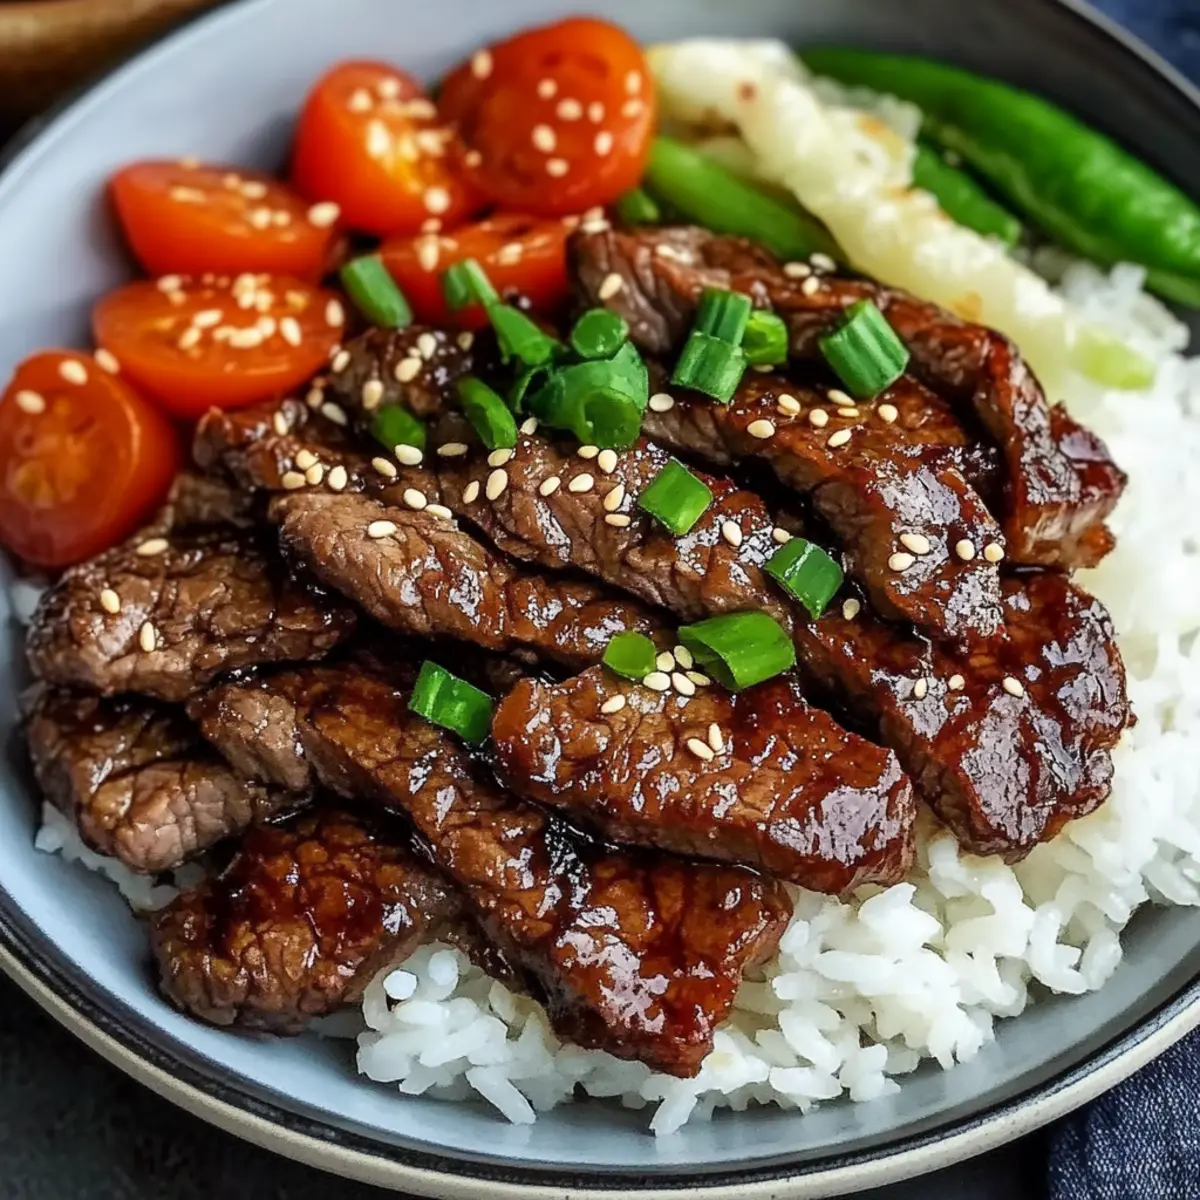
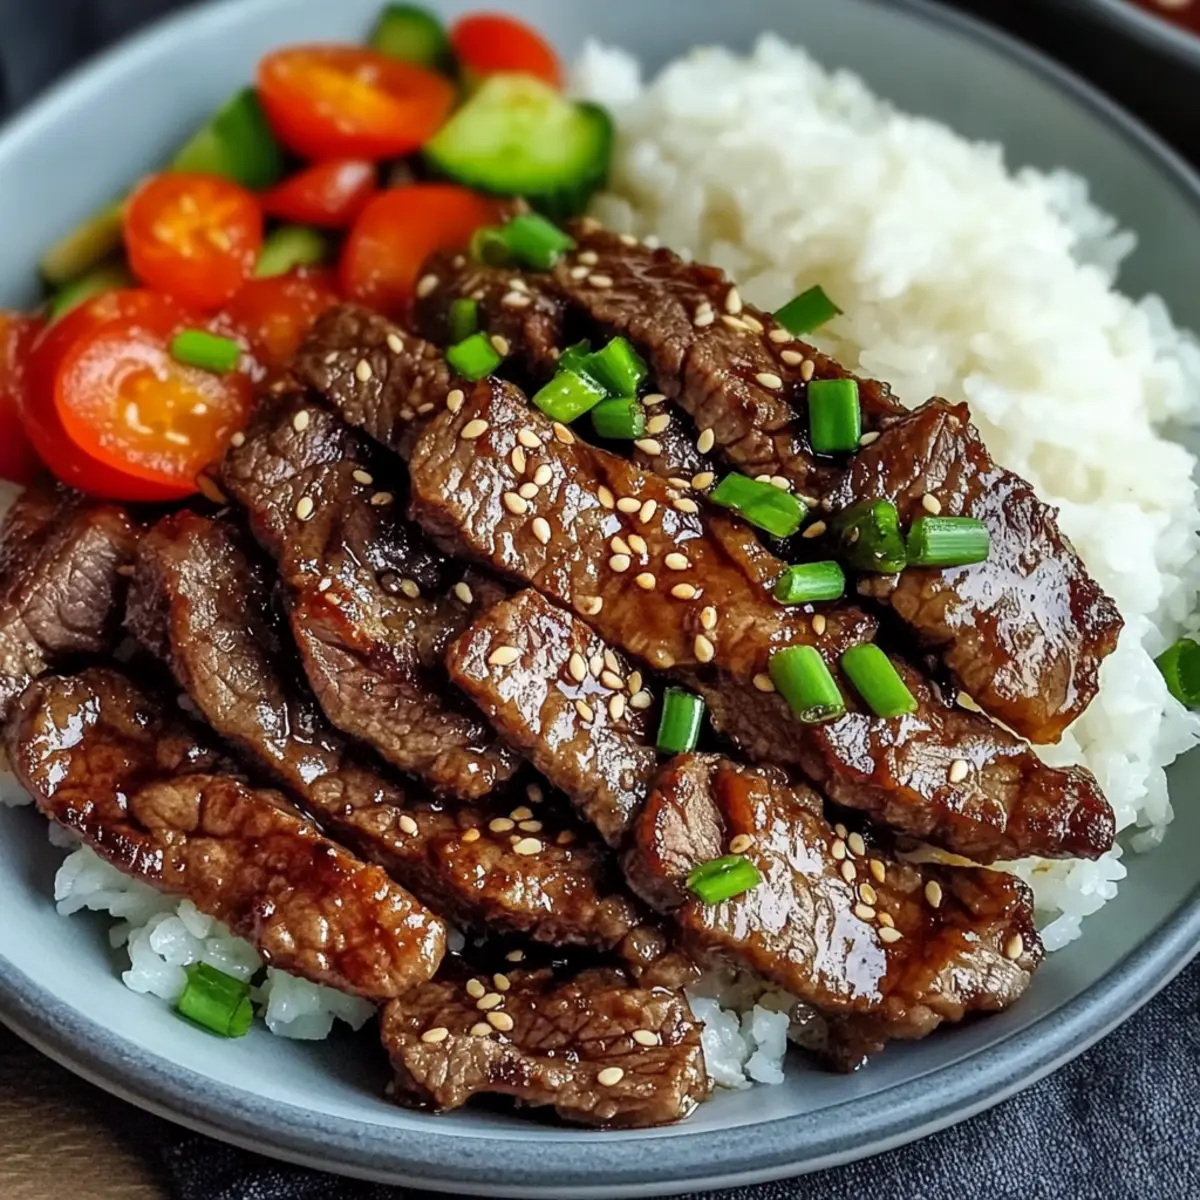
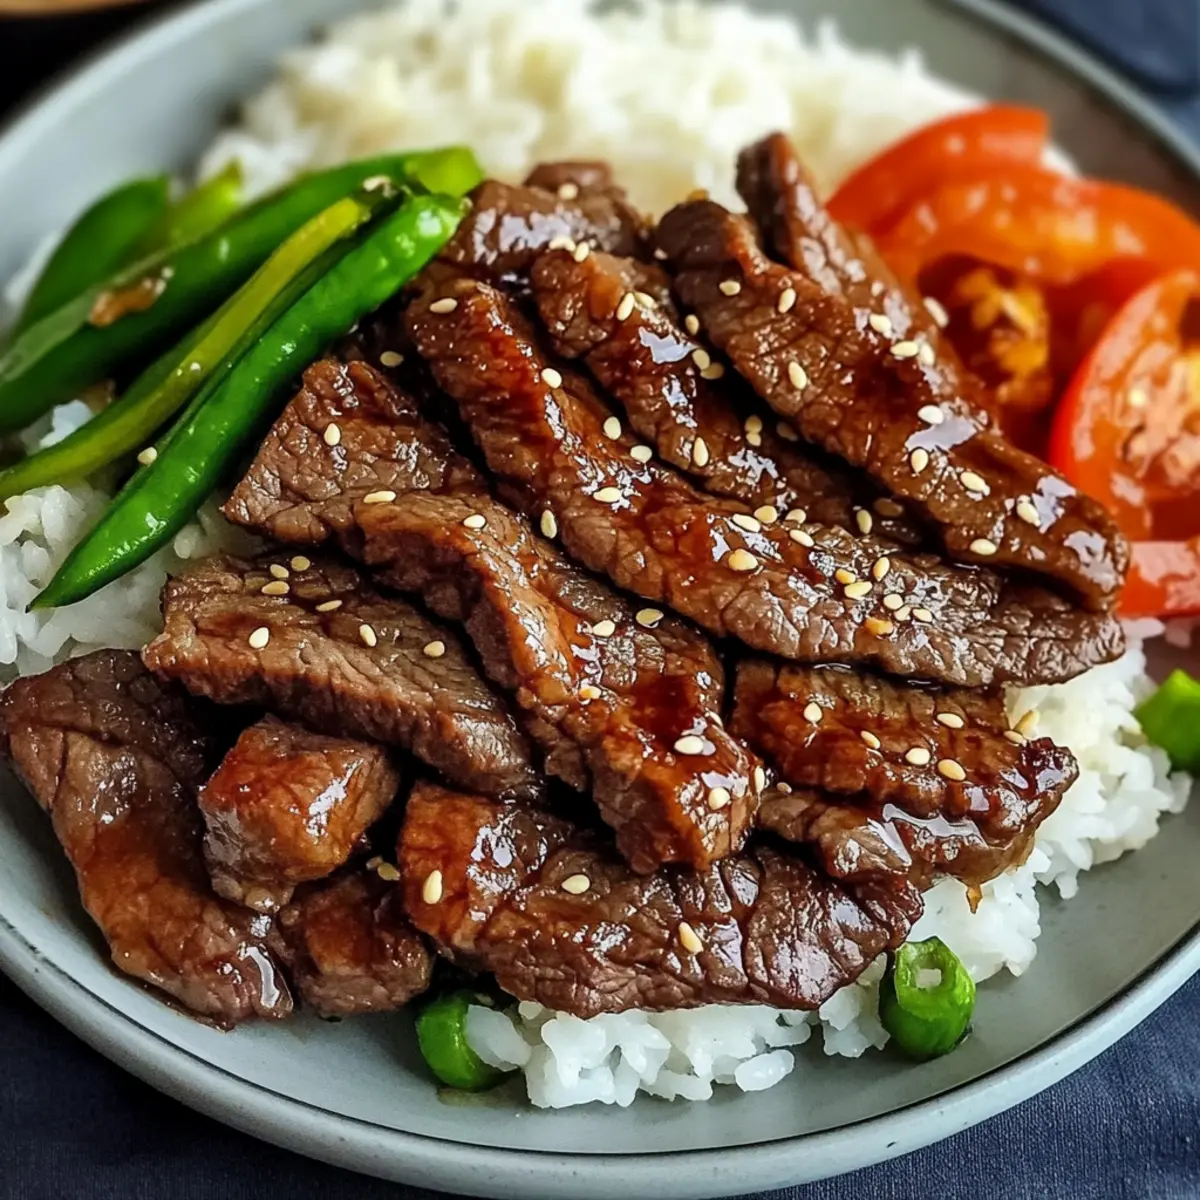
Transfer the cooked Beef Yakiniku to the pre-warmed serving bowl. For a finishing touch, sprinkle sesame seeds over the beef, enhancing both the flavor and presentation. Serve immediately alongside boiled rice and fresh vegetables, creating a beautiful balance that highlights the savory essence of your homemade Japanese-style dish.
How to Store and Freeze Beef Yakiniku
Fridge: Store cooked Beef Yakiniku in an airtight container for up to 3 days. Keep it in the refrigerator to maintain freshness and flavor.
Freezer: You can freeze leftover Beef Yakiniku for up to 2 months. Ensure it’s in a well-sealed freezer bag, removing as much air as possible before sealing.
Reheating: For best results, reheat Beef Yakiniku in a hot skillet over medium heat until warmed through. This will help retain its savory goodness and texture.
Make-Ahead Tips: Marinate the beef up to 24 hours in advance. This way, your Beef Yakiniku is ready to cook whenever you’re set for a quick meal!
Helpful Tricks for Beef Yakiniku
- Slicing Technique: Ensure your flank or skirt steak is partially frozen before slicing. This makes it easier to cut very thin strips, essential for tender Beef Yakiniku.
- Marination Time: For optimal flavor, allow the beef to marinate for at least 2 hours but up to 24 hours if you can. The longer it sits, the more flavorful it becomes!
- High Heat Cooking: Preheat your wok until it’s smoking hot. This step is crucial for caramelization and achieving that signature grilled essence.
- Batch Cooking: Avoid overcrowding in the pan; cook the beef in batches to ensure each piece gets that beautiful sear. This step helps retain the juices and enhances the overall taste.
- Serving Tips: Serve the Beef Yakiniku immediately after cooking to ensure it stays warm and maintains its crispy texture. Pair with a refreshing salad for a complete meal!
Beef Yakiniku Variations & Substitutions
Get creative with your Beef Yakiniku by exploring these enticing variations that will elevate your dining experience!
- Gluten-Free: Use tamari or coconut aminos instead of soy sauce for a gluten-free delight without losing flavor.
- Heat Level Up: Swap gochujang with sriracha for a different kick—adjust to your taste for that perfect spicy balance.
- Veggie Boost: Add stir-fried bell peppers, onions, or carrots to the pan while cooking to introduce color, nutrients, and a satisfying crunch.
- Different Cuts: Experiment with sirloin or ribeye for a richer flavor—each cut brings a unique twist to your Yakiniku experience.
- Sweetness Variation: For a hint of tropical sweetness, consider adding a splash of pineapple juice alongside the marinade ingredients.
- Citrusy Twist: A squeeze of fresh lime or lemon juice just before serving can brighten up the flavors and add a zing!
- Herb Infusion: Fresh herbs like cilantro or green onion sprinkled on top can introduce a fresh herbal note that complements the savory meat beautifully.
Feel free to personalize your dish according to your taste preferences. If you’re looking for more inspiration, check out this flavorful Ground Beef Potato recipe, offering a comforting and delicious alternative!
Make Ahead Options
Beef Yakiniku is an excellent candidate for meal prep, saving you precious time on busy weeknights! You can marinate the beef up to 24 hours in advance, allowing the flavors to penetrate deeply. Simply prepare the marinade, coat the thinly sliced steak, and refrigerate it in an airtight container. When you’re ready to serve, heat your wok and cook the beef as instructed—this ensures the meat remains tender and juicy, just like when freshly made. To maintain quality, avoid marinating longer than 24 hours to prevent overly softening the meat. With these make-ahead tips, you’ll have a delicious meal on the table in no time!
What to Serve with Beef Yakiniku?
The perfect accompaniment can transform a delicious dish into a memorable meal, and with Beef Yakiniku, the possibilities abound.
- Steamed Rice: A classic pairing, fluffy rice soaks up the savory marinade, balancing the rich flavors of the beef beautifully.
- Crisp Cucumber Salad: Refreshing and light, cucumbers add a crunchy contrast to the tender meat and provide a burst of freshness. Try it tossed in sesame dressing for added flair.
- Grilled Vegetables: Add bell peppers, zucchini, or asparagus for a smoky flavor that complements the grilled essence of Yakiniku. These veggies also bring vibrant colors to your plate!
- Miso Soup: A warm bowl of miso soup enhances the umami experience and offers a comforting element to your meal. Its subtle flavors won’t overpower the main dish.
- Pickled Vegetables: A tangy touch of pickled radishes or carrots can cut through the richness of the beef, cleansing the palate between bites.
- Sake or Japanese Beer: Pair your Beef Yakiniku with a chilled glass of sake or a light Japanese beer, which complements the dish’s complex flavors wonderfully.
- Green Tea: For a soothing beverage choice, green tea provides a calming finish that enhances your dining experience without overshadowing the beef.
These pairings will not only enhance your Beef Yakiniku but also create a satisfying meal that invites everyone to the table!
Beef Yakiniku Recipe FAQs
What type of steak is best for Beef Yakiniku?
For the most tender and flavorful Beef Yakiniku, I recommend using flank or skirt steak. These cuts offer ideal marbling and texture. Be sure to slice the beef thinly against the grain for the best results, achieving that perfect melt-in-your-mouth experience.
How should I store leftover Beef Yakiniku?
Store any leftover Beef Yakiniku in an airtight container in the refrigerator for up to 3 days. To maximize freshness, ensure it’s well-sealed to prevent moisture loss and maintain flavor. When ready to enjoy again, simply reheat it in a hot skillet to restore its delicious texture.
Can I freeze Beef Yakiniku?
Absolutely! You can freeze leftover Beef Yakiniku for up to 2 months. To do this, place it in a freezer bag, sealing it tightly while removing as much air as possible. This helps prevent freezer burn. When ready to eat, thaw the beef in the fridge overnight and reheat in a skillet to enjoy its savory flavors.
How do I know when the steak is cooked perfectly?
Cook the marinated steak in a hot pan, making sure to sear each side for about 5-6 minutes total. Look for a rich brown color with some crispy edges. It should be tender to the bite. If you’re unsure, a kitchen thermometer can help; aim for an internal temp of 135°F (57°C) for medium-rare.
Is there a gluten-free option for Beef Yakiniku?
Yes, you can easily make a gluten-free version of Beef Yakiniku! Substitute the soy sauce with tamari or coconut aminos. This swap does not compromise the dish’s flavor; it enhances the umami taste while keeping it suitable for gluten-sensitive diets.
Can I prepare the marinade ahead of time?
Absolutely! You can prepare the marinade a day or two in advance. Store it in an airtight container in the refrigerator. Just be sure to add the steak just prior to cooking to keep it fresh and flavorful. Marinating ahead of time can also deepen the flavors, making your Beef Yakiniku even more delightful!

Savory Beef Yakiniku: Your New Favorite Quick Dinner
Ingredients
Equipment
Method
- In a large mixing bowl, whisk together the soy sauce, gochujang, mirin, minced ginger, garlic powder or paste, sesame oil, neutral oil, and light brown sugar until well combined.
- Add the thinly sliced flank or skirt steak to the marinade, ensuring each piece is well coated. Cover and refrigerate for at least 2 hours.
- Heat a wok or skillet over high heat for 3 to 5 minutes.
- Add half of the marinated beef to the pan in a single layer. Sear for about 3 minutes, then stir and cook for an additional 2 to 3 minutes until browned.
- Remove the beef and repeat with the remaining beef. Transfer cooked beef to a pre-warmed serving bowl and garnish with sesame seeds.
- Serve immediately with boiled rice and fresh vegetables.
Leave a Reply