
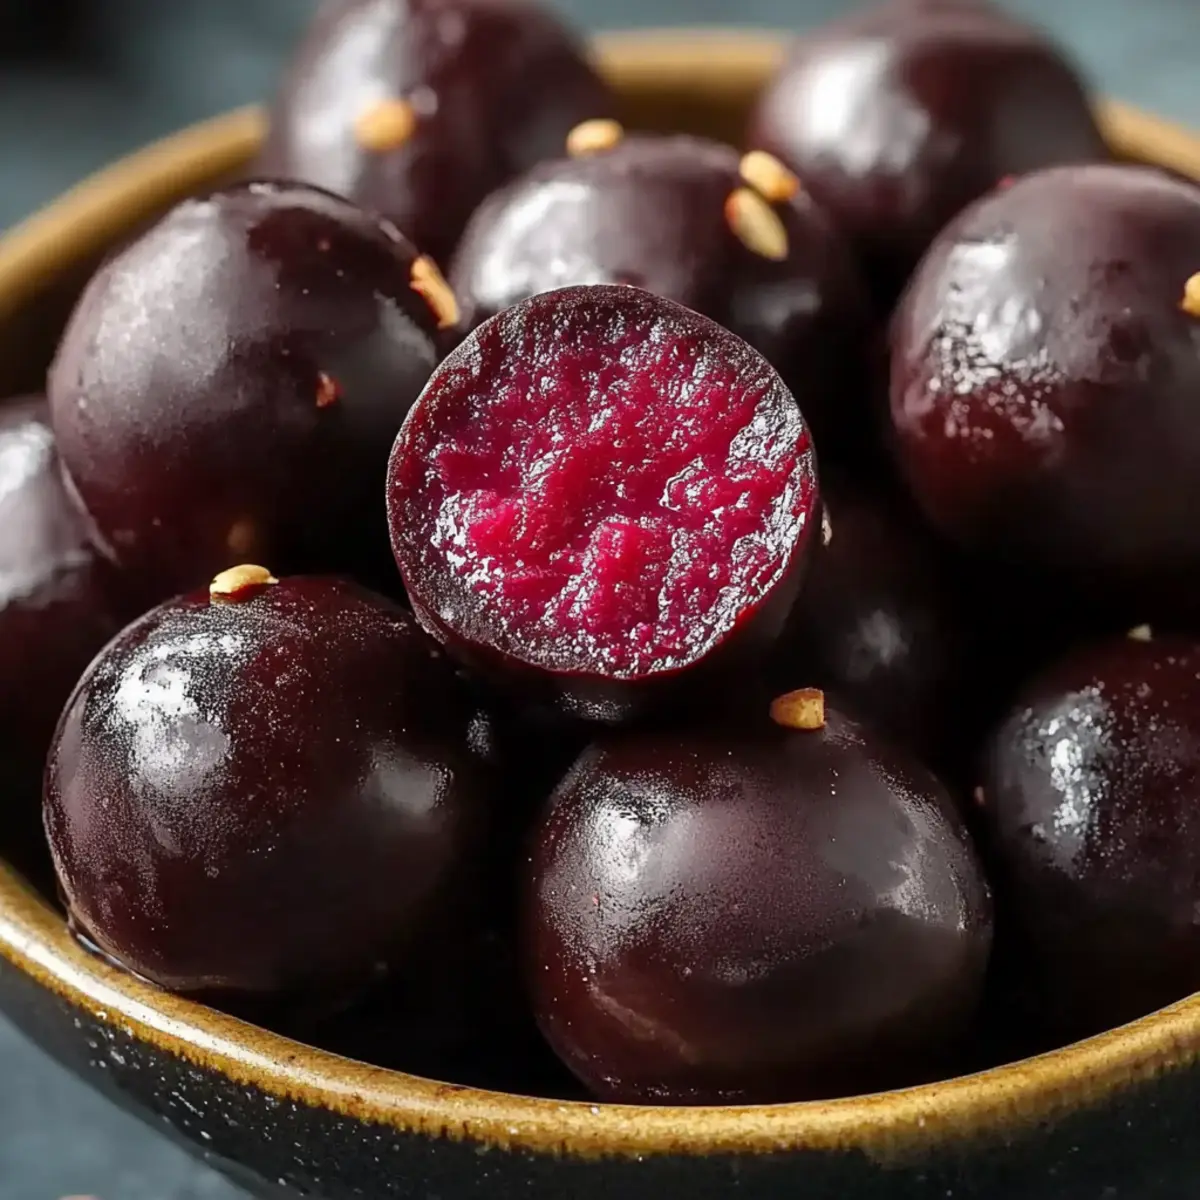
As I rummaged through my pantry one rainy afternoon, I stumbled upon a can of maraschino cherries, instantly sparking a craving for something sweet and nostalgic. That’s when I knew it was time to whip up a batch of Cherry Mash Truffles! This no-bake treat beautifully marries the sweet, tangy taste of cherries with creamy peanut butter, all coated in a luxurious layer of chocolate. Not only are these truffles a delightful homage to the classic candy bar, but they also come together in a flash, making them perfect for unexpected gatherings or a cozy night in. Plus, they’re vegetarian, satisfying those sweet tooth cravings without the hassle of an oven. Curious about how to recreate this charming dessert? Let’s dive into the magic of making Cherry Mash Truffles!
Why Choose Cherry Mash Truffles?
Nostalgic Delight: These truffles invoke sweet memories with their classic cherry and chocolate combination.
Effortless Preparation: No baking needed! Just mix, chill, and enjoy.
Endless Variations: Experiment by using different extracts or chocolate types for a personalized touch.
Perfect for Any Occasion: Whether it’s a party, holiday, or cozy night in, these truffles are a hit! If you enjoyed these, check out my Cherry Cobbler Muffins for another delightful treat.
Vegetarian-Friendly: A satisfying dessert that fits many dietary preferences. Indulge without the guilt!
Cherry Mash Truffles Ingredients
• Ready to create a sweet masterpiece?
For the Truffle Filling
- Maraschino Cherries – Provides a burst of sweet cherry flavor; ensure they are well-drained for the best results.
- Cherry Juice – Adds additional sweetness and elevates the cherry flavor profile.
- Butter – Offers richness and helps bind the mixture; use unsalted to control salt levels.
- Almond Extract – Imparts a subtle nutty aroma; you can substitute with extra vanilla for a different flavor.
- Vanilla Extract – Contributes warmth and enhances the overall flavor.
- Salt – Balances sweetness and enriches flavor, making each bite irresistible.
- Powdered Sugar – Sweetens and provides structure to the filling; no substitutes recommended for ideal texture.
- Peanut Butter – Adds creaminess and complements the chocolate; use crunchy for extra texture or swap for a nut-free alternative.
For the Truffle Coating
- Semisweet Chocolate Chips – Forms the rich chocolate coating; dark chocolate can be used for a deeper flavor.
- Salted Peanuts – Adds a crunchy texture contrast; simply omit for a nut-free version.
Now that you have the ingredients for your delightful Cherry Mash Truffles, let’s get mixing!
Step‑by‑Step Instructions for Cherry Mash Truffles Recipe
Step 1: Prepare the Cherry Mixture
In a large mixing bowl, combine finely chopped maraschino cherries, cherry juice, softened butter, almond extract, vanilla extract, and a pinch of salt. Stir gently with a spatula until the mixture is well blended and uniform in texture. The cherries should be evenly distributed throughout, creating a visually appealing and fragrant base for your Cherry Mash Truffles.
Step 2: Form the Truffle Dough
Gradually add the powdered sugar to the cherry mixture, stirring constantly until a thick dough forms. Depending on the humidity and other environmental factors, you may need to adjust the amount of powdered sugar slightly. Once the dough is combined, cover the bowl with plastic wrap and refrigerate for 20-30 minutes to help it firm up and make it easier to shape.
Step 3: Shape the Truffles
After chilling, use your hands to roll the mixture into 1-inch balls. Place each ball onto a parchment-lined baking sheet, making sure they don’t touch each other. This step is crucial for the final presentation of your Cherry Mash Truffles, so help your truffles maintain a round shape as you arrange them on the sheet. Once formed, freeze the truffles for about 15-20 minutes.
Step 4: Melt the Chocolate Coating
In a microwave-safe bowl, combine semisweet chocolate chips and peanut butter. Microwave in short bursts of 20 seconds, stirring in between, until the mixture is completely melted and smooth. Keep an eye on it as chocolate can burn quickly; the goal is to create a luscious chocolate coating that will envelop your chilled truffles beautifully.
Step 5: Dip the Truffles
Using a fork, dip each chilled cherry ball into the melted chocolate mixture, ensuring it’s fully coated. Gently tap the fork against the edge of the bowl to remove excess chocolate before returning the truffle to the parchment-lined sheet. This step is essential to achieving that perfect thin, glossy chocolate layer that defines these Cherry Mash Truffles.
Step 6: Set the Chocolate Coating
Place the dipped truffles back in the refrigerator for about 15 minutes to allow the chocolate coating to set properly. This will create a crisp outer shell around the chewy, cherry-filled center that is so delightful in each bite. If desired, you may garnish the truffles with chopped peanuts or a drizzle of melted white chocolate right before chilling.
Step 7: Serve and Enjoy
Once the chocolate coating has hardened, your Cherry Mash Truffles are ready to be served! Arrange them neatly on a serving platter, and savor the delightful combination of flavors and textures you’ve created. These no-bake truffles make for a wonderful sweet treat for any occasion, ensuring everyone will enjoy your homemade creation.
Cherry Mash Truffles Recipe Variations
Feel free to play around and customize these delightful Cherry Mash Truffles to suit your taste buds!
- Nut-Free: Swap peanut butter with sunflower seed butter and omit salted peanuts for a tasty alternative.
- Vegan Delight: Substitute butter with coconut oil and use dairy-free chocolate chips to make these truffles completely plant-based.
- Extra Chocolate: Add cocoa powder to the truffle filling for an intensified chocolate flavor; it’s sure to satisfy your cravings!
- Spicy Kick: Fold in a pinch of cayenne pepper or a dash of chili powder into the chocolate coating for a surprising heat that balances the sweetness.
- Fruit Twist: Experiment with different fruits like crushed strawberries or raspberries in place of cherries for an exciting flavor variation; each fruit lends its unique charm!
- Liqueur Infusion: Add a splash of cherry liqueur or flavored extract for a grown-up twist that transforms these truffles into an elegant adult dessert.
- Crunchy Texture: Mix crispy rice cereal into the chocolate coating for added texture and a delightful crunch in every bite.
- Garnish Options: Top with sea salt, crushed pretzels, or even a drizzle of caramel for that extra burst of flavor and a stunning presentation.
If you love experimenting with sweet treats, check out my Mushroom Stroganoff Hearty for a savory contrast to these indulgent truffles, or try making Honey Garlic Tofu for a delightful meal that complements your sweet creations beautifully.
What to Serve with Cherry Mash Truffles
Create a delightful dessert experience that balances flavors and textures!
- Fresh Fruit Salad: A medley of juicy berries and citrus adds a refreshing contrast to the rich truffles.
- Vanilla Ice Cream: Creamy and cool, it offers a soothing counterpoint to the sweet and tangy cherry flavors.
- Chocolate Dipped Pretzels: The salty crunch provides a wonderful textural contrast, enhancing the indulgent experience.
- Tea or Coffee: A warm cup complements the sweetness and adds a cozy touch, making each bite even more enjoyable.
- Cheesecake Squares: Their creamy richness pairs well with the tart cherry essence, creating a satisfying dessert duo.
- Chocolate-Covered Almonds: These add an extra crunch, harmonizing with the flavors found in your Cherry Mash Truffles.
Whether you’re hosting a gathering or enjoying a quiet evening, these pairings elevate your dessert experience!
Make Ahead Options
These Cherry Mash Truffles are a fantastic option for those who love to prep in advance! You can make the truffle filling and shape the balls up to 24 hours ahead of time; simply refrigerate them in an airtight container to preserve their freshness. For even better flavor, consider preparing the filling and chilling it overnight before rolling into balls. When you’re ready to indulge, just dip the chilled truffles in the melted chocolate mixture and let them set for an additional 15 minutes in the refrigerator. This way, your homemade treats will be just as delicious, saving you time for celebrations or cozy evenings!
Storage Tips for Cherry Mash Truffles
Fridge: Store your Cherry Mash Truffles in an airtight container in the refrigerator for up to 1 week, ensuring they stay fresh and delicious.
Freezer: For longer storage, freeze the truffles in an airtight container for up to 1 month. Just let them thaw in the fridge before enjoying.
Layering: To prevent sticking, place parchment paper between layers of truffles in the storage container.
Reheating: No need to reheat; simply enjoy your truffles chilled straight from the fridge or at room temperature for the best flavor experience.
Expert Tips for Cherry Mash Truffles
Chill for Easy Handling: Ensure the cherry mixture is well-chilled before rolling; this makes shaping the truffles much easier.
Perfect Coating Technique: Use a fork to dip the truffles, minimizing mess while ensuring an even chocolate layer.
Adjust Your Sweetness: If your dough feels too sticky, add more powdered sugar gradually for the ideal consistency in your Cherry Mash Truffles recipe.
Texture Contrast: For extra crunch, incorporate chopped peanuts into the melted chocolate before dipping the truffles.
Storage Savvy: Store truffles in an airtight container to keep the chocolate shell crisp and fresh for up to a week.
Cherry Mash Truffles Recipe FAQs
How do I choose the best maraschino cherries?
Absolutely! When selecting maraschino cherries, look for ones that are vibrant in color and free from any dark spots or signs of spoilage. They should be well-drained to avoid excess moisture in your truffle filling, which helps maintain the ideal texture and prevents your dough from being too sticky.
How should I store leftover Cherry Mash Truffles?
Very! You can store your truffles in an airtight container in the refrigerator for up to 1 week. Just make sure to keep them chilled to maintain their freshness and delightful texture. If you’re planning to enjoy them later, consider freezing them!
Can I freeze Cherry Mash Truffles?
Absolutely! To freeze your Cherry Mash Truffles, place them in an airtight container with parchment paper between layers to prevent sticking. They can be frozen for up to 1 month. When you’re ready to enjoy them, simply transfer the container to the fridge to let them thaw gradually for a better texture.
What should I do if the truffle mixture is too sticky?
If your truffle dough feels too sticky to work with, don’t worry! Gradually mix in additional powdered sugar, about a tablespoon at a time, until the desired consistency is achieved. Remember, the mixture also needs to be well-chilled for easier handling, so a short chill in the fridge can do wonders.
Are Cherry Mash Truffles safe for my dog?
No, it’s best to keep these truffles away from pets. The chocolate coating is toxic to dogs, and while cherries are generally safe in small amounts, the sugar and other ingredients in these treats may lead to digestive upset. Always err on the side of caution when sharing human food with your furry friends.
Can I make substitutions for dietary restrictions?
Absolutely! For a nut-free version, you can swap peanut butter with sunflower seed butter and omit the salted peanuts. Additionally, feel free to increase the vanilla extract if you prefer to skip the almond extract. Enjoy crafting your Cherry Mash Truffles recipe with your personal touch!
Sweet Cherry Mash Truffles Recipe: No-Bake Indulgence Awaits
Ingredients
Equipment
Method
- In a large mixing bowl, combine finely chopped maraschino cherries, cherry juice, softened butter, almond extract, vanilla extract, and a pinch of salt. Stir gently with a spatula until the mixture is well blended and uniform in texture.
- Gradually add the powdered sugar to the cherry mixture, stirring constantly until a thick dough forms. Refrigerate for 20-30 minutes.
- After chilling, roll the mixture into 1-inch balls and place them on a parchment-lined baking sheet. Freeze for about 15-20 minutes.
- In a microwave-safe bowl, combine semisweet chocolate chips and peanut butter. Microwave in short bursts of 20 seconds, stirring in between, until melted.
- Using a fork, dip each cherry ball into the melted chocolate mixture, ensuring it’s fully coated. Tap off excess chocolate.
- Place the dipped truffles back in the refrigerator for about 15 minutes to allow the chocolate coating to set properly.
- Once the chocolate coating has hardened, serve the truffles on a platter.
Leave a Reply