
The fizz and crackle of homemade treats bring back that magical feeling of childhood, don’t you think? Let me introduce you to the charming Magic Candy Recipe—a delightful way to transform simple pantry ingredients into colorful, crunchy shards of joy. This candy isn’t just a treat; it’s a canvas for your creativity. Whether you’re looking to spice up a birthday bash, plan a festive gathering, or simply fill a weekend with delicious fun, this recipe is perfect for all occasions. Plus, it’s gluten-free and budget-friendly, allowing you to whip up something special without breaking the bank. Ready to dive into this adventure and see how easy it is to create your own edible art? Let’s get started!
Why is Magic Candy So Special?
Endless Creativity: With this Magic Candy Recipe, you can play with flavors and colors to craft your perfect treat. Customizing it is as fun as eating it!
Kid-Friendly Fun: This recipe is a fantastic kitchen project for children, sparking imagination while teaching basic cooking skills.
Quick and Budget-Friendly: Using pantry staples makes this sweet treat not only easy but also easy on your wallet—perfect for spontaneous celebrations!
Versatile Treats: Serve it as party favors or use it as a whimsical accent on dessert tables. It’s an eye-catching addition to any gathering!
Nostalgic Appeal: This candy takes you back to childhood, evoking memories of childhood sweets while creating new ones with your family.
Experience the joy of creating with this delightful Magic Candy Recipe, and if you love experimenting with flavors, don’t miss my Mushroom Stroganoff Hearty for a savory twist!
Magic Candy Recipe Ingredients
-
For the Candy Mixture
-
Granulated Sugar – Sweetness and structure; can substitute with alternative sugars, but this may affect texture and sweetness balance.
-
Corn Syrup – Prevents crystallization, ensuring a smooth candy; no direct substitute, but honey can be used in small amounts for a different flavor.
-
Water – Facilitates the sugar solution; no substitutes necessary.
-
For Flavor and Color
-
Flavor Extract (e.g., vanilla, fruit) – Adds a delightful flavor profile; opt for natural extracts for a richer taste.
-
Food Coloring (optional) – Enhances visual appeal; use gel-based colors for vibrant hues.
-
For Dusting
-
Powdered Sugar (optional) – Prevents sticking; can substitute with cornstarch if needed.
This fantastic Magic Candy Recipe invites you to unleash your creativity while creating delightful treats!
Step‑by‑Step Instructions for Magic Candy Recipe
Step 1: Prepare Baking Dish
Begin by lining a 9×13-inch baking dish with parchment paper, ensuring it extends over both edges for easy removal. Lightly spray the parchment with cooking spray to prevent sticking. This will be the foundation where your beautiful Magic Candy takes shape, so make sure it’s well-prepared before moving on to the next step.
Step 2: Cook Sugar Mixture
In a medium saucepan, combine granulated sugar, corn syrup, and water. Stir gently to dissolve the sugar, then heat over medium-high. Allow the mixture to boil without stirring—watch for bubbles to form. Use a candy thermometer to monitor the temperature, cooking until it reaches 300°F (hard crack stage) or passes the cold water test. This should take about 10-15 minutes.
Step 3: Flavor & Color Addition
Once the candy mixture hits 300°F, promptly remove it from heat. Take care as it will be extremely hot! Quickly stir in your selected flavor extract and food coloring, mixing until well combined. The vibrant colors will start to swirl beautifully, adding that magical touch to your Magic Candy.
Step 4: Cool and Cut Candy
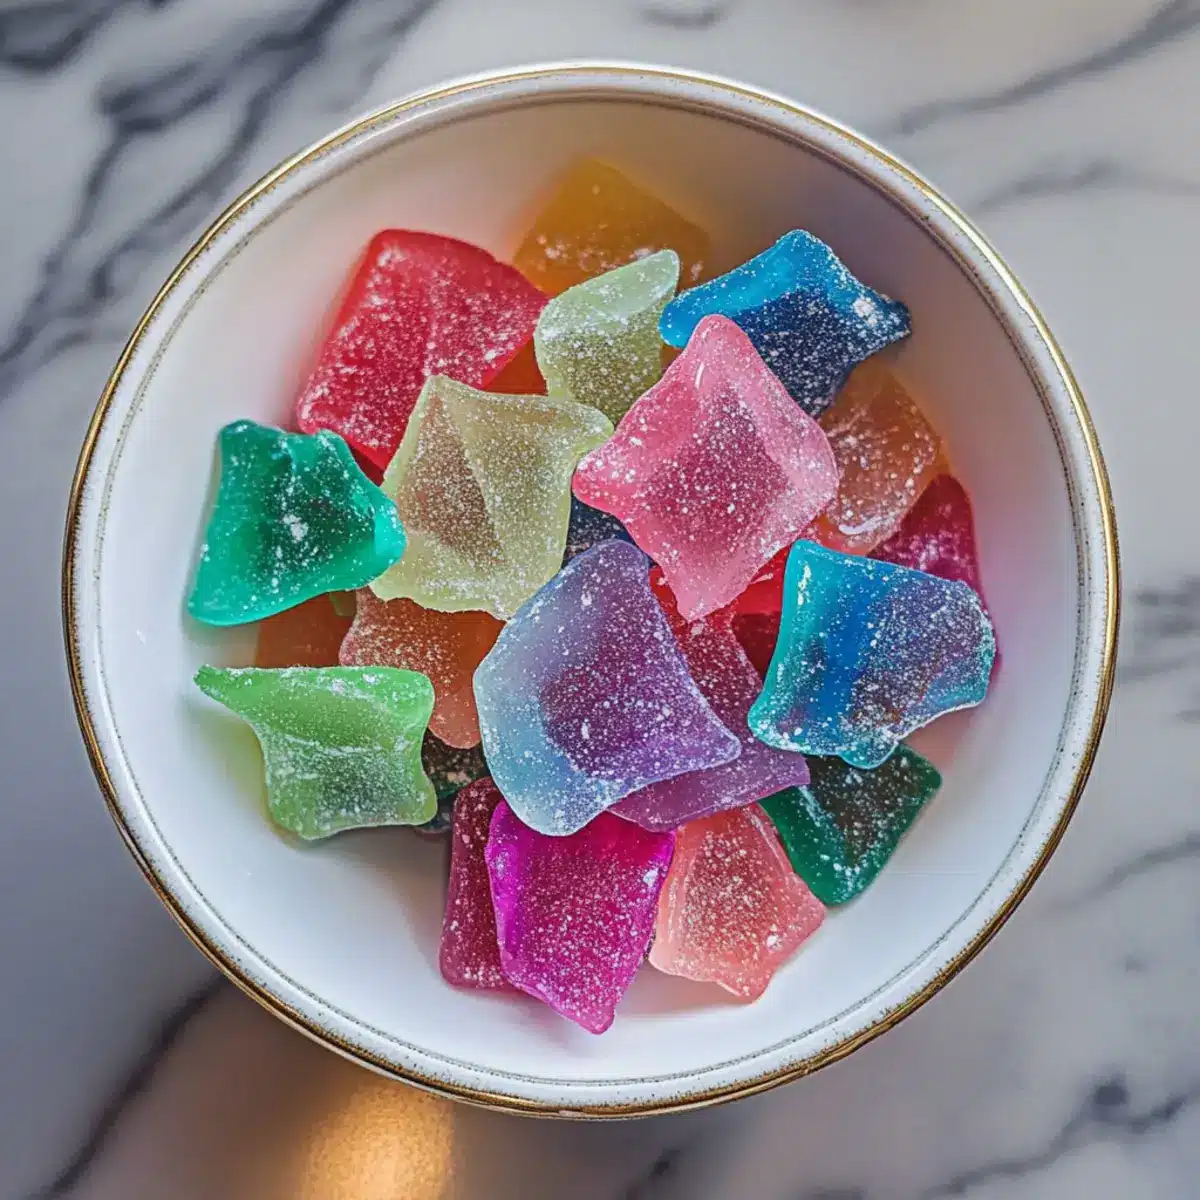
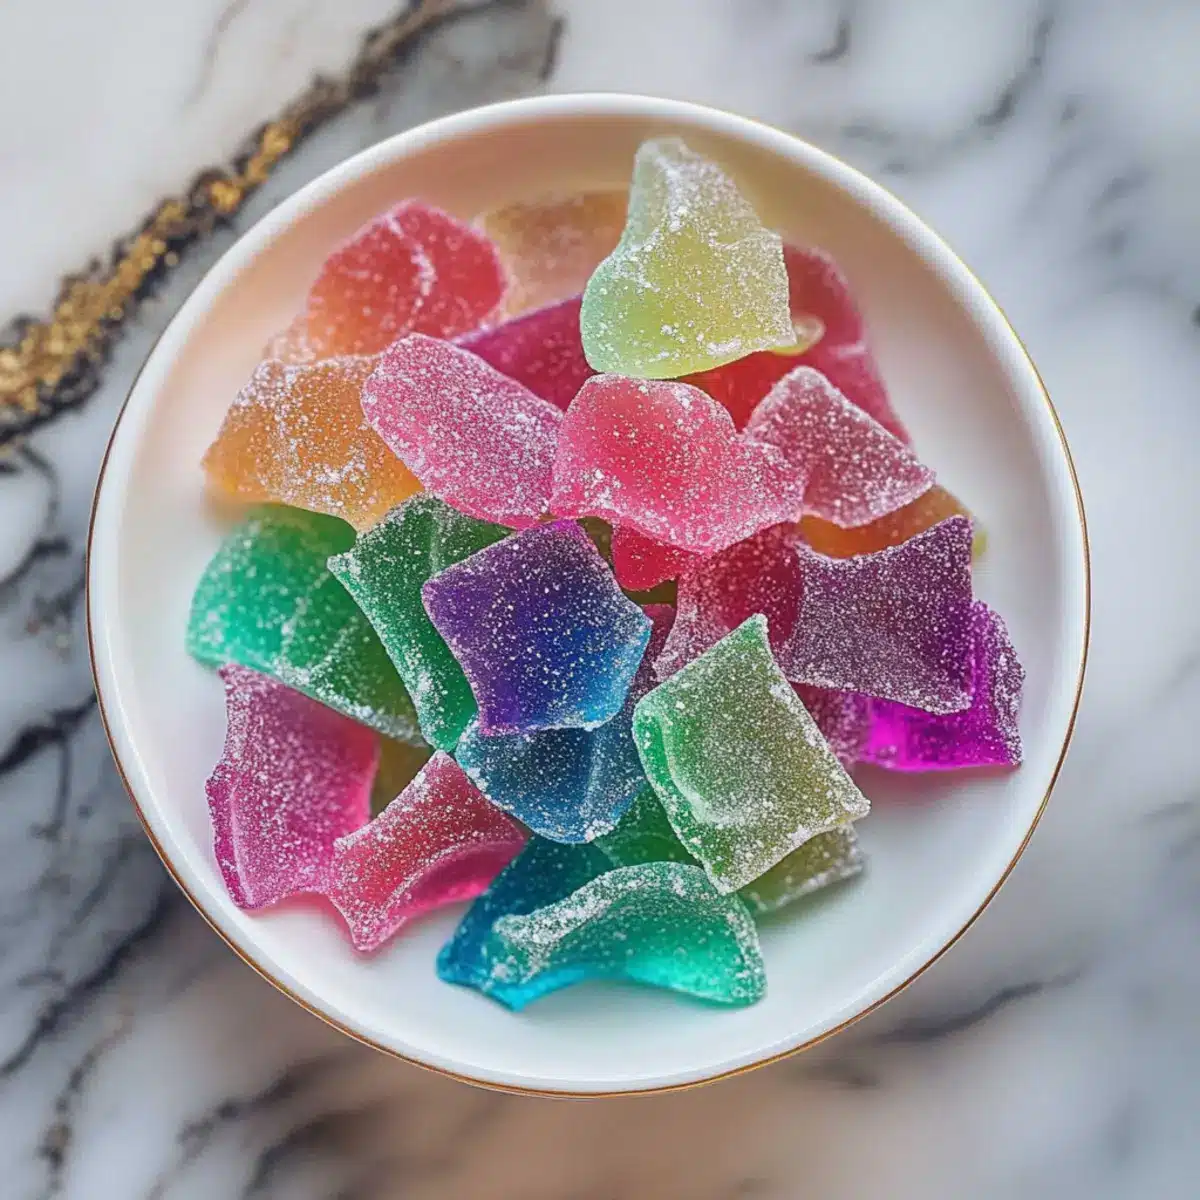
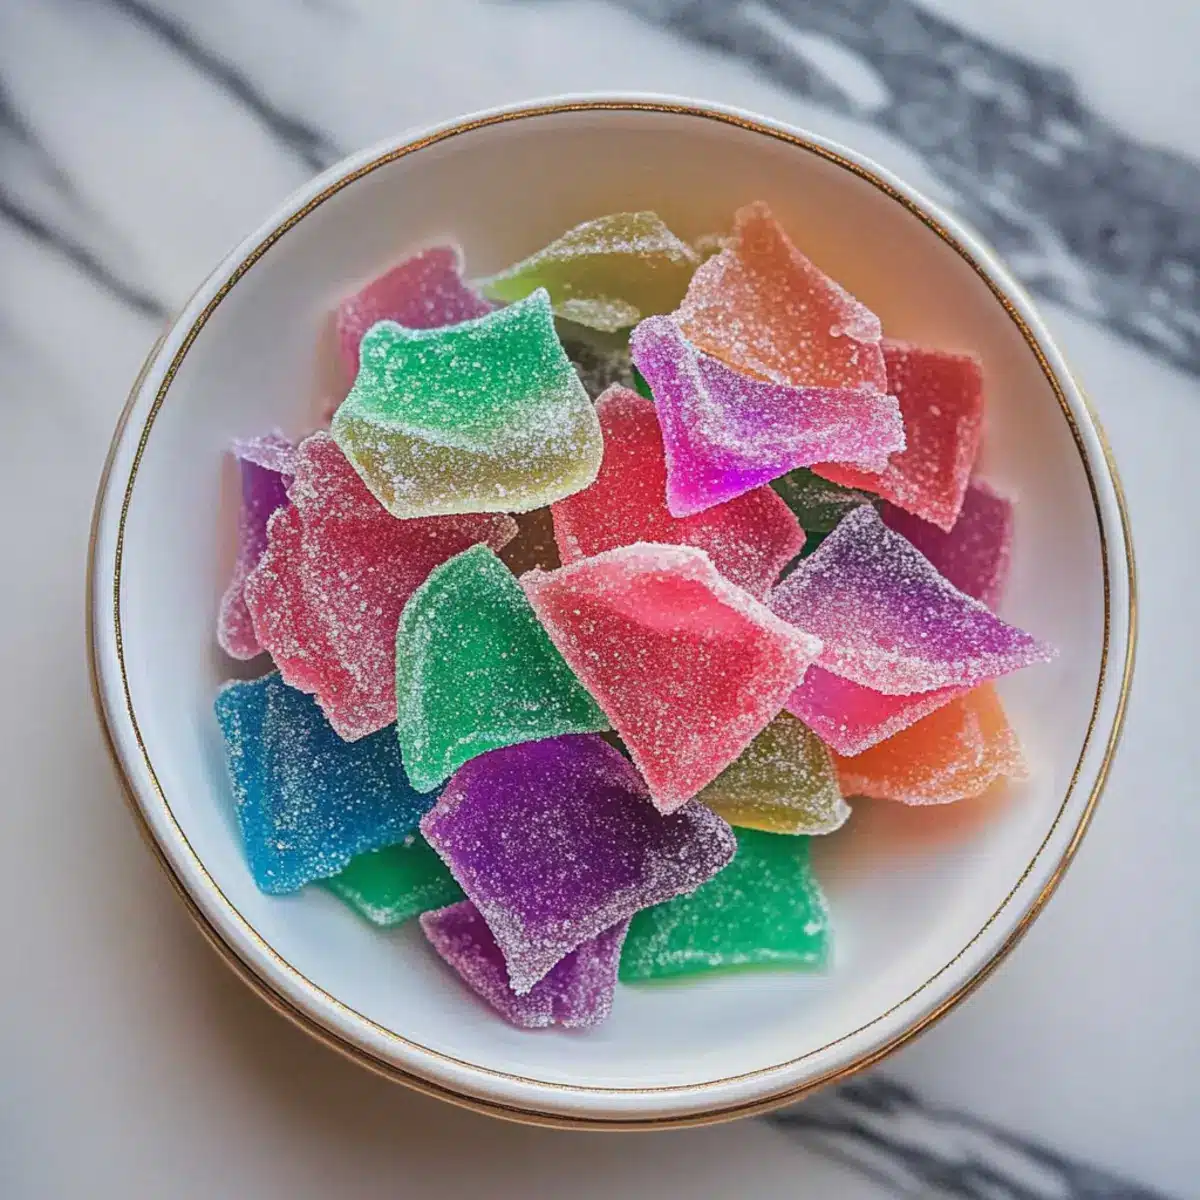
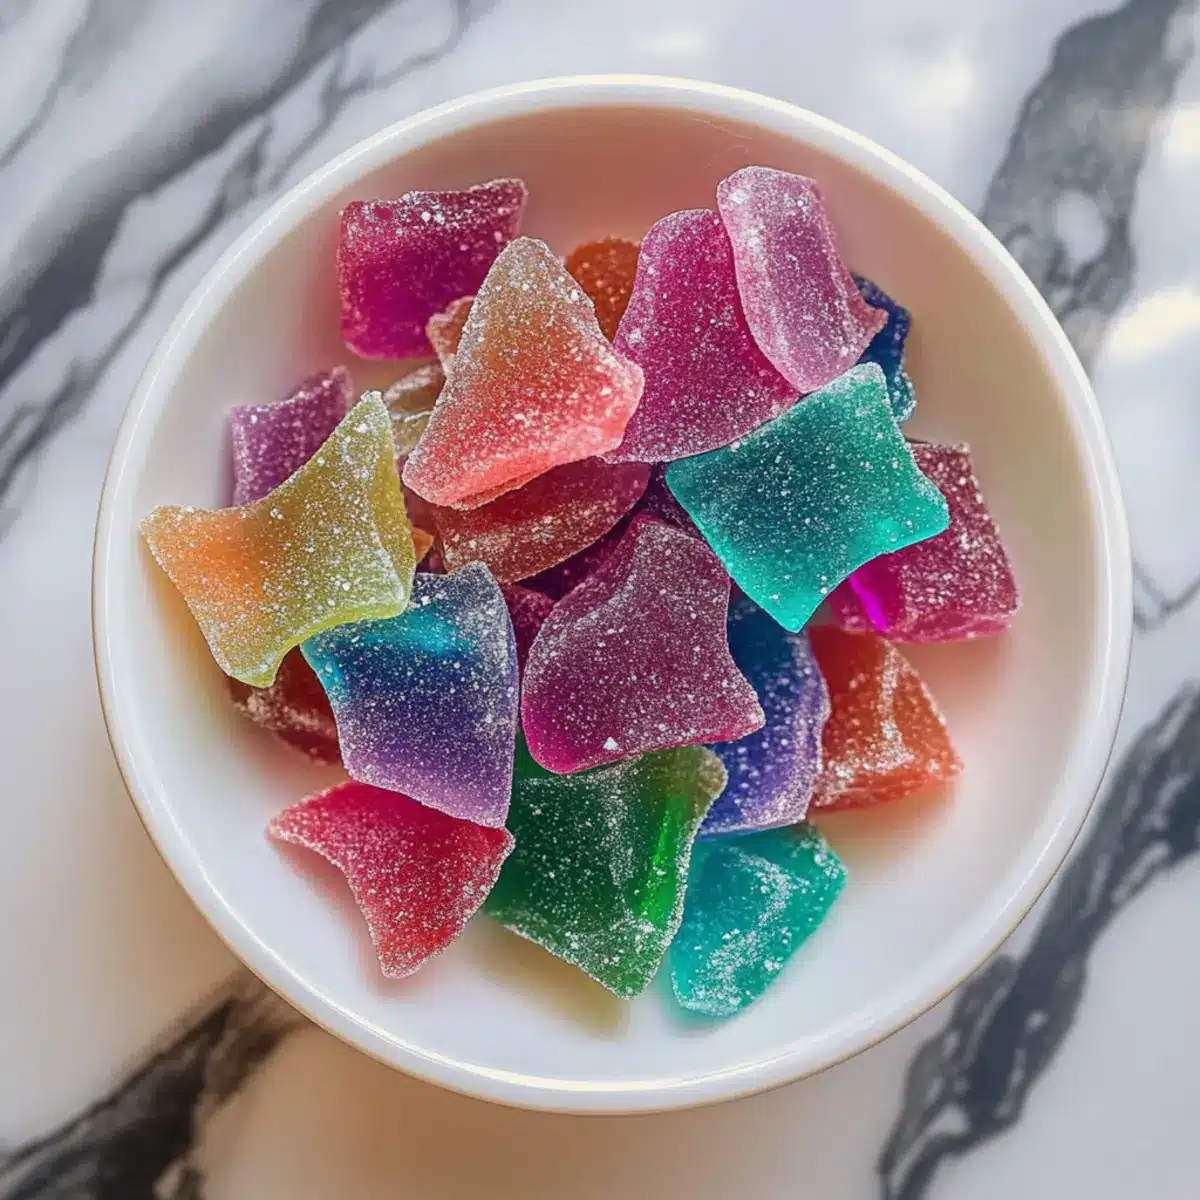
Carefully pour the hot syrup into the prepared baking dish, spreading it evenly with a spatula. Allow the candy to cool completely at room temperature for about 45 minutes, until it has hardened. Once set, you can break it into impressive shards, showcasing the dazzling colors and delightful crunch.
Step 5: Storage
If desired, dust the candy shards with powdered sugar to prevent them from sticking together. Layer the pieces in an airtight container, separating them with parchment paper to keep them fresh. Store at room temperature, where your homemade Magic Candy can last up to two weeks, ready to enjoy at any moment!
What to Serve with Magic Candy Recipe
Looking to craft the perfect experience to accompany your dazzling Magic Candy? Here are some delightful pairings to elevate your sweet creation!
- Fresh Fruit Skewers: Juicy and refreshing, fruit skewers balance the sweetness and add a splash of color to your candy table.
- Chocolate Fondue: Rich, melty chocolate invites guests to dip and enjoy with Magic Candy, creating a charming dessert station.
- Sparkling Lemonade: This zesty and bubbly drink quenches thirst with a hint of sweetness, matching the fun vibe of homemade candy.
- Vanilla Ice Cream: Creamy vanilla ice cream complements the crunchy texture of Magic Candy, adding a smooth and cool contrast.
- Cupcake Treats: Delightfully frosted cupcakes can be garnished with crunchy shards of Magic Candy, turning them into whimsical creations.
- Cheesecake Squares: Rich and creamy cheesecake squares provide a decadent contrast; adding bright candy shards amplifies visual appeal.
- Party Mix: Incorporate Magic Candy into a vibrant snack mix for a festive touch, combining various textures and flavors everyone will love.
- Pineapple Salsa: A fresh and zesty salsa, this tropical topping can be served with chips for a sweet-savory balance to your candy feast.
- Fruit Punch: A fruity punch is always a crowd-pleaser; the flavors can enhance the enjoyment of the sweet Magic Candy.
- Chocolate Milkshake: Creamy and indulgent, a chocolate milkshake is a quintessential pairing and a nostalgic treat reminiscent of childhood.
How to Store and Freeze Magic Candy
Room Temperature: Store your Magic Candy in an airtight container at room temperature for optimal freshness; it can last up to 2 weeks without losing its delightful crunch.
Layering: If you stack pieces in the container, use parchment paper between layers to prevent them from sticking together and maintain the beautiful shards.
Freeze: For longer storage, you can freeze Magic Candy; wrap individual pieces in plastic wrap and place them in a freezer-safe bag. They will keep well for up to 3 months.
Reheating: When ready to enjoy, simply thaw the candy at room temperature. Avoid reheating in the microwave, as it may lose its crunchy texture.
Expert Tips for Magic Candy Recipe
-
Candy Thermometer Use: Always use a candy thermometer for accuracy. If you don’t have one, perform the cold water test to ensure perfect hardness.
-
Avoid Stirring: Never stir the sugar mixture while it’s boiling to prevent crystallization, which can ruin your Magic Candy.
-
Layering Flavors: For multi-flavored Magic Candy, let each layer set slightly before adding the next color or flavor to create beautiful stripes.
-
Popping Candy Addition: For an exciting twist, add popping candy just before serving. It enhances the fizz and adds a fun surprise!
-
Storage Secrets: Keep your candy in an airtight container at room temperature for up to two weeks. Avoid refrigeration to maintain that delightful crunch!
Magic Candy Recipe Variations
Feel free to let your imagination run wild with these creative spins to personalize your Magic Candy!
-
Flavor Explosion: Experiment with different flavor extracts like almond, lemon, or mint for a unique twist. Each flavor brings its own delightful essence to your candy.
-
Citrus Zing: Add a splash of citrus zest for an extra fresh tartness. Whether lemon or orange, this variation brightens up the candy and elevates its taste.
-
Layered Colors: Pour colored syrup in stages, letting each layer set slightly before adding the next. This technique creates a mesmerizing rainbow effect that’s as gorgeous as it is delicious.
-
Fizzing Fun: Mix in popping candy just before serving for a fun surprise! Kids will adore the crackling sensation, making it a memorable treat for any occasion.
-
Healthier Twist: Swap some granulated sugar for coconut sugar for a more earthy sweetness. This will subtly change the flavor while keeping it equally delightful!
-
Sour Kick: For an extra zing, sprinkle juniper tar or citric acid on your shards just before serving. It adds an exciting tang that playfully contrasts the sweetness.
-
Dye-Free Delight: If you’re aiming for a dye-free version, utilize natural food colorings like beet juice or turmeric for color that’s both vibrant and healthy.
-
Choco-Dipped Magic: Dip the shards in melted dark chocolate for a decadently rich layer of flavor. The crunch of the candy paired with smooth chocolate is pure bliss!
By mixing and matching these variations, you can create a stunning array of Magic Candy that is sure to delight your family and friends! And if you want a cozy dinner idea afterward, consider pairing it with my delightful Honey Garlic Tofu for a complete culinary experience!
Make Ahead Options
These Magic Candy shards are perfect for busy home cooks looking to save time! You can prepare the sugar mixture up to 24 hours in advance, simply cooking it until it reaches 300°F and letting it cool completely. Once cooled, break the candy into shards and dust them with powdered sugar, if desired. Store them in an airtight container at room temperature to maintain their delightful crunchiness—layer them with parchment paper to prevent sticking. When it’s time to enjoy your treats, they’re ready to serve as-is, ensuring that your homemade Magic Candy is just as delicious as the day you made it!
Magic Candy Recipe FAQs
What type of sugar should I use for Magic Candy?
You’ll want to use granulated sugar for the Magic Candy Recipe as it provides the necessary sweetness and structure. While you can experiment with alternative sweeteners, be aware that this may change the candy’s texture and sweetness balance.
How long can I store Magic Candy?
Your homemade Magic Candy can last up to 2 weeks when stored in an airtight container at room temperature. Just be sure to layer the pieces with parchment paper to prevent sticking and maintain that lovely crunch.
Can I freeze Magic Candy?
Absolutely! To freeze your Magic Candy, wrap each piece tightly in plastic wrap and then place them in a freezer-safe bag. They can remain frozen for up to 3 months. When you’re ready to treat yourself, simply let them thaw at room temperature for about 30 minutes.
What if my Magic Candy crystallizes?
If your candy crystallizes, it’s likely due to stirring the mixture while it was boiling or impurities in the sugar. To prevent this, avoid stirring and ensure all equipment is spotless. If crystallization does occur, you can re-cook the mixture by adding a little water and gently heating it to melt the crystals away.
Can I make Magic Candy gluten-free?
Yes! This Magic Candy Recipe is naturally gluten-free since it primarily uses sugar, corn syrup, and flavor extracts—just make sure that any flavorings or food colorings you use are certified gluten-free.
Is this recipe suitable for children?
Very! Making Magic Candy is a fun activity for kids, allowing them to explore flavors and colors while learning basic cooking skills. Just be mindful of the hot syrup and ensure adult supervision during the cooking process for safety.
Magic Candy Recipe FAQs
Create Irresistible Magic Candy Recipe for Joyful Moments
Ingredients
Equipment
Method
- Prepare Baking Dish: Line a 9x13-inch baking dish with parchment paper and spray with cooking spray.
- Cook Sugar Mixture: Combine granulated sugar, corn syrup, and water in a saucepan; boil without stirring until it reaches 300°F.
- Flavor & Color Addition: Remove from heat, stir in flavor extract and food coloring quickly.
- Cool and Cut Candy: Pour the mixture into the prepared dish, let it cool, then break into shards.
- Storage: Dust with powdered sugar if desired, store in an airtight container.
Leave a Reply